Import Roles Using Transports
Learn how to import roles into ECC and GW development/sandbox system.
To import roles using Transports:
- Extract the zip or .rar files that you received from Innovapptive and save the files to your local machine.
-
Extract and upload/copy the files to the SAP ECC & GW System
Directories.
- Extract the zip files and copy all co-files that start with ‘K90*’ from software deployment package to the USR/SAP/TRANS/COFILES path on the SAP ECC & GW system.
- Extract the zip files and copy all data files that start with R90* from the software deployment package to the USR/SAP/TRANS/DATA path on the SAP ECC &GW system.
- Log in to the SAP GW & ECC System where you want to import transports.
- Navigate to the transaction code STMS_Import.
-
Navigate to Extras, Other Requests, Add.
Figure 1. Import Queue 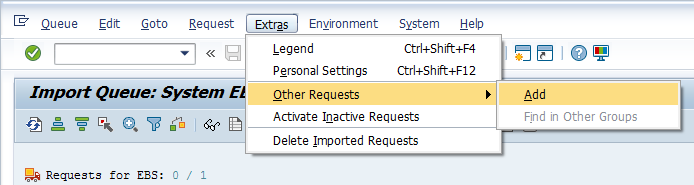
-
Enter the following transport number in the Transp. Request field and
confirm by pressing the ENTER key to attach transports to the import
queue.
Table 1. SAP ECC Transports for Roles Transport Description Dependency ERDK904636 INNOV:ECC Project Team Roles None Table 2. SAP NWG Transports for Roles Transport Description Dependency NGTK904332 INNOV:NWG Project Team Roles None Figure 2. Add Transport Request to Import Queue 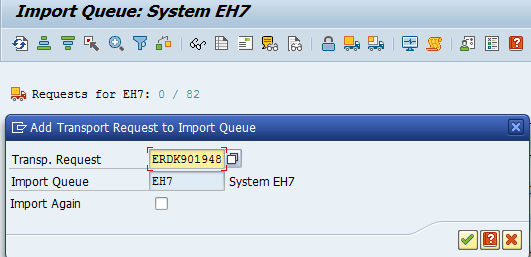
- Click Yes to proceed to the next step.
- Select the transport request that needs to be imported.
-
Click the Transport icon.
Figure 3. Truck icon 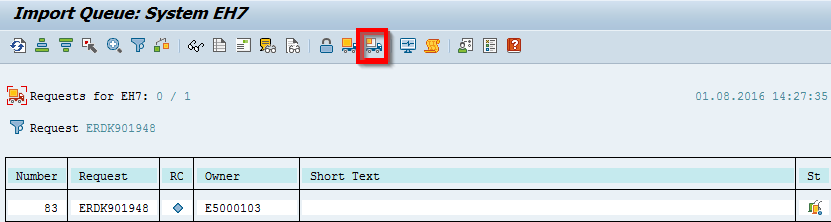
- Enter the target client number in Target Client field.
- Select Leave Transport Request in Queue for Later Import and Ignore Invalid Component Version check boxes.
-
Click Yes in the confirmation screen.
Note: If you face any issues/errors while importing the Transports, send the log files with screenshots and details of the error to your Innovapptive SAP Basis team contact.