Create a Functional Location
Learn how to create a functional location.
-
In the Functional Location module of Home screen, tap
 .
.
Figure 1. Create Functional Location 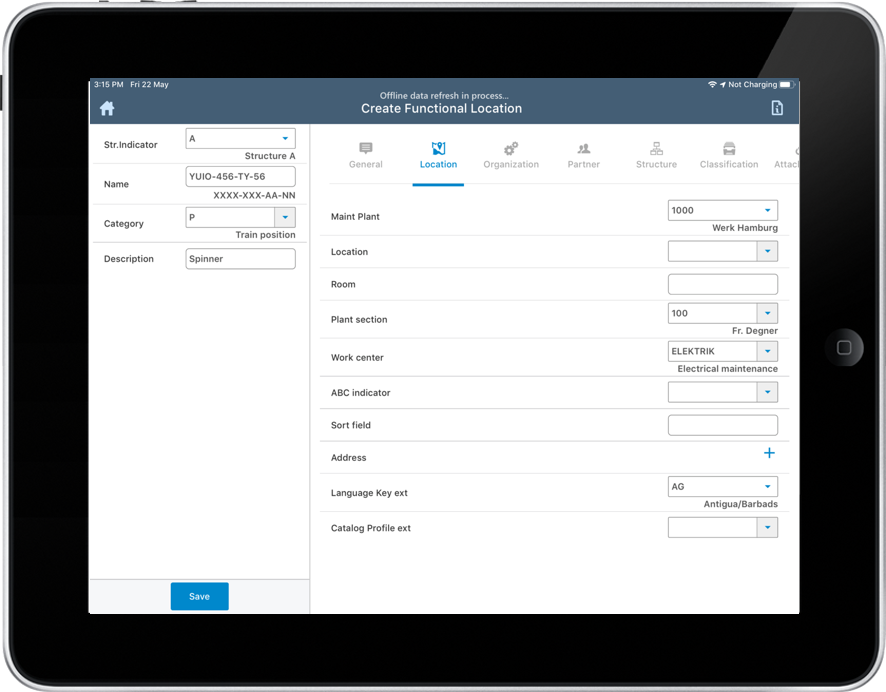
- In the left section of the Functional Location screen enter Structure Indicator, Name, Description, and Category.
-
In the right section of the Functional Location screen, enter details
under the following tabs:
Note: Fields that are displayed depend on the UI validations configured in RACE.General:
- Select the Object Type from the list.
- Select the Authorization Group from the list
- Enter the Inventory Number.
- Select the Valid on date.
- Enter the name of the Manufacturer and select the country of manufacturer.
- Enter other details like model number, part number, serial number and so on.
Location: Enter Plant Code, Location, room number, plant section code, Work Center code, and address (tap + next to Address) where this Equipment is located.
Organization: Enter Company Code, the business area, asset id of the Equipment, appropriate cost center code, code group, main Work Center and so on.Note: Code Group and Planning plant fields get automatically pre-filled when you enter the Maintenance Plant in the Location section.Classification: Enter the Class Type, Class, and Characteristics. Refer to Add a Class for more details.
Structure: Enter superior Functional Location and construction type. Tap the check-box next to Equi-installation allowed if you want to confirm this attribute/specification.
Partner: Tap
 to enter partner type
and partner name on Add Partners screen.
to enter partner type
and partner name on Add Partners screen.