
How to create Tenant/Super Admin role
You can create a tenant/super admin role and provide access to relevant applications such as mWorkOrder and mInventory and the modules available in the CBO application.
-
Click the Tenant Management module on the left side pane.
Figure 1. Tenant Management Module 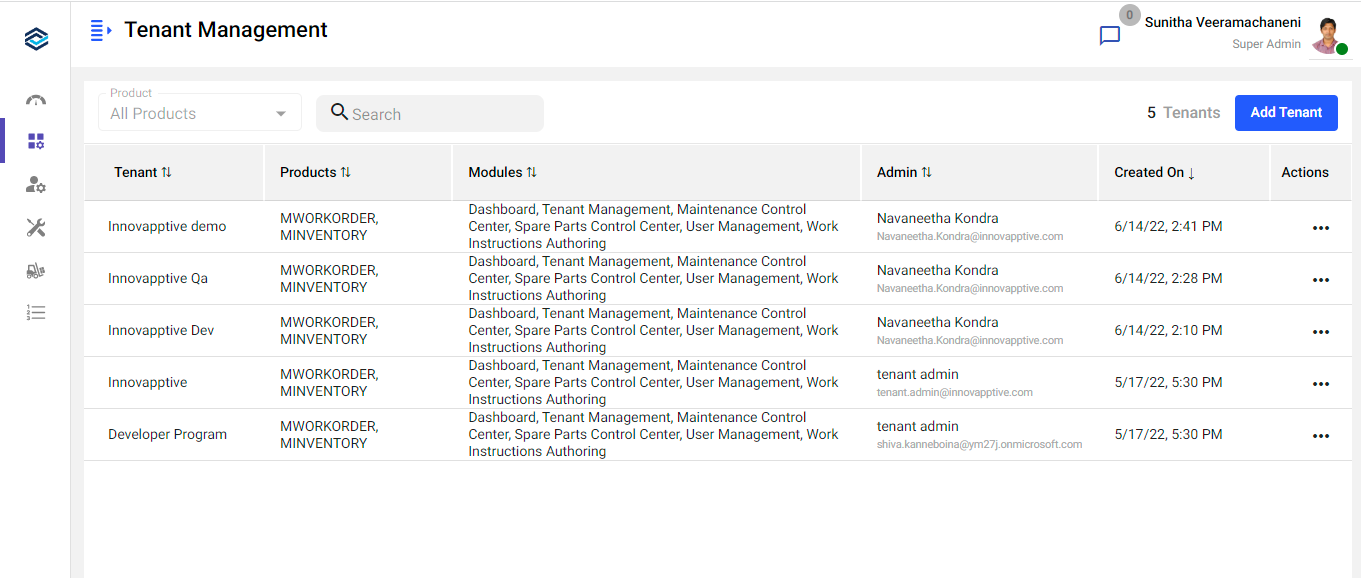
- Click the Add Tenant button on the right-side.
-
In the Primary tab, enter the following details:
- Tenant ID – enter the customer id.
- Tenant Name – enter the customer’s name.
- Tenant IDP – select the value from the drop down.
- Client ID – enter the client id.
- Authority URL – enter the URL to which you want to provide access (for example, CWP application).
- Redirect URI – enter the URL to redirect.
- Tenant Domain Name – enter the customer domain name.
- In the Tenant Admin Details section, enter First Name,
Last Name, Title, and Email.Note: The email is valid based on the selected Tenant IDP.
Figure 2. Add Tenant Primary Details 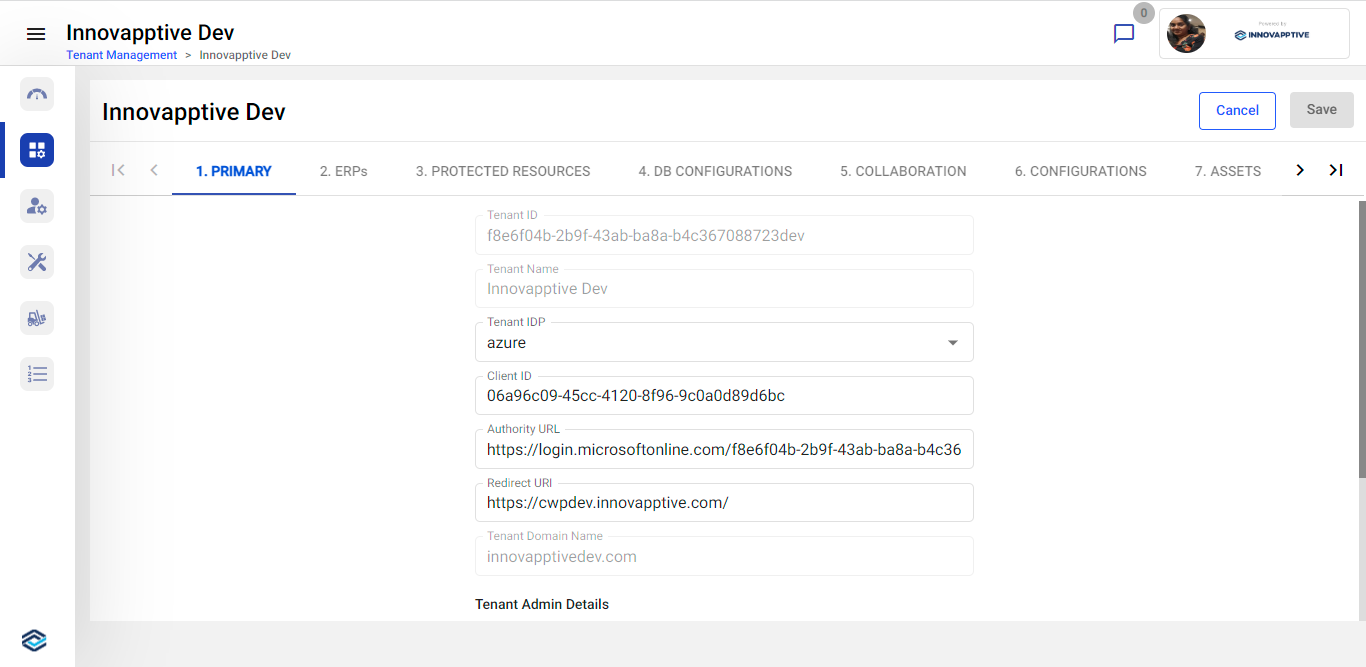
-
In the ERPs tab, do the following:
- In the SAP Details section, enter the following:
- Base URL – enter the relevant URL.
- OAuth2 URL – enter the relevant URL.
- User Name – enter the customer username.
- Password – enter the customer password.
- Grant Type – enter the type.
- Client ID – enter the client id.
- Scope – enter the scope id.
- In the SAP SAML Details section, enter the following:
- OAuth2 URL – enter the relevant URL.
- Grant Type – enter the type.
- Client Secret – enter the client secret code.
- Resource – enter the resource link.
- Token Use – enter the token id.
- Token Type – enter the type of the token.
Figure 3. Add Tenant ERP Details 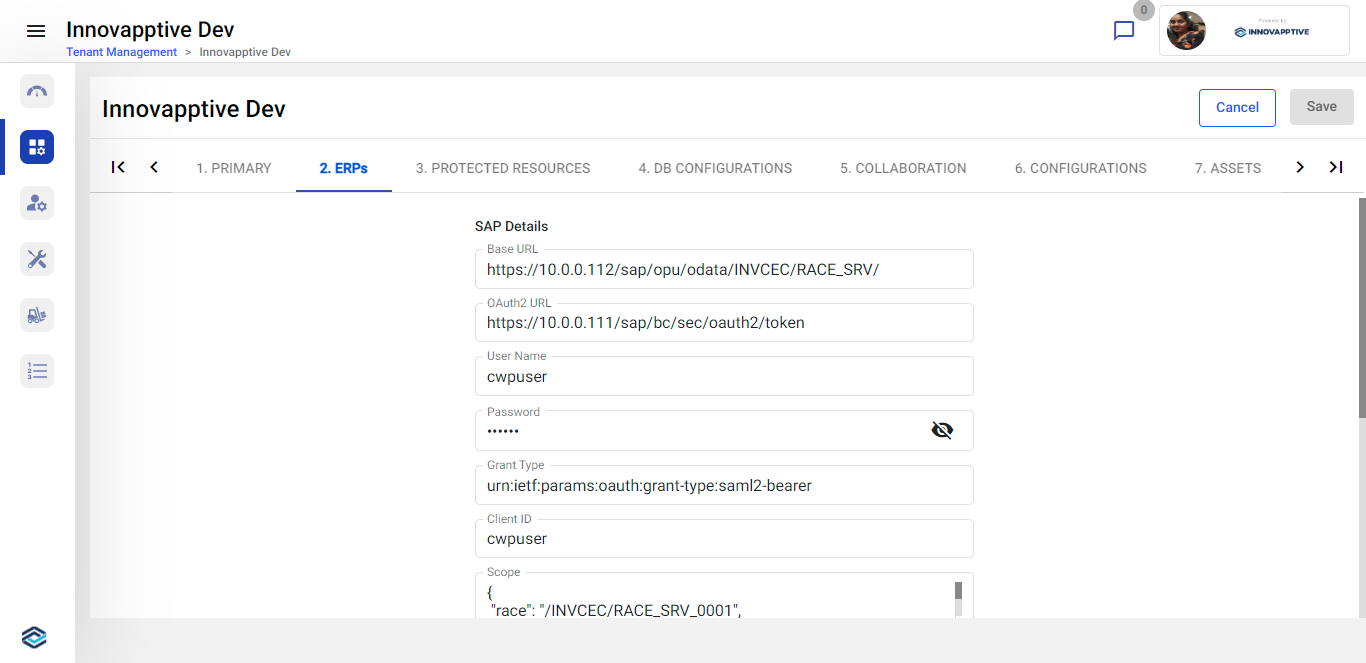
- In the SAP Details section, enter the following:
-
In the Protected Resources tab, do the following:
- In the SAP Details section, enter the following:
- Identity Metadata URL – enter the metadata URL.
- Issuer URL – enter the issuer URL.
- Client ID – enter the client id.
- Audience – enter the audience id.
- Scope – enter the scope id.
- In the SAP URLs section, enter the relevant URLs.Click the Add icon to add extra fields.
- In the Node Details section, enter the following:
- Identity Metadata URL – enter the metadata URL.
- Issuer URL – enter the issuer URL.
- Client ID – enter the client id.
- Audience – enter the audience id.
- Scope – enter the scope id.
- In the Node URLs section, enter the relevant URLs.Click the Add icon to add extra fields.
Figure 4. Add Tenant Resources Details 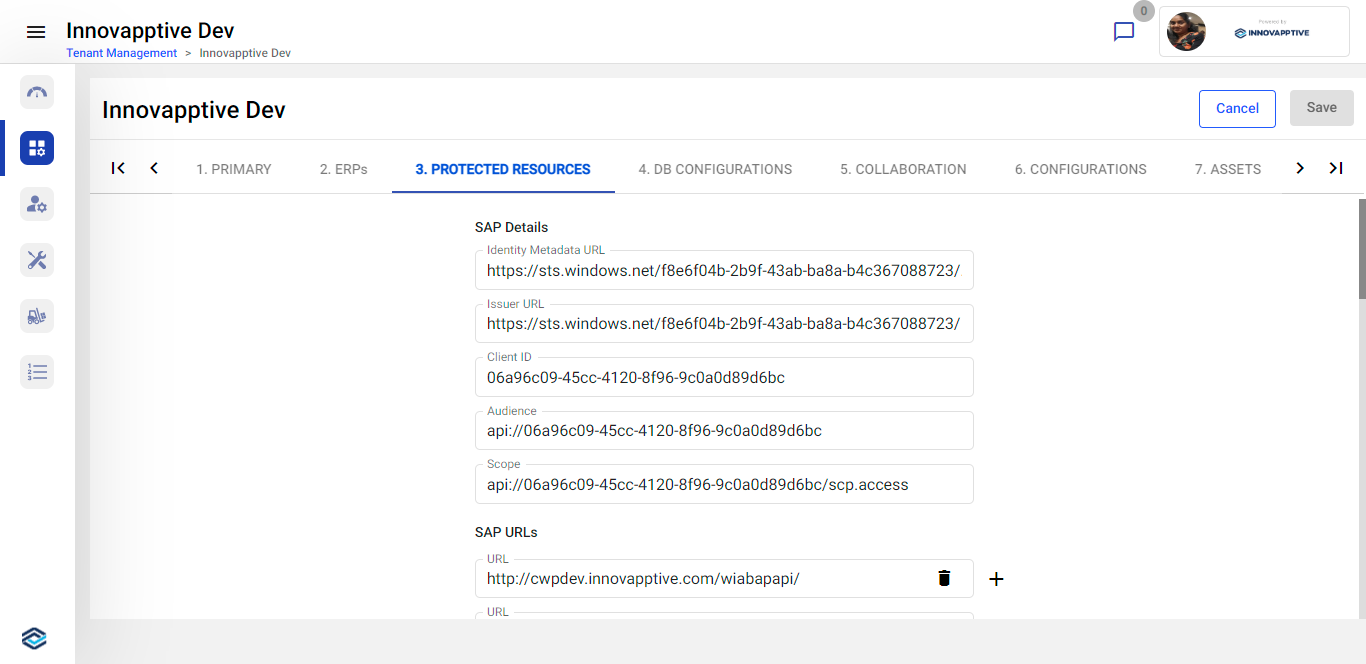
- In the SAP Details section, enter the following:
-
In the DB Configurations tab, enter the following:
- In the RDBMS section, enter the following:
- Host – enter the database host.
- Port – enter the port number.
- User – enter the username.
- Password – enter the password.
- Database – fills automatically.
- Dialect – select the value from the drop down.
- In the NoSQL section, enter the following:
- Host – enter the database host.
- Port – enter the port number.
- User – enter the username.
- Password – enter the password.
- Database – fills automatically.
Figure 5. Add Tenant Database Details 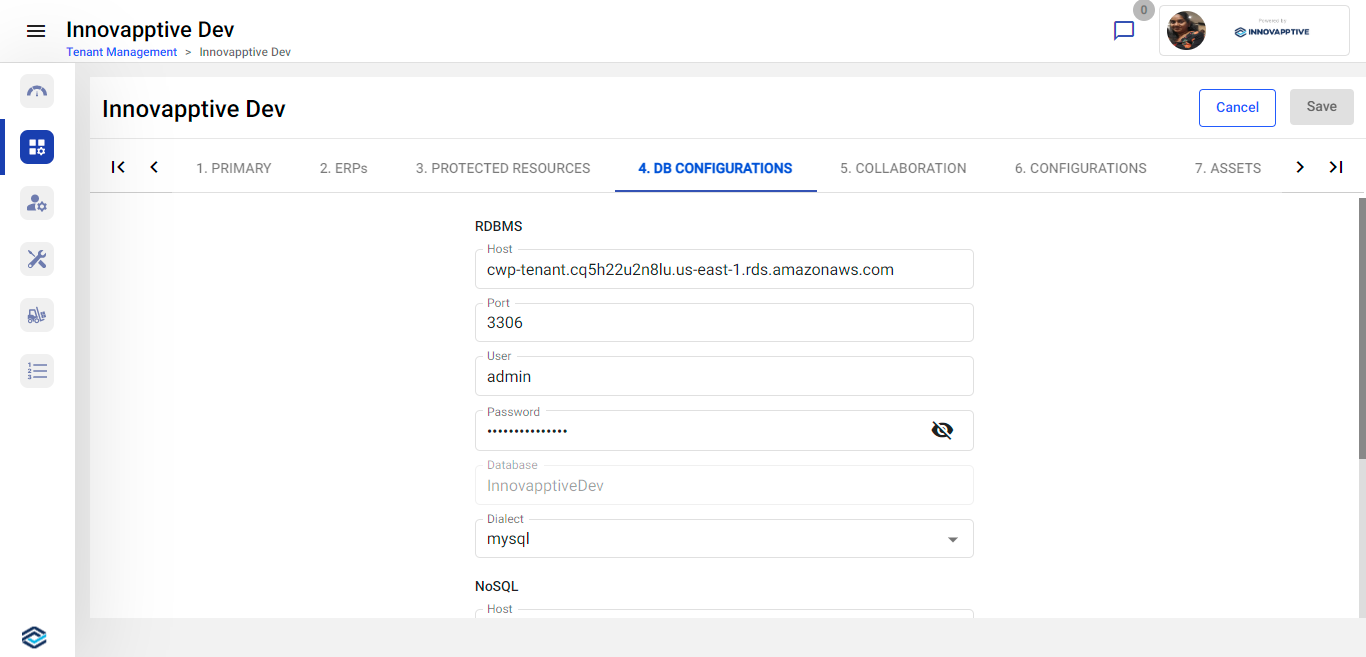
- In the RDBMS section, enter the following:
-
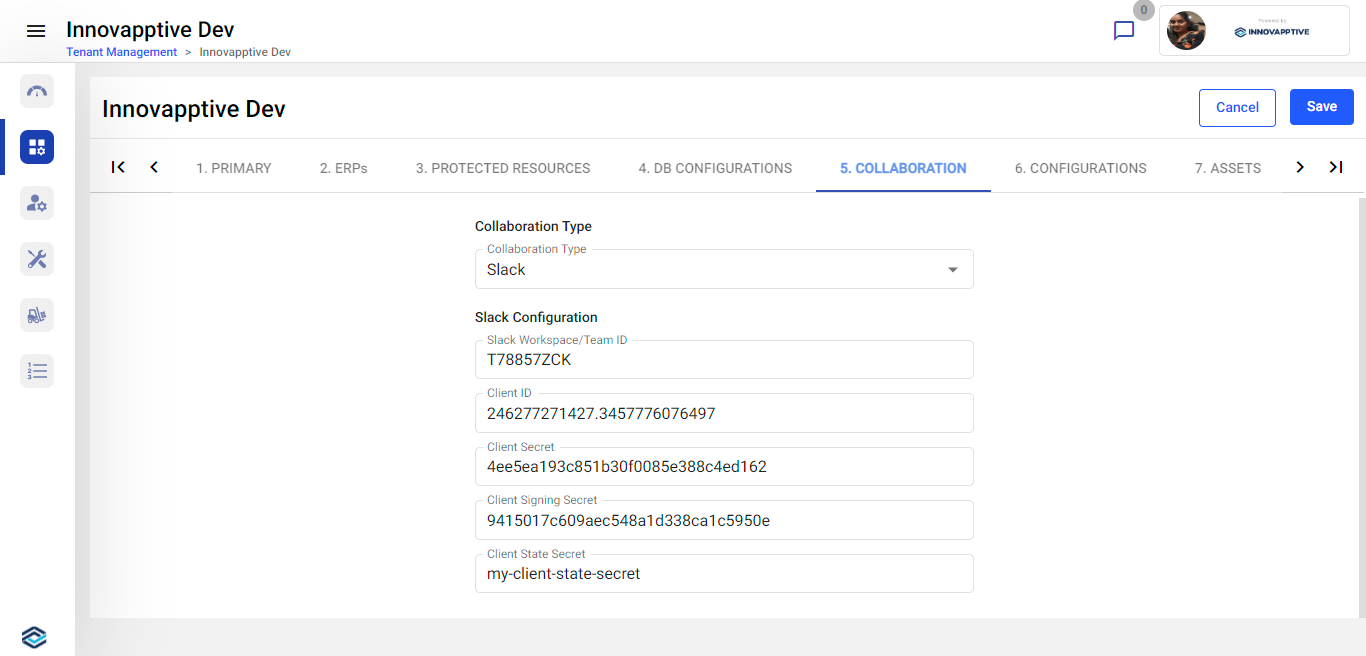
In the Collaboration tab, enter the following:
- Collaboration Type – select a collaboration type Slack or MS Teams to connect to the external chat application.
- If the Collaboration Type is Slack, enter the
following:
- Slack Workspace/Team ID: enter slack workspace or team id.
- Client ID: enter client id.
- Client Secret: enter client secret code.
- Client Signing Secret: enter client signing secret code.
- Client State Secret: enter client state secret code.
- If the Collaboration Type is MS Teams, enter the
following:
- Tenant ID: enter onboard tenant id.
- Client ID: enter client id.
- Client Secret: enter client secret code.
- Share Point Site ID: enter share point site id.
- Private Key: enter RSA private key.
- Public Key: enter RSA public key.
-
In the Configurations tab, enter the following:
- License Count – enter the count of the licenses that are provided to the tenant.
- Products – select the products that are assigned to the tenant from the drop down.
- Modules – select the modules that are assigned to the tenant from the drop down.
- Log DB Type – select the relevant database type from the drop down.
- Log Level – select the level from the drop down.
Figure 6. Add Tenant Configuration Details 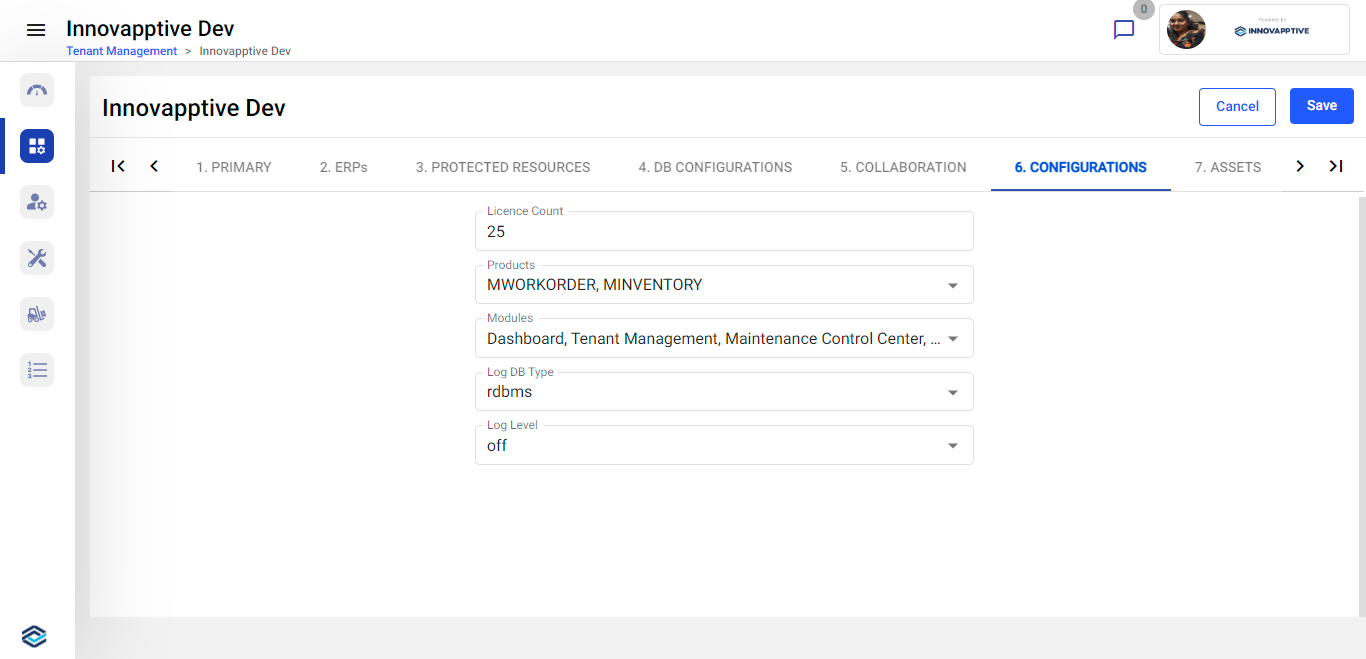
-
In the Assets tab, use the Browse Logo button to change the logo
on top right.
Figure 7. Add Logo 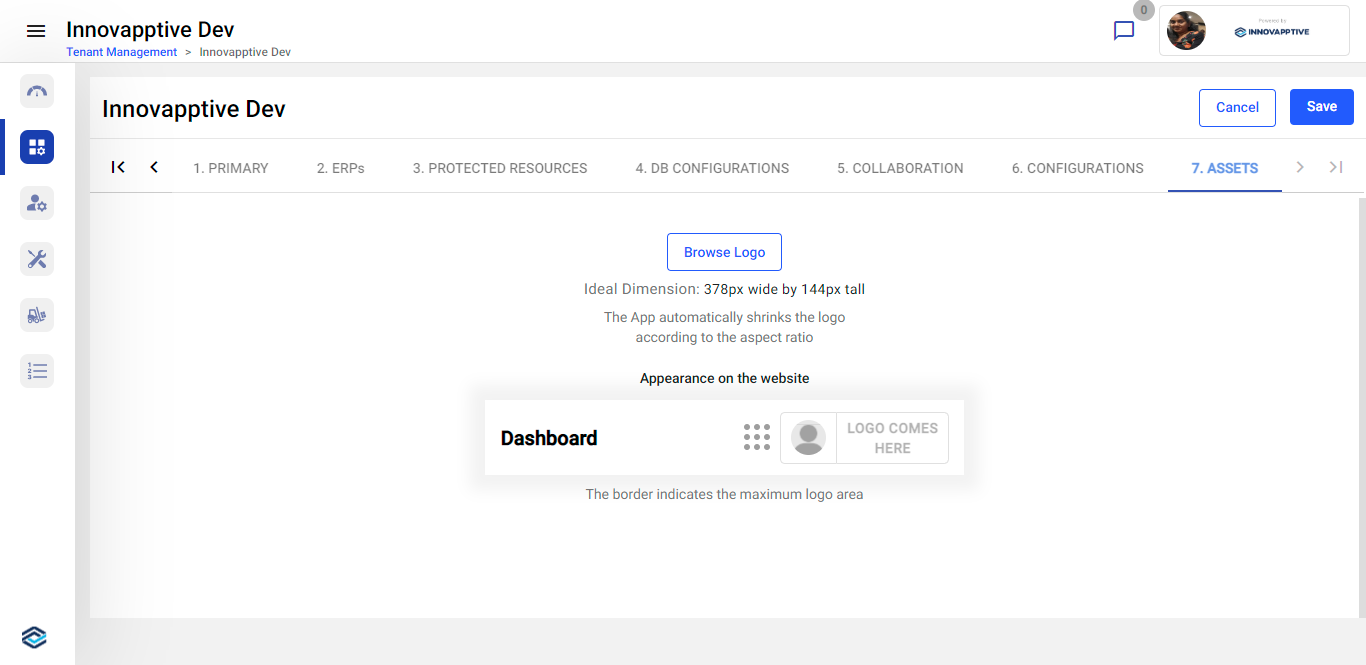
-
Click the Save button.
The tenant/super admin is created successfully, and you can access and edit it from the Tenant Management screen.