Add Operations and Assign them to Technicians
Create multiple operations and assign each operation in a work order to separate technicians based on their expertise. Dividing a work order (operations) among multiple technicians based on assigned operations on split-level to get work done quicker.
To add operations and activities to a work order:
-
In the right side of the My Work Orders screen under the
Operations tab, tap the Add
 icon.
icon.
- The ADD OPERATION screen is populated with a few pre-filled values. You can change the pre-filled values of the operation code, work center, and plant.
-
Enter the required information in other fields, such as Std text key and
Unit of Work and Operation Recipient.
Note:
- In the work field, if you enter a value less than or equal to 1, then select H in the Unit of Work field and for a higher value, enter HR.
- Once you enter the amounts in the Work and the Number of Resources fields, the Duration field is automatically updated.
-
Under Operations, tap the User Status and select the user status
of the operation. The Set User Status screen appears with both the
sequential and non-sequential user statuses.
Figure 1. Work Order User Status 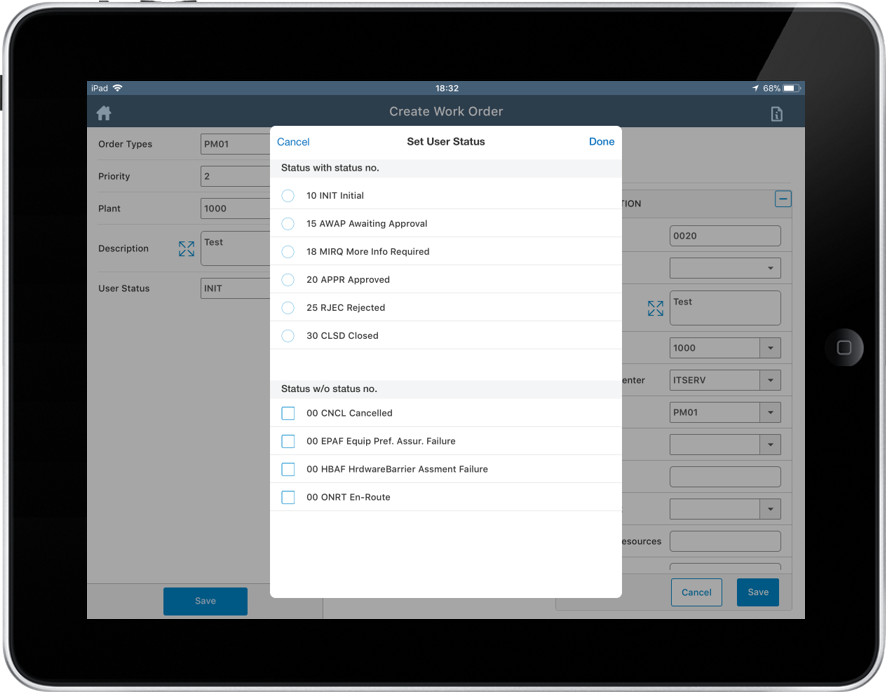
-
Select the User Status for Operation from the list.
Note:Users can select single sequential status and/or multiple non-sequential statuses.
- Tap Done.
-
Tap the Update link in the Resources field to assign the
operation to the crew/technicians.
Figure 2. Assign Resources 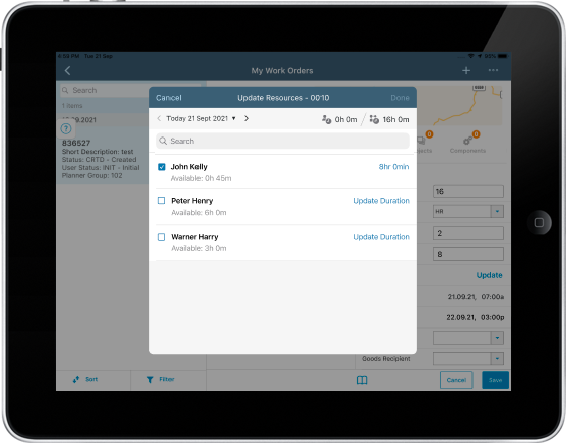
- In the Update Resources window, tap Update Duration next to the selected resource.
-
Enter the start and end dates fields using a timer and tap Done.
Figure 3. Add Duration 
- Tap Done in the Update Resources window.
-
Tap Save.
Note:
- You can also add operations from the Task Lists. For details, see Add Task List Based Operations.
- You can edit the details of operation in the same screen. You can edit the details only when it is in created and released state; not when the work order is completed.
- You can create, copy, edit, and delete operations. To delete an operation that is created in the offline mode, access the offline outbox and swipe to delete.