Create Transactions Reports
To create a report:
- Click the Reports on the left-side pane.
-
In the Reports screen, click the Create Report button.
Figure 1. Select Objects and Reports 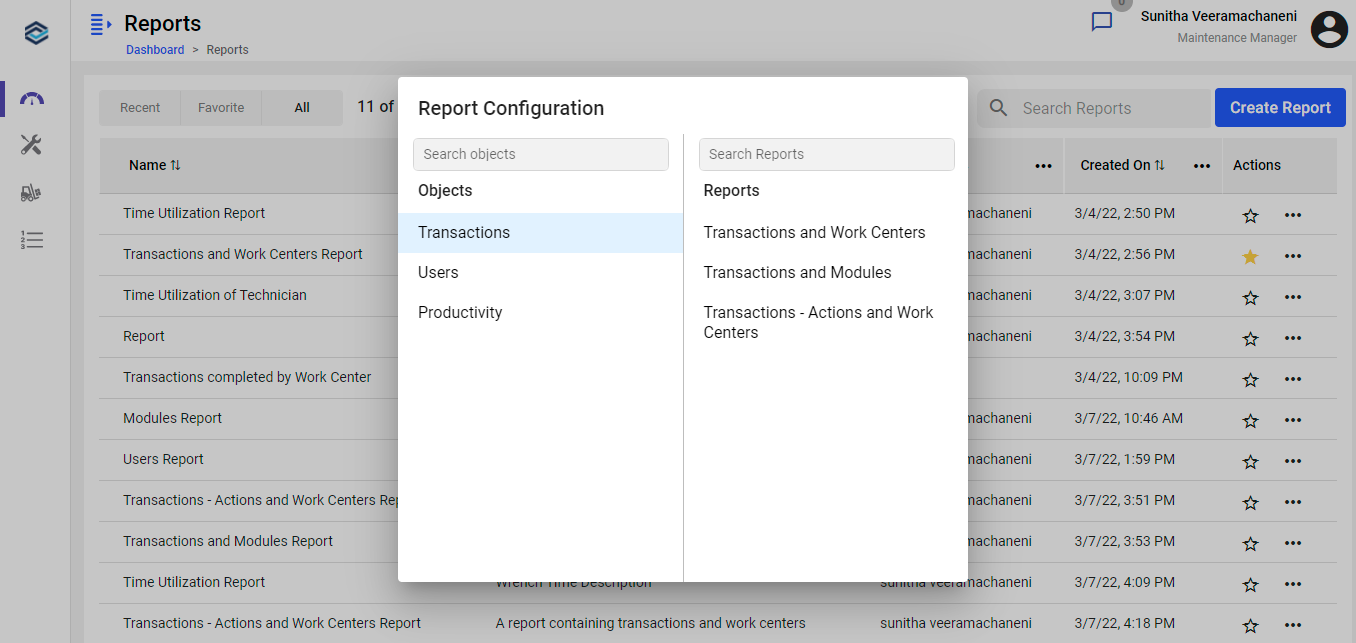
-
In the Report Configuration window,
- Select the Objects such as Transactions, Users, or Productivity on the left side.
- Select the Reports on the right side.
-
In the Report Name field, click the Edit
 icon to
update the title of the report, if needed.
icon to
update the title of the report, if needed.
- In the Group by Fields field, select or add the columns to group the data by the selected columns in the report.
- In the Columns field, select the required columns to display in the report.
-
Click Save or Save As on the top right to save the report with a
different name.
The report is saved successfully.
Figure 2. Add Report Details 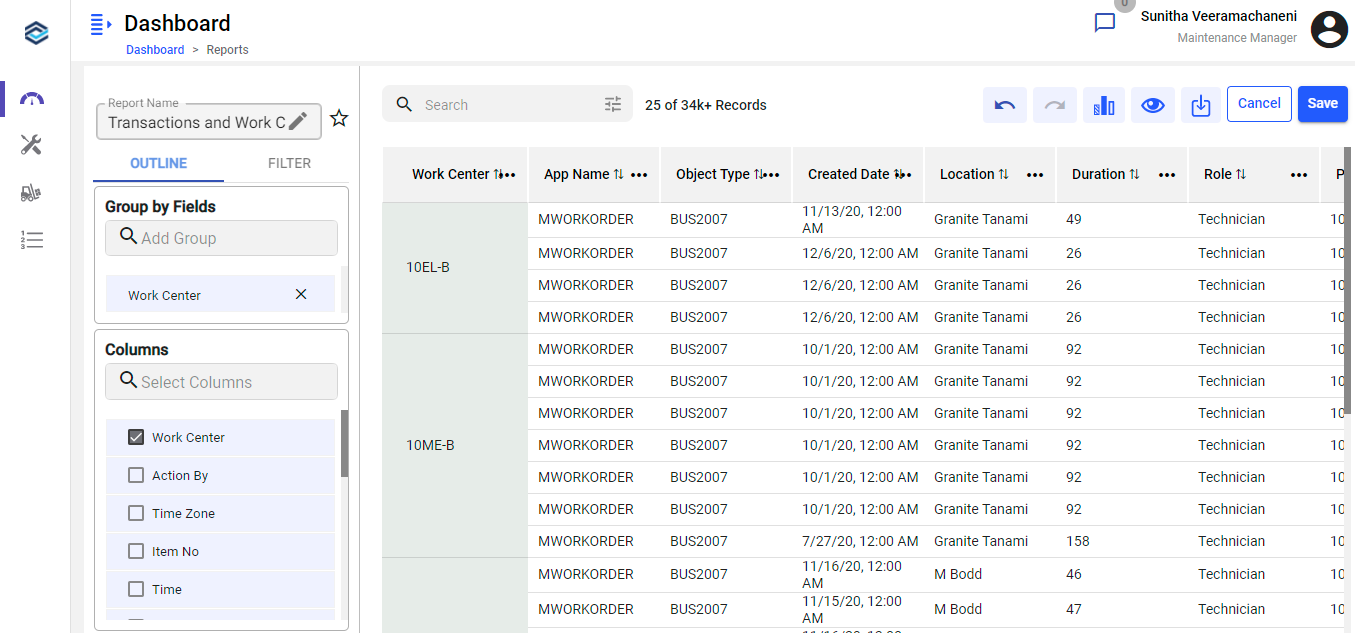 In this screen, you can,
- Make the report favourite using the Favourite
 icon next to the Report Name
field.
icon next to the Report Name
field. - Search the columns using the Search bar.
- Apply the filters in the Filter
 tab to load a few records.Note:Filter doesn’t apply to the bar chart.
 - Undo and redo the actions that you have performed using the Undo
 and Redo
  icons.
 - Show the data in the bar graph using the Bar Graph
 icon.
icon. - View the preview of the report using the Preview
 icon.
icon. - Download the report into excel format using the Download
 icon.
icon. - Sort the columns in the table using the Sort
 icon.
icon. - Hide, move left, move right, stick, and group the columns.Note:To access the Hide Column, Move Left, Move Right, Stick, and Group Rows by this Column options, click the More
 icon next to the columns.
Note:To see Reports, click Hamburger menu on the top left and then click the Expand
  icon
next to the Dashboard.In this screen, you can,
icon
next to the Dashboard.In this screen, you can,- See the recent, favourite, and all reports.
- Search the reports using the Search bar.
- Sort the columns using the Sort icon
next to the columns.
- Make the report favourite using the Favourite
icon.
- View the preview of the report using the More icon
> Preview option.
- Edit the report using the More icon
> Edit option.
- Hide, move, stick, and group the columns in the table.
- Freeze the particular column using the Stick option.Note:To access the Hide Column, Move, Stick, and Group Rows by this Column options, click the More icon next to the columns.
- Export the report to excel format using the More icon
> Export to Excel option.
- Copy the existing report to create a new report using the More icon
> Copy option.
- Delete the report using the More icon
> Delete option.
- Make the report favourite using the Favourite