Create New Versions, Edit and Publish RACE Dynamic Forms
With the forms versioning functionality you can modify a form and deploy it in production directly. This functionality eliminates the lengthy change management process of moving forms from development, to QA, and to production environments when changes are minimal.
A form has the following statuses:
- Saved: When you create a new form or when you create a new version from an existing form by clicking the Duplicate Form Version button, it goes into the Saved status. You can continue to edit the form in this state.
- Verified: Once the form is created or edited, it is verified by clicking the Verify Form Version button. The form then goes into the Verified status. Verification is normally done by another person who is responsible for that.
- Published: When the form is verified, publish it by clicking the Publish Form Version button. The form moves into the Published status. This Published from is seen in the mobile app.
- Archive: When you publish a version of a from, other versions go into the
Archive status.Note: Only one version of a form will be in the Saved, Verified, and Published state. Archived state can have multiple versions as old versions are moved to this state. When you publish an Archived version and the state changes to Published and the exisiting published version moves to the archived state.
To create new versions, edit and publish them:
Note: User with specific roles and releated permissions can do tasks like create forms,
and modify and publish them. For information, see User roles and authorizations for working with forms
- Click Dynamic Forms on the left panel.
- Select the form from Recents, Favourites or Categories sections.
-
Click the Form Version History button.
Figure 1. Check Form Version History 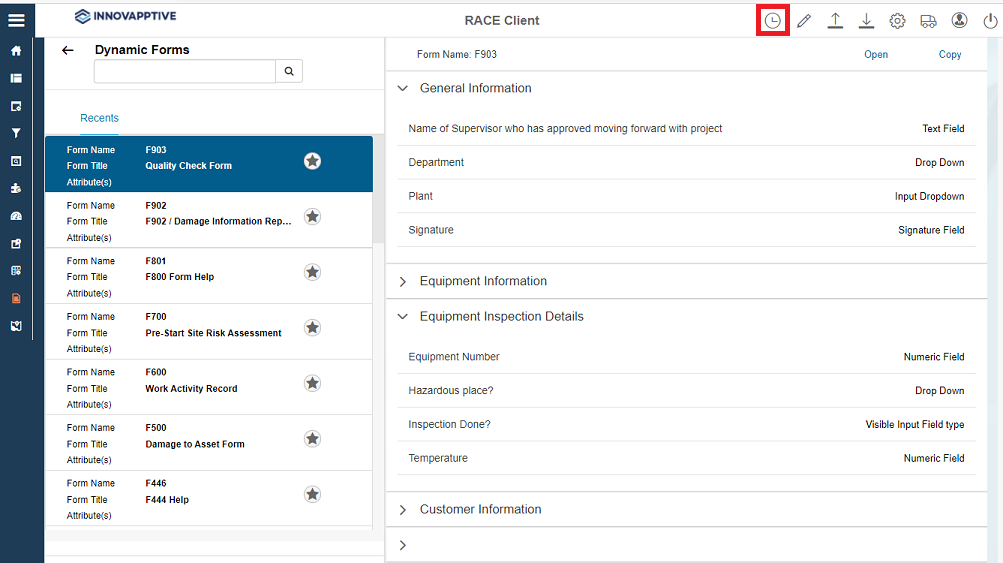
Note: You can also click Open after selecting the form and click the button on the top to change the form status
from Verified to Published and so on. The process is defined in the
following steps.
button on the top to change the form status
from Verified to Published and so on. The process is defined in the
following steps. -
Select the version on left side (For example, Version 1) which is in the
Published status.
Figure 2. Duplicate Version 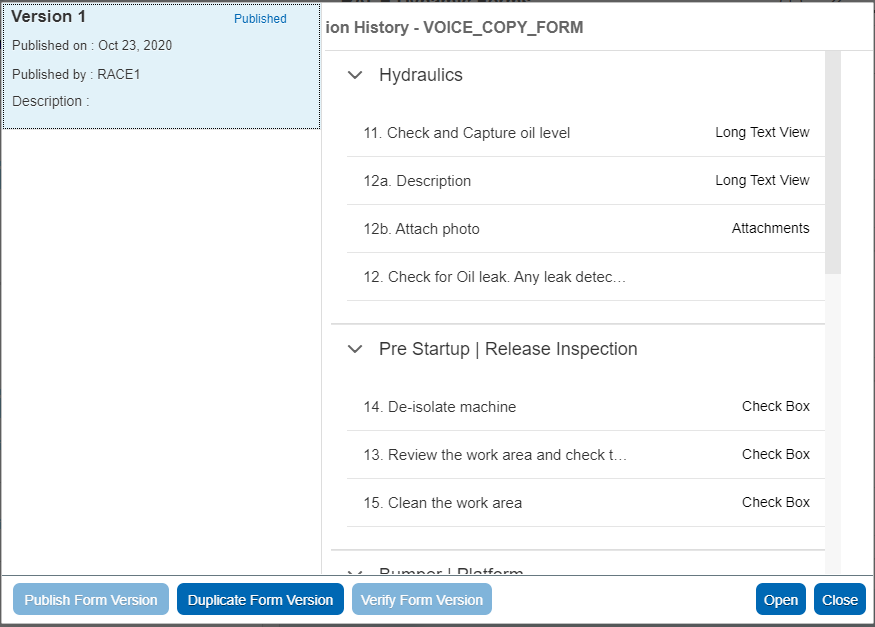
- Click the Duplicate Form Version button.
-
Enter the Version Description and click Yes.
The new version (Version 2) is created and the form status is changed to Saved. You can now edit the form.
- Edit the form that is in the Saved status and save it.
-
Select the form on the left side, click From Version History and select
the form that is in Saved status.
For example, select Version 2 which is in Saved status.
Figure 3. Verify Form Version 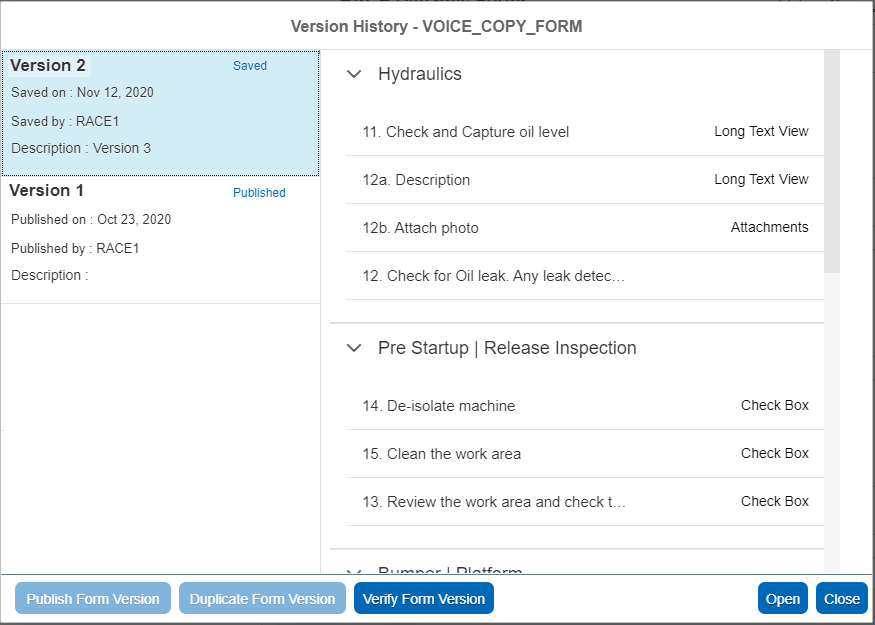
- Click the Verify Form Version button.
- Enter the Version Description and click Yes.
-
Select the form on the left side, click From Version History and select
the form that is in Verified status.
For example, select Version 2 which is in the Verified status.
Figure 4. Publish Form 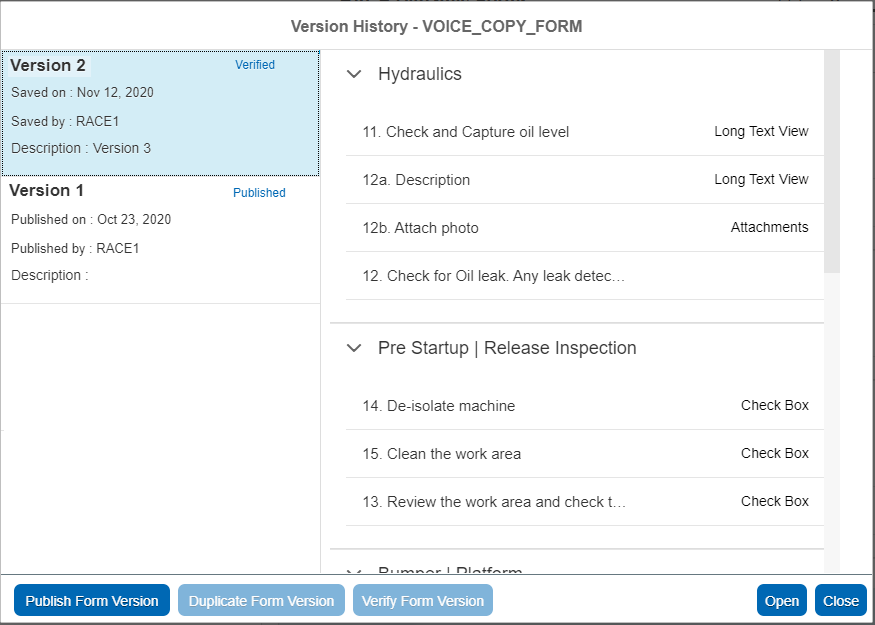
- Click the Publish Form Version button.
-
Enter the Version Description and click Yes.
The form is published successfully. Version 2 is changed to the Published status and Version 1 is changed to the Archive status.
Figure 5. Form Published Status 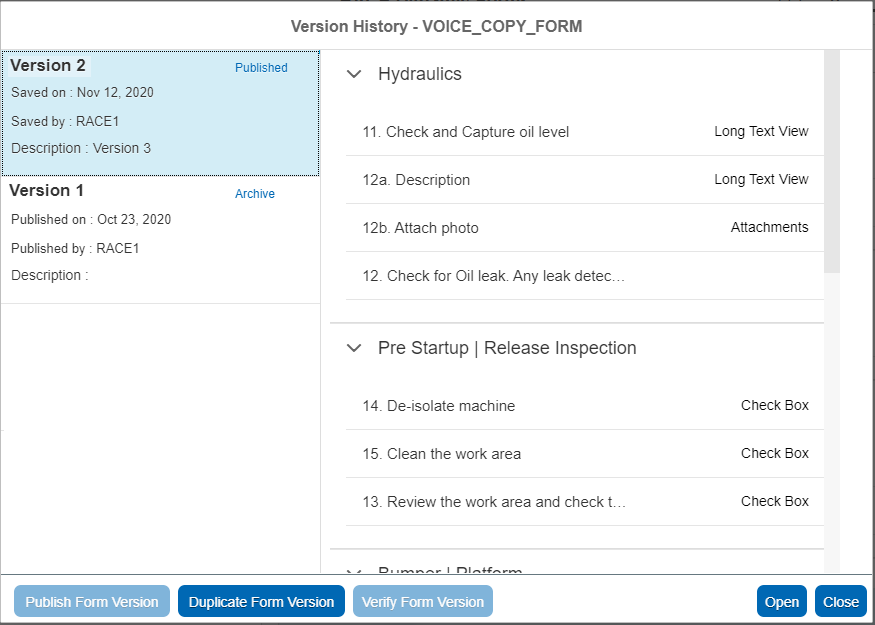
You can view the published form in the mobile app.