How to create Roles and Assign Permissions
Use the Roles and Permissions sub module to create roles and assign relevant permissions.
-
Click the Roles and Permissions on the left-side pane.
Note: To see the Roles & Permissions module, click the Hamburger
 menu on the top left and then click the Expand
 icon next to User Management.
Figure 1. Roles and Permissions Screen 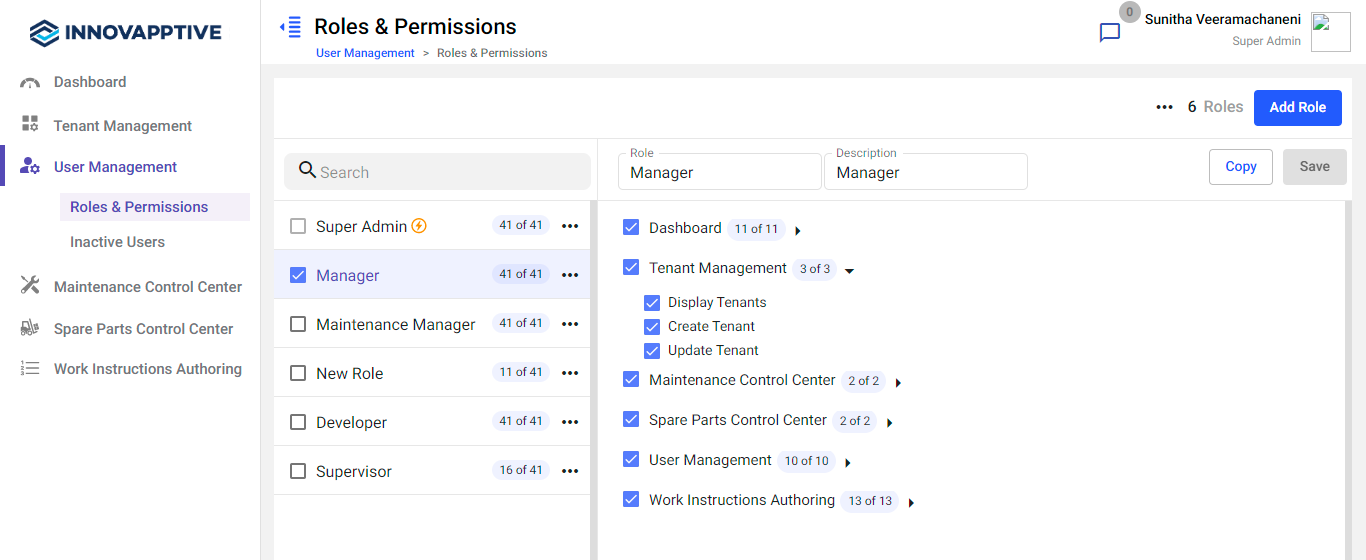
- Click the Add Role button on the top right.
-
Do the following in the right section:
- Enter the role name in the Role field.
- Enter the description of the role in the Description field.
- Select the modules that are required for the role.Expand the down arrow icon to select the sub-modules.
Figure 2. Add Role Details 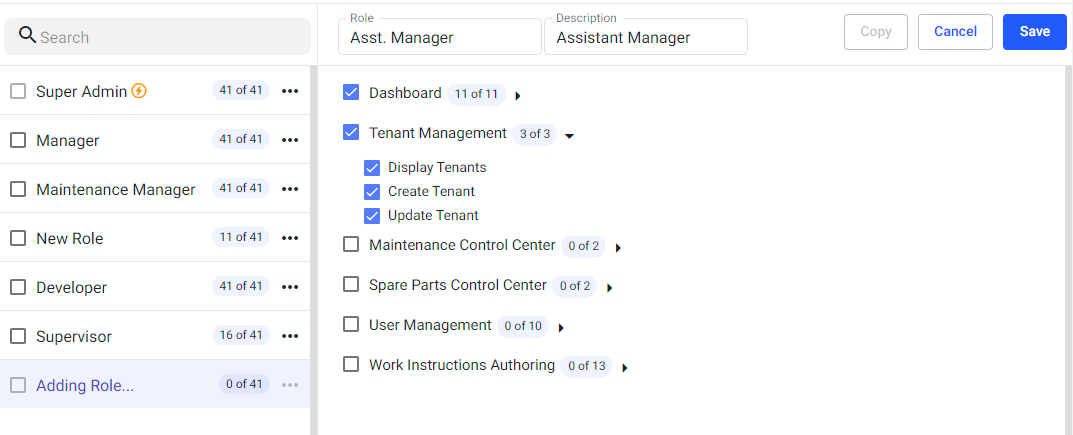
-
Click the Save button.
The role is created and you can see it on the left section.In this sub module, you can,
- Search the roles using the Search bar on the left-side section.
- Copy the role using the More
 icon > Copy option to create a new role from the existing
role on the left-side section.Note: You can even select the Copy option on the right-side section to copy.
icon > Copy option to create a new role from the existing
role on the left-side section.Note: You can even select the Copy option on the right-side section to copy. - Delete the role using the More
icon > Delete option on the left-side section or you can
delete all the roles at a time by selecting the check boxes and then
selecting the More icon > Delete option on the
right.Note:
- You cannot edit or delete the Super Admin role. You can only copy.
- You cannot delete the role which is already assigned to the user.
- Add a role using the Add Role button on the right side.
- Edit the role details or permissions on the right side.