How to create a Connection for ODBC Connector
Create a new connection to connect to an ODBC connector.
To create a connection for ODBC connector:
- Click the Integrations Manager module on the left side pane.
-
Click the Add button in the Connections section on the left side.
Figure 1. Add ODBC Connection 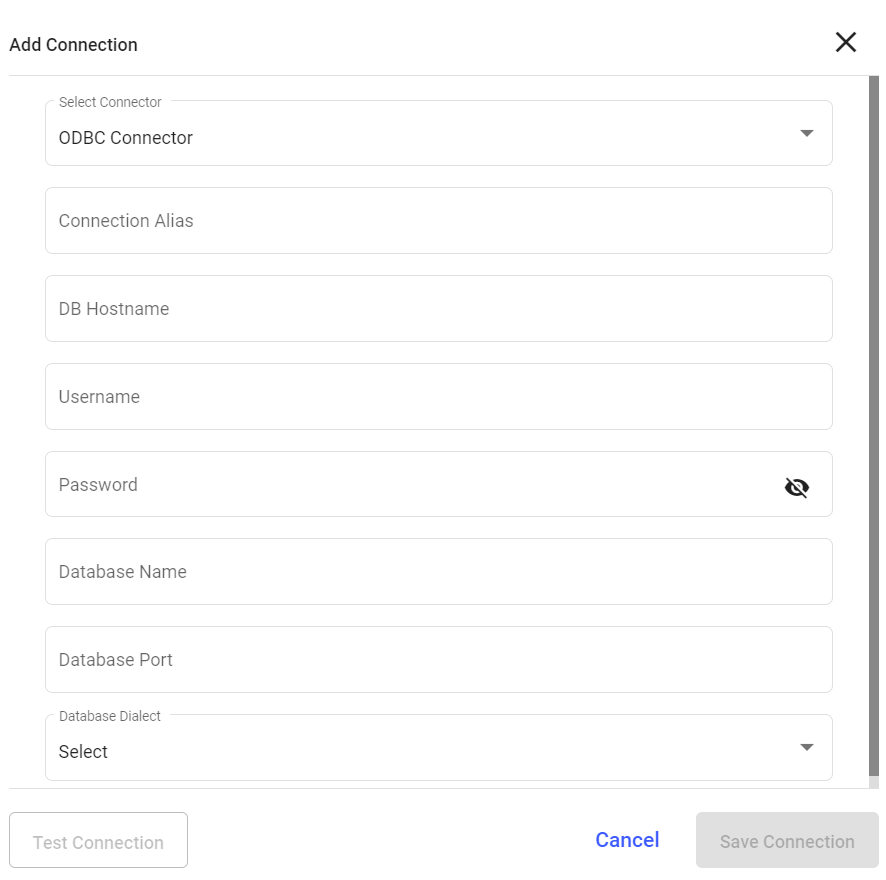
-
In the Add Connection window, do the following:
- Select ODBC Connector from the Select Connector drop-down.
- Enter the connection alias name in the Connection Alias field.
- Enter the host address in the DB Hostname field.
- Enter the username in the Username field.
- Enter the password in the Password field.
- Enter the database name in the Database Name field.
- Enter the port number in the Database Port field.
- Select the database type from the Database Dialect drop-down.
- Click Test Connection to test the connection.
- Click Save Connection if the connection is successful.
The Connection is created successfully and you can see it in the Connections section.
In this section, you can,- Click the More icon next to the connection and select View Details to see the connection details.
- Click the More icon next to the connection and select Edit Connection to edit the connection details.
- Click the More icon next to the connection and select Delete Connection to delete the connection.