Configure an Issue
Administrators can define:
- Custom fields to capture plant-specific data
- Default values to standardize entries
- Help texts to guide end users
- Auto-fill conditions to speed up data entry and reduce errors.
This ensures accurate, consistent, and efficient issue reporting across your operations.
To configure an issue:
- Click the Observations section on the left-side pane.
- Click the Issues tab.
- Click Configure Issue.
-
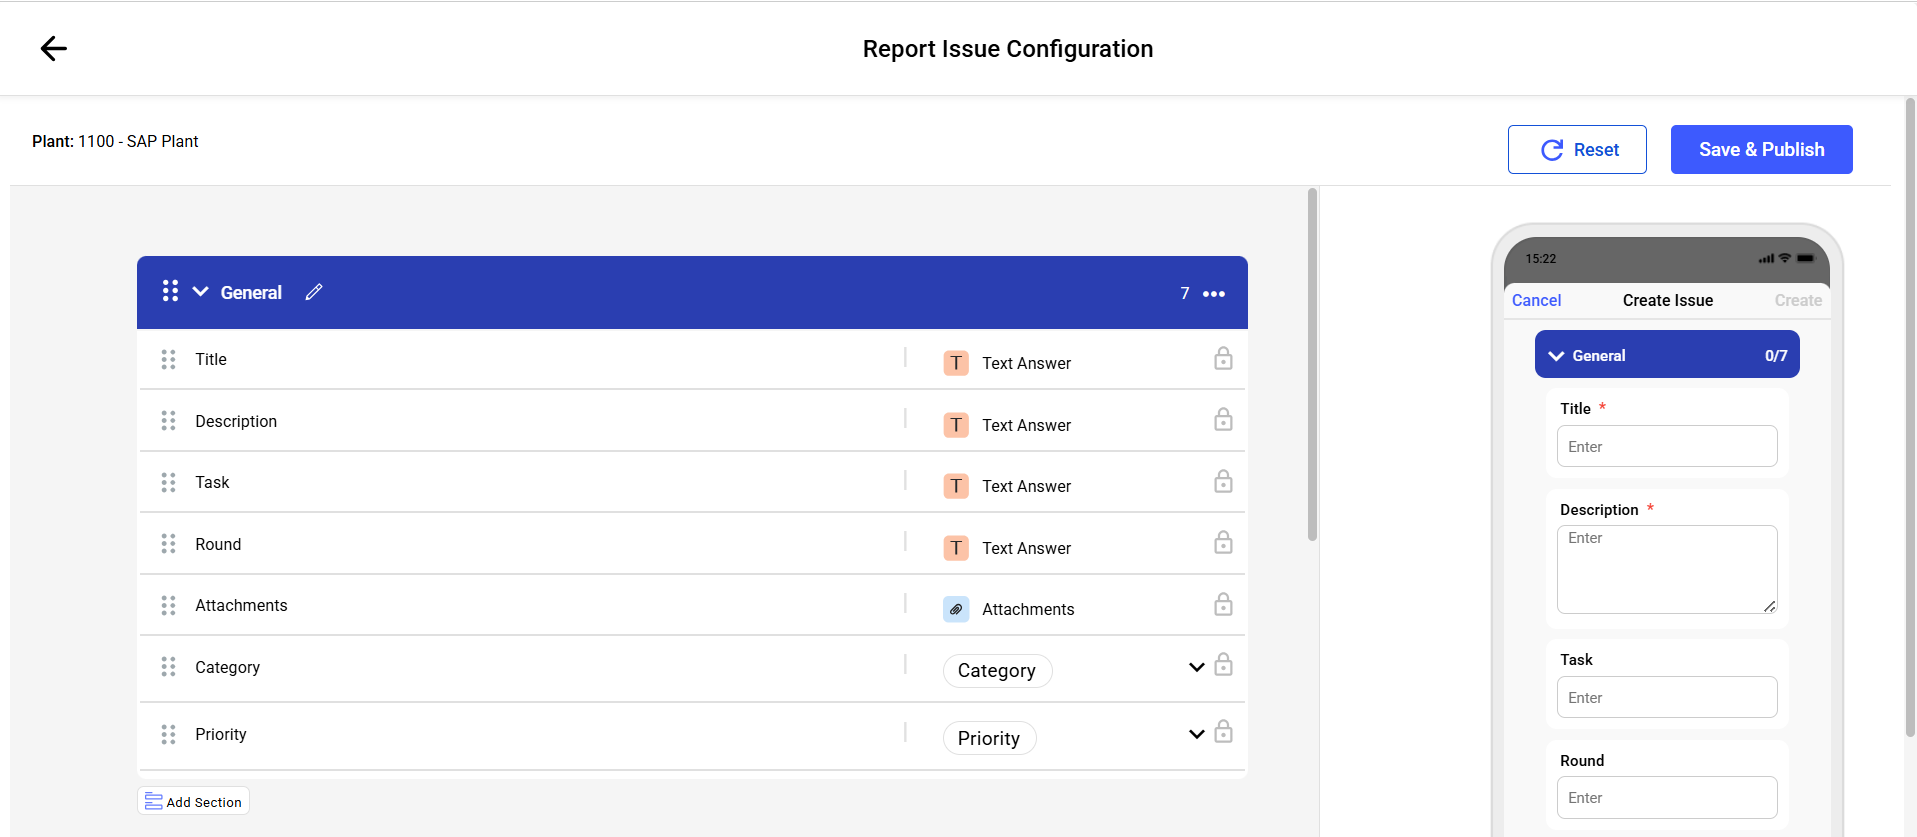
In the General section, customize, Issue Title,
Description, Photos, Priority, Category fields.
Configure an Issue
-
In the More Details section, adjust Plant, Unit,
Location, Asset, Assignee, Due Date and Time, New Custom Field and Status
fields.
Add additional fields by clicking Add Field.
Create new sections by clicking Add Section.
Add or remove columns except for mandatory fields like Title, Unit (if enabled), Location/Asset, Priority, Status, Due Date, Assigned To.- New fields added during configuration appear as selection criteria in column configuration.
- Default configuration applies to newly created plants. You need to modify configurations to meet specific business needs.
- You can Copy configurations from one plant to another.
- When modifying one plant's configuration, you will be prompted to apply changes to all plants.
-
Click Save & Publish.
The right side of the screen displays a mobile preview of the "Create Issue" form, allowing you to verify the layout and functionality before publishing.