Create a Work Order
This section guides you through creating a work order, detailing the steps to add operations, components, permits, forms, and assign resources, and capture relevant information efficiently.
To create a work order:
- Navigate to the Work Orders screen.
-
Tap the Create
 icon at the bottom-right
of the screen.
icon at the bottom-right
of the screen.
-
In the Create Work Order screen, you can describe the issue using one of
the following methods:
- Use the Camera: Tap the Camera
 icon to capture or upload a photo of the
issue. The system uses the image to identify the problem and suggest
relevant fields.
icon to capture or upload a photo of the
issue. The system uses the image to identify the problem and suggest
relevant fields. - Type a Prompt: Enter key details like equipment, functional location, and severity in the text box.
- Use Voice Input: Tap the Mic
 icon and speak your description. The
system records and analyzes your input to auto-fill details using
AI.
icon and speak your description. The
system records and analyzes your input to auto-fill details using
AI.
Figure 1. Create Work Order 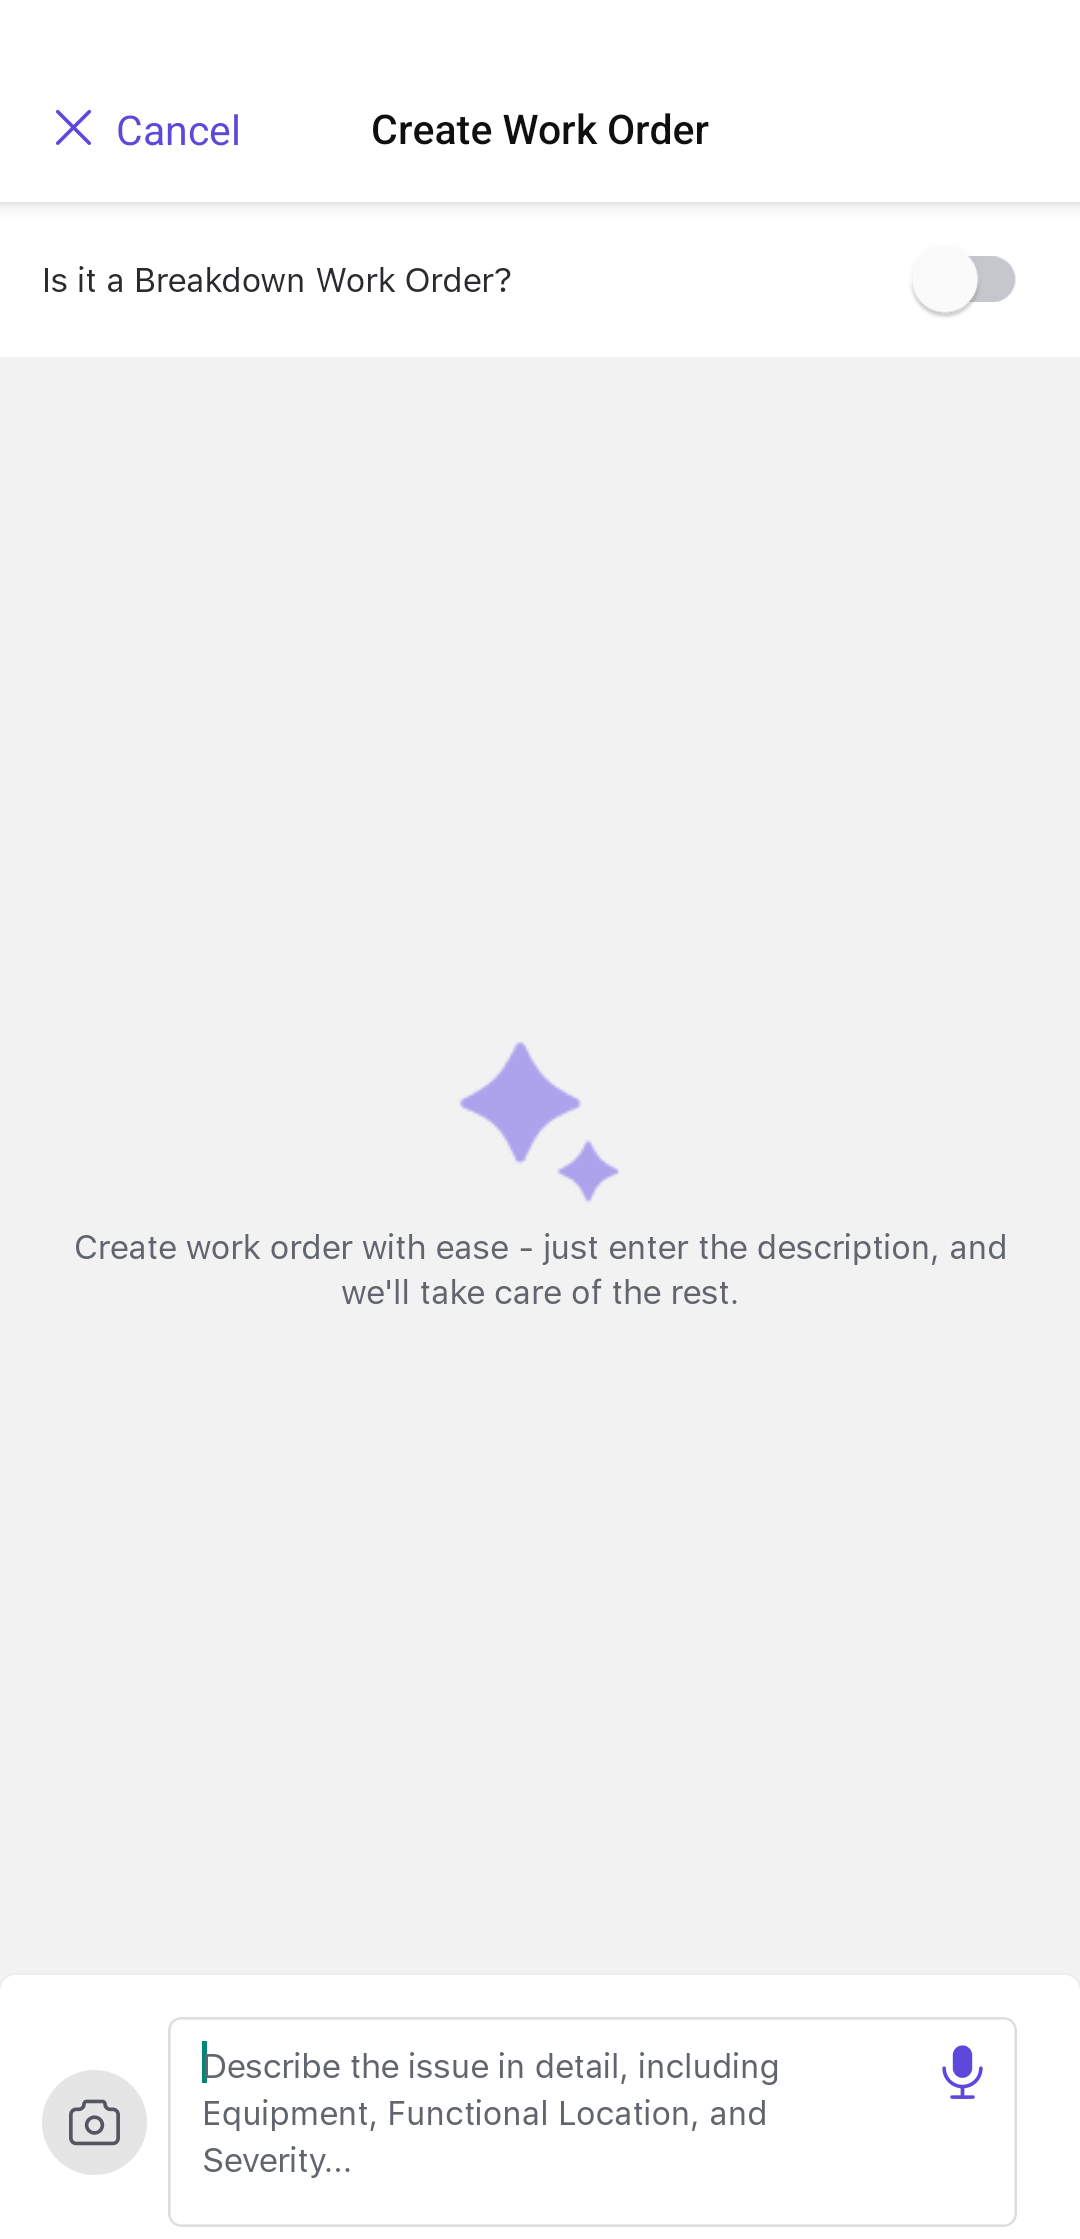
Note:Switch Is it a Breakdown Work Order? toggle if it is an emergency work order. - Use the Camera: Tap the Camera
-
Tap the Enter
 icon.
icon.
The AI assistant (AI Plan) uses your input to suggest the right equipment, identify likely root causes, and recommend appropriate operations—helping you create Work Orders faster and more accurately, even in urgent situations.
Tip: Review and adjust the AI-suggested details before saving the Work Order.Note:Rate AI-generated responses using the Like or Dislike buttons to help improve suggestions.Figure 2. AI Generated Work Order Details 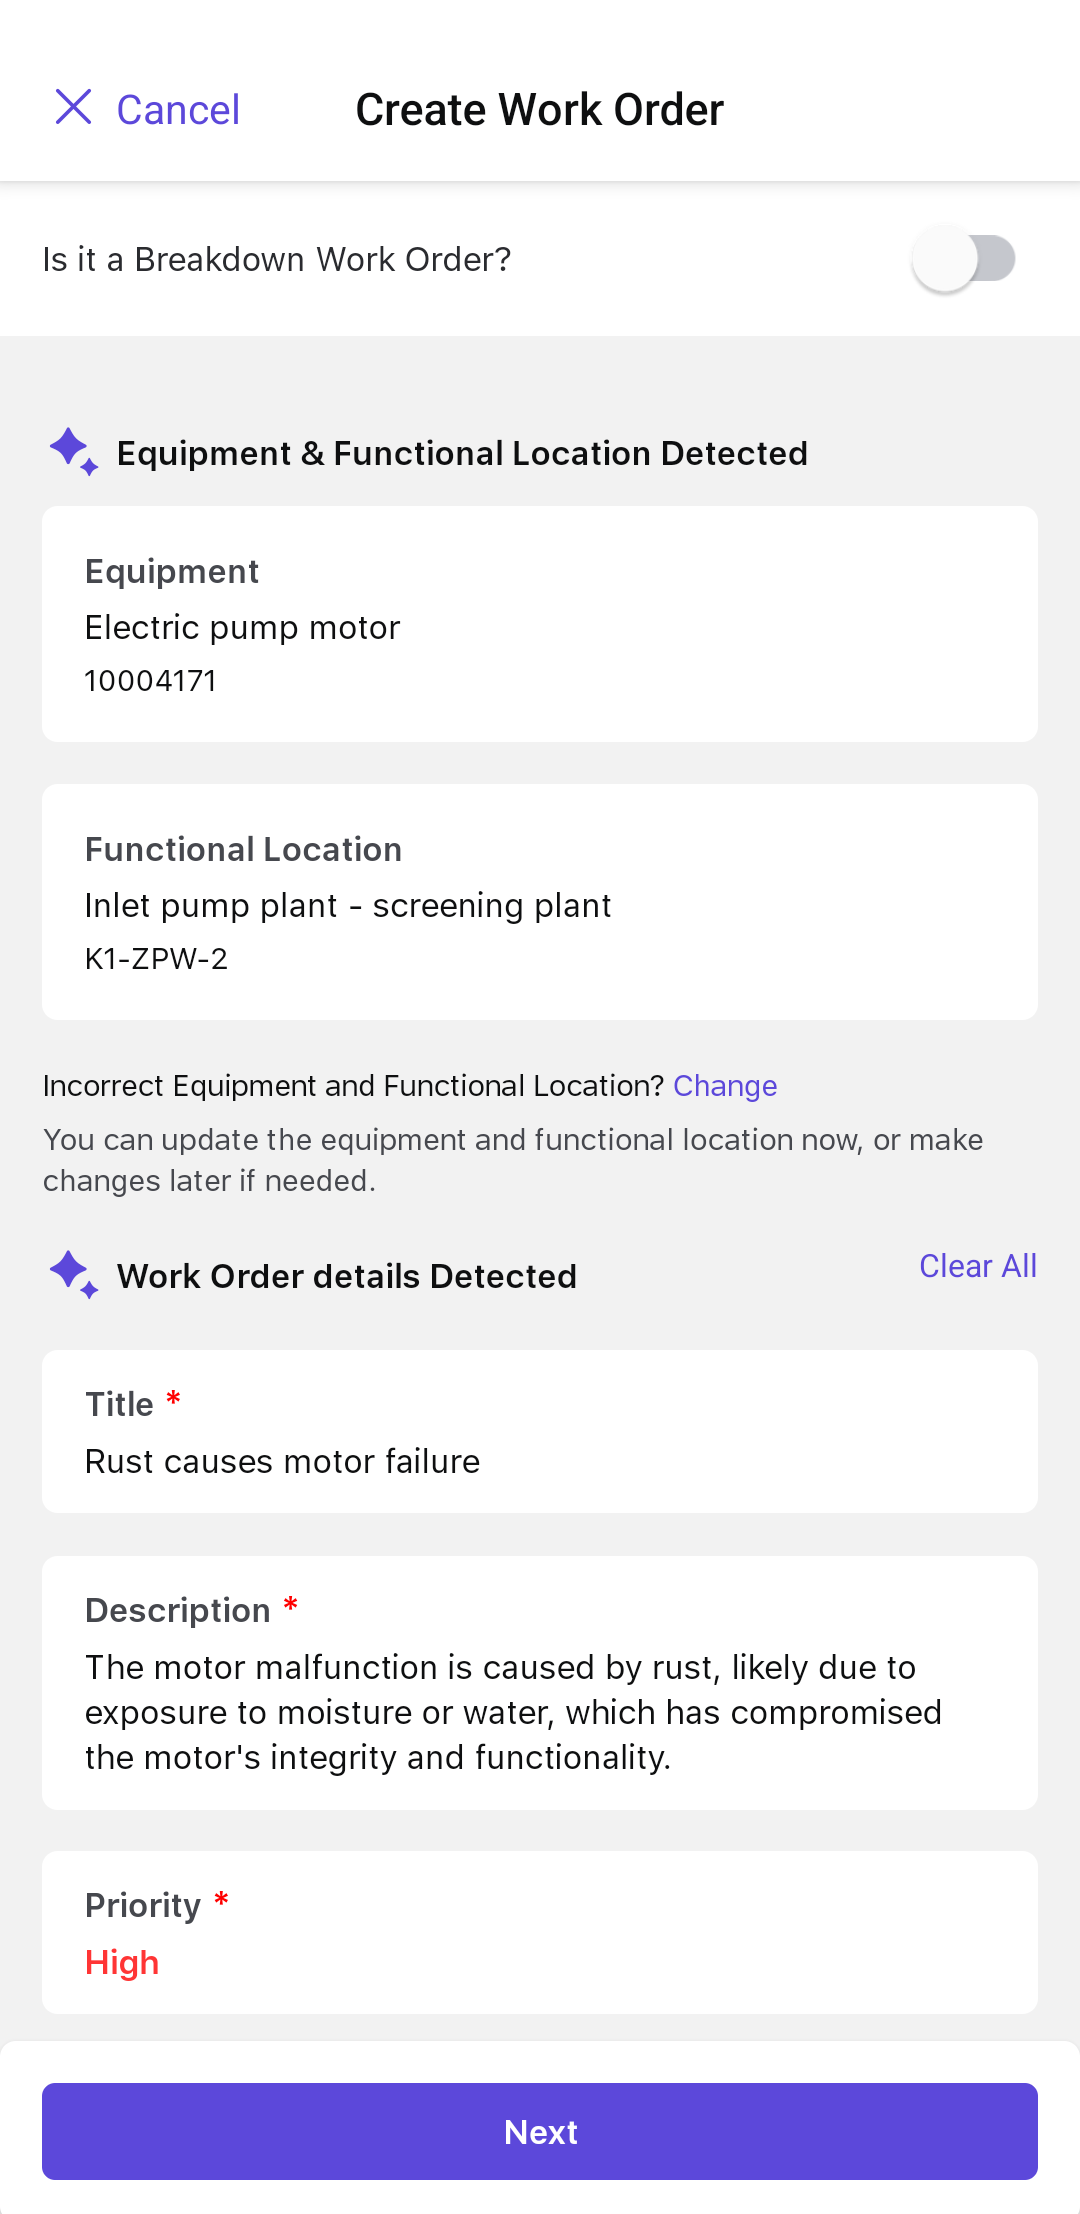
- Equipment: The machine or equipment in need of maintenance or repair.
- Functional Location: The area where the equipment is
located.Note:To change the Equipment and Functional Location details, tap Change.
- Title: Title or a brief description of the work order.
- Description: A detailed explanation of the work order.
- User Status: Tap to change the status of the work order. For example, INIT, APPR, RJEC, CLSD, and so on.
- Work Order Type: Select the required type from drop-down. For example, Corrective WO, Preventive WO, and so on.
- Maintenance Activity Type: Populates automatically based on the selected Work Order Type.
- Maintenance Plant: Populates automatically based on the selected Equipment or Functional Location.
- Planning Plant & Planning Group: Populate automatically based on the rules.
- Priority: The urgency of the work order.Note:To change the Work Order details, tap Update Details.
-
To change priority, tap on Priority.
Note:Tap the References link below the Priority to view the information the AI used to determine the priority.
Figure 3. Update Priority 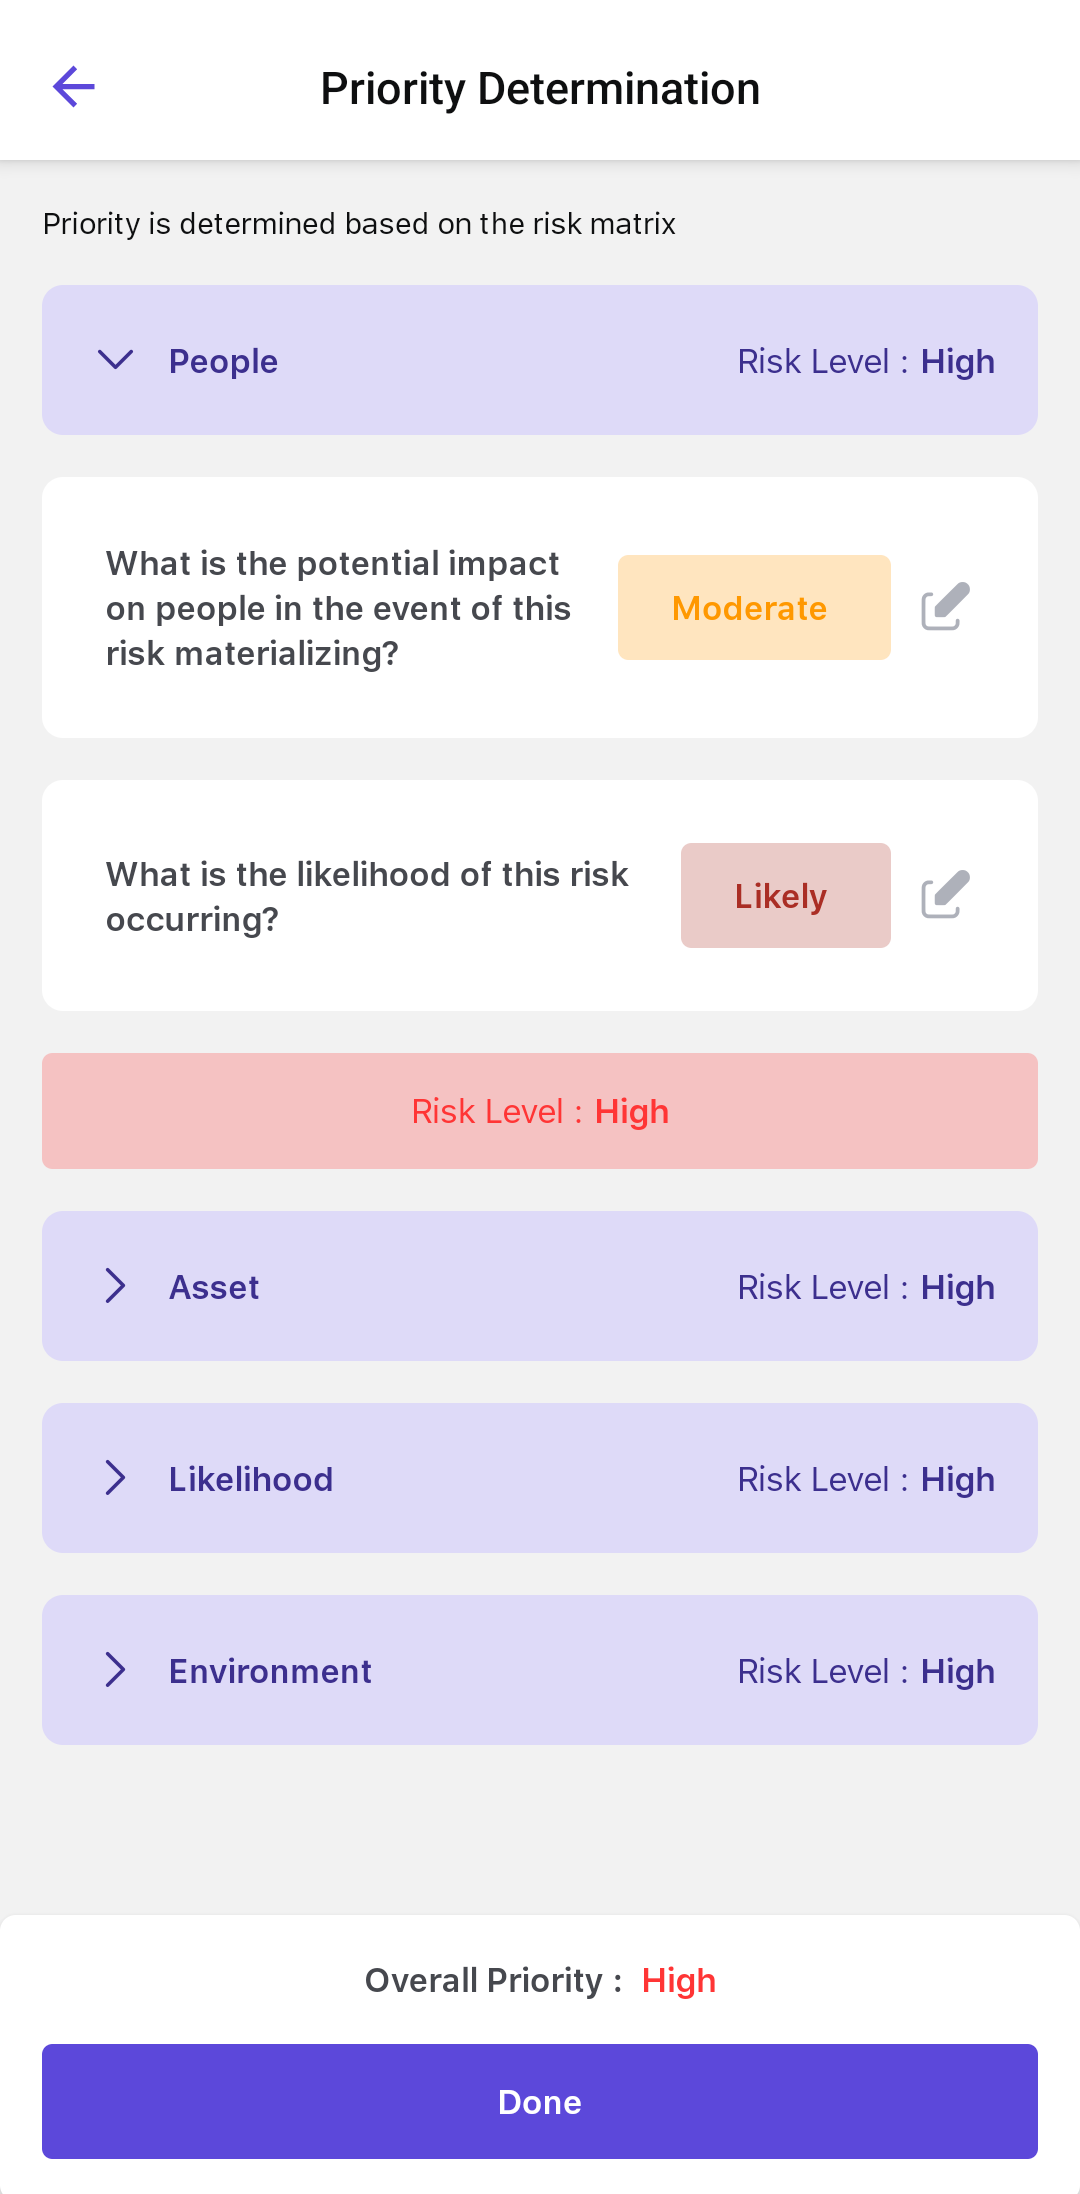
-
In the Priority Determination (risk assessment) screen, assess the risk
level by selecting the likely impact in each category:
- People: Impact of the issue on worker safety.
- Assets: Potential damage to equipment.
- Likelihood: How likely the issue is to occur.
- Environmental: Impact on surroundings or compliance.
- Based on your selections, the AI automatically calculates the Overall Priority as Low, Medium, or High Risk.
- Tap Done.
The system automatically assesses the risk associated with each issue and assigns a risk level to the corresponding work order. This ensures that high-priority problems are addressed promptly and appropriately.
For example, if a valve leak poses a significant threat to nearby equipment and has a high likelihood of recurring, the system flags it as a High Risk work order. This prompts the planner to immediately dispatch a technician—preventing potential safety incidents or unplanned shutdowns.
This automated risk ranking:- Prioritizes critical issues based on real-time conditions.
- Helps maintenance teams focus on high-impact tasks.
- Minimizes downtime and safety risks.
In addition, the system intelligently selects relevant operations based on the severity level of the issue, reducing manual input and accelerating the Work Order creation process.Note:- You can also manually select the Priority value from the drop-down, instead of relying on the Risk Assessment Matrix for automated determination.
- You can use the chat feature within the Work Order details screen to send messages, share files, and tag team members in real time. It supports notifications and automatic updates, making collaboration and tracking more efficient.