
Create Users and Assign Roles
Creating users allows you to add personnel to the system and assign them appropriate roles and permissions. When adding a new user, you define their role (such as Supervisor, Technician, or Manager) and configure their access permissions based on the modules they need.
By setting up users correctly, you ensure that each team member has the right level of access to perform their tasks efficiently while maintaining system security and data integrity.
To create a user and assign a role:
-
Expand the User Management module and select Active Users on the
left side menu.
Figure 1. User Management Module 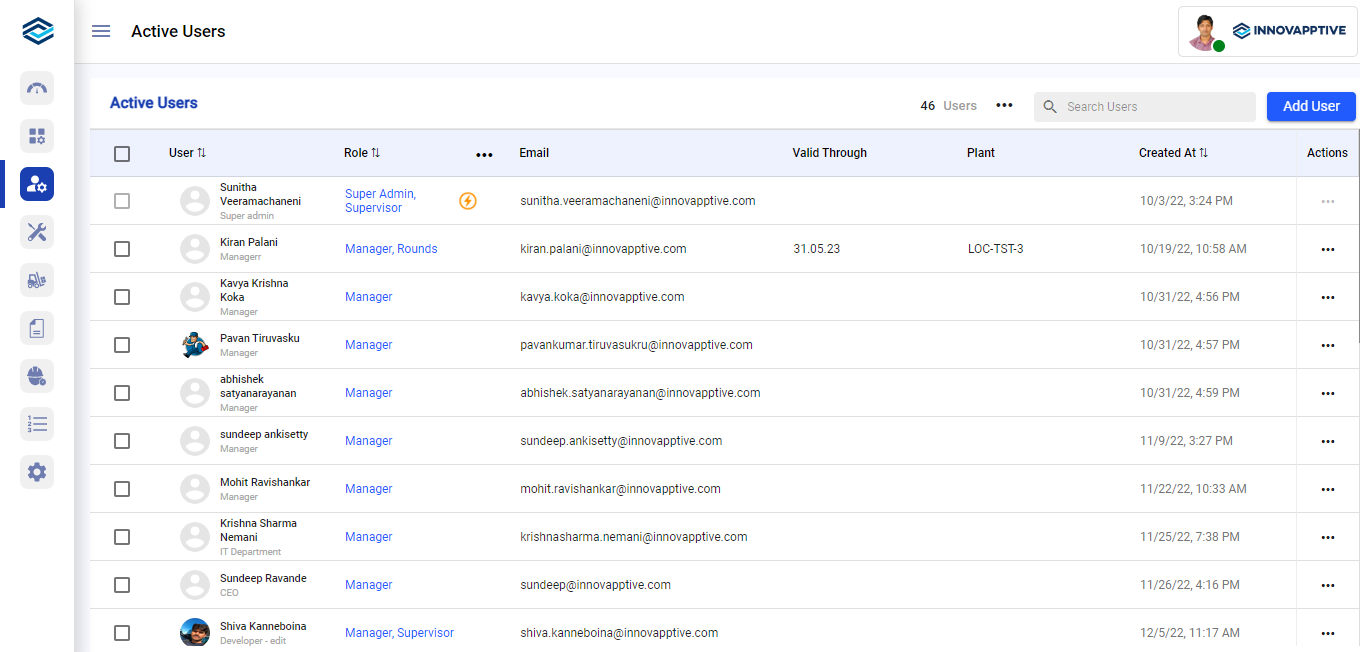
-
In the Add User window, do the following:
- Add the photo of the user.
- Enter the first name of the user in the First Name field.
- Enter the last name of the user in the Last Name field.
- Enter the title of the user in the Title field.
- Enter the mail id of the user in the Email field.Note:You can maintain two separate email addresses to access both the Web and Mobile applications.
- Select the relevant role from the Roles drop-down.Note:You can click the More Info icon to check the permissions assigned to the particular role.
Figure 2. Check Permissions 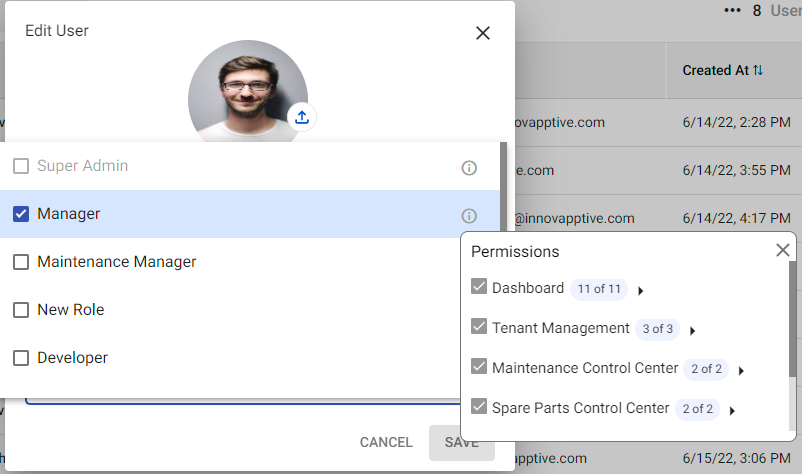
- Select the user group from the User Group drop-down.
- Select the dates from the Valid From and Valid Through calendars.
- Select the plants from the Plant drop-down.Note:You can select more than one plant for a user. This enables the user to view rounds assigned to the user from multiple plants.
- Select the unit from the Unit drop-down.
- Select the position from the Position drop-down.
- Click the Add User button.
Figure 3. Add User Details 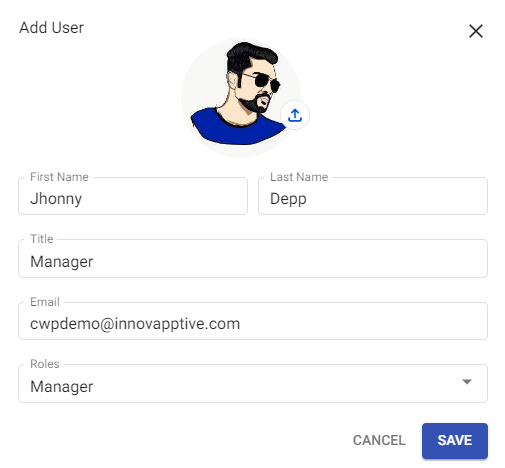
User is created successfully. You view the newly added users list in the Active Users screen. To download the users list in excel format, click the More icon > select Download Users List.