Confirm an Operation Manually
Once you finish an operation for the work order, you can close it by confirming the action done on it. You can enter the details of the work done with details like start time and end time, ID of the crew who completed the operation and so on either manually or configure to take values automatically.
Once the Operation is partially or fully confirmed, tap  icon on the
Operation details screen and navigate to the Time Sheets create screen using the
Create Time Sheet option. To learn how to create a time sheet, see Create a Time Sheet.
icon on the
Operation details screen and navigate to the Time Sheets create screen using the
Create Time Sheet option. To learn how to create a time sheet, see Create a Time Sheet.
- In the left section of the Work Order screen, tap the Work Order.
- In the right section of the Work Order screen, tap Ops/Activities.
- Under the Ops/Activities, tap the operation and tap Confirm.
-
In the Confirmation screen, tap Manual Confirmation.
Figure 1. Selecting Manual Confirmation or Automatic Confirmation 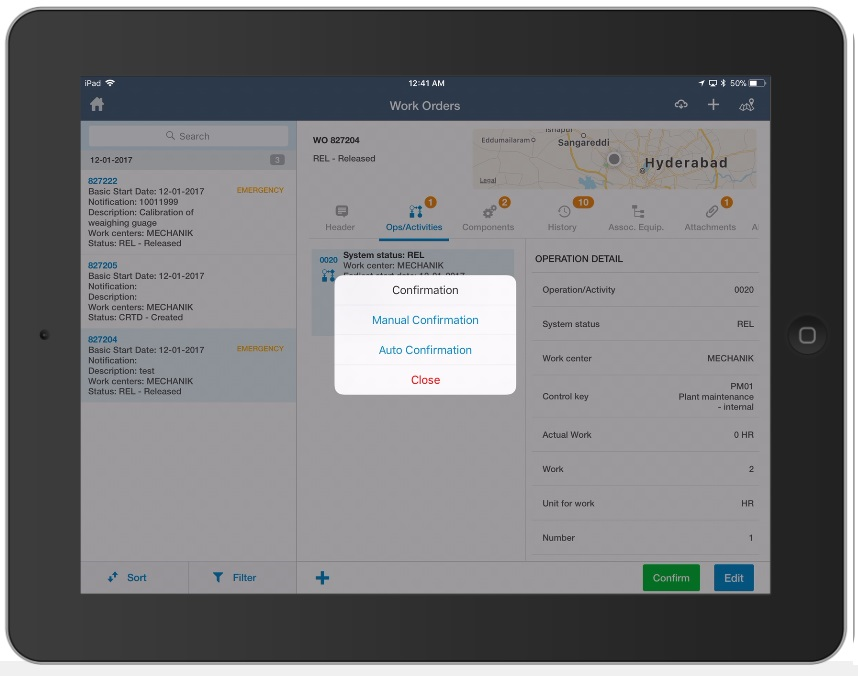
-
Under Operation Detail, enter the following:
- Execution Start: Tap the Calendar icon to select the date and time for start of execution.
- Crew ID: Tap the Crew ID icon to select the Crew IDs from
the list. When there are multiple fields to select, you can tap the
 icon to select or deselect
all. This feature is available in both Online and Offline modes.
icon to select or deselect
all. This feature is available in both Online and Offline modes. - Finish Execution: Tap the Calendar
 icon to select the date and time for
finishing execution.
icon to select the date and time for
finishing execution. - Actual Work: This field is non-editable.
- Unit for work: This field is non-editable.
- Final Confirmation: Select the check box for Final Confirmation.
- No Remaining Work: Select the check box to confirm that there is no pending work for the operation selected.
- Reason for Variance: Select the Reason for Variance from the list.
- Confirmation text: Enter the Confirmation text.
Figure 2. Entering Confirmation Details Manually 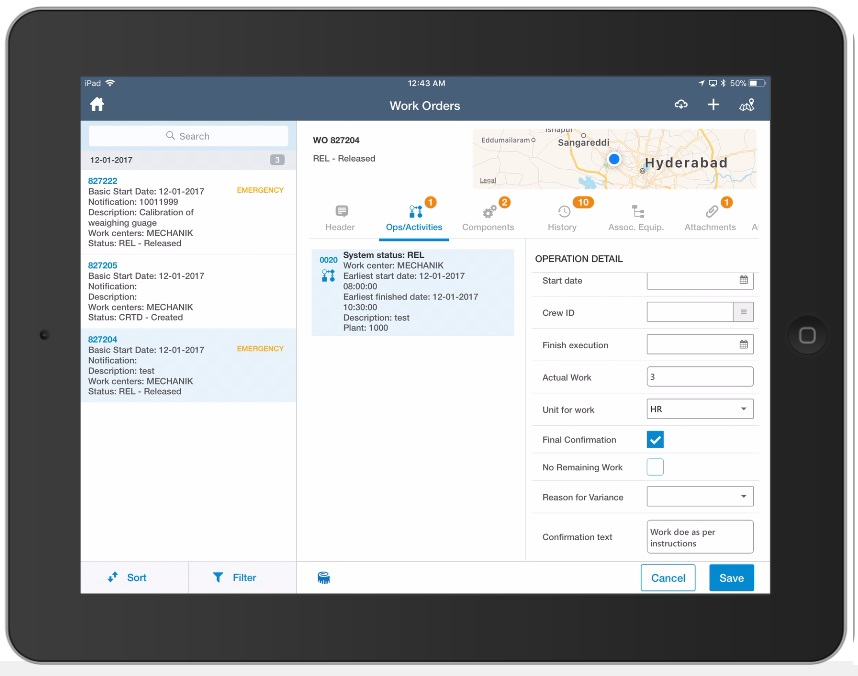
-
Tap the Measuring Document
 icon to select the measuring points
to create the measurement document.
Measuring Points are displayed on the following tabs:
icon to select the measuring points
to create the measurement document.
Measuring Points are displayed on the following tabs:- Objects: Shows measuring points associated with Objects like Functional location and Equipment.
- Operations: Shows measuring points associated with operations as Production Resource Tools (PRTs).
- Select the measuring points and tap Done.
-
Tap Save.
Operation confirmed successfully message appears.