Add SCP Metadata to ADFS
After you download Metadata file from SCP, log in to ADFS 2.0 server and copy the Metadata file to Desktop.
To establish Mutual Trust between SCP and ADFS:
- Click Start, Administration Tools, AD FS 2.0 Management.
- Expand View ADFS 2.0, Trust Relationships, right-click Relying Party.
- Select
Relying Party Trusts and select
Add Relying Party Trust.
Figure 1. ADFS Relying Party Trusts 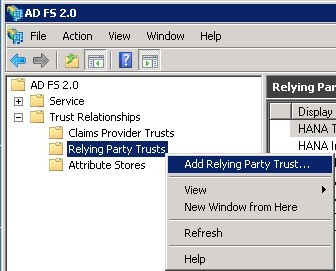
- Click Start.
- Select Import data about the relying party from a file and click Browse.
- Navigate to the file, which you copied and click Next.
- Enter Display name and click Next.
-
Select
Permit all users to access this relying
party and then click
Next.
All the SAML2 Metadata configurations that are imported into ADFS can be viewed in different tabs.
Figure 2. Relying Party Trust Wizard 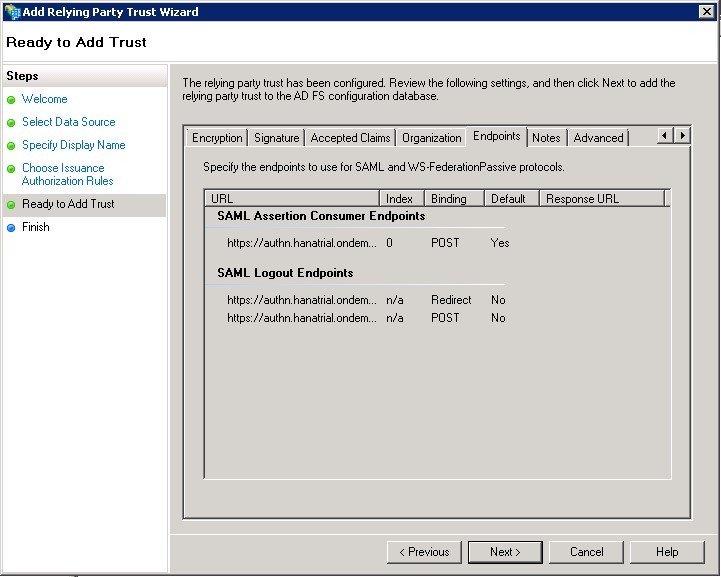
- Click Next.
-
Click Close. The Claim Rule Editor window opens.
If you do not remove the check box active, you will continue further to post user creations.
- After adding the SCP Metadata to ADFS, add Claim Rules to accept username and password and send the required assertion tokens after validations.
- Go to ADFS Management Console, select Relying Party Trusts and select the entry. In this case, it is SCPTRIAL_S00XXXXX.
-
Click Edit Claim Rules.
Figure 3. Edit Claim Rules 
This Claim Rule instructs ADFS to issue the user’s (Domain) logon name as the subject name identifier (Name ID) in the SAML Response sent back to SCP.
- Click
Add Rule, select
Send
LDAP Attributes as Claims under Claim rule
template and click
Next.
- Claim rule name: Issue SAMAccountName as Name ID.
- Attribute store: Active Directory.
- Mapping of LDAP attributes to outgoing claim
types:
- LDAP Attribute: SAM-Account-Name.
- Outgoing Claim Type: Name ID.
Figure 4. Edit Rule 
- Click Finish. Rule1 is now saved.
- Click Add Rule. This Claim Rule instructs ADFS to issue the user’s firstname, lastname, organizational ID, and employee ID as SAML Attributes (also known as “Claims”) in the response. (Options Configurations per the requirement).
-
Under
Claim rule template, select
Send
LDAP Attributes as Claims and click
Next.
Figure 5. Select Rule Template 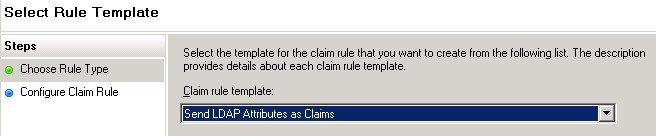
-
Claim rule name: Enter the
Claim rule
name as
Send Given Name and enter the
details as shown below.
Figure 6. Configure Rule 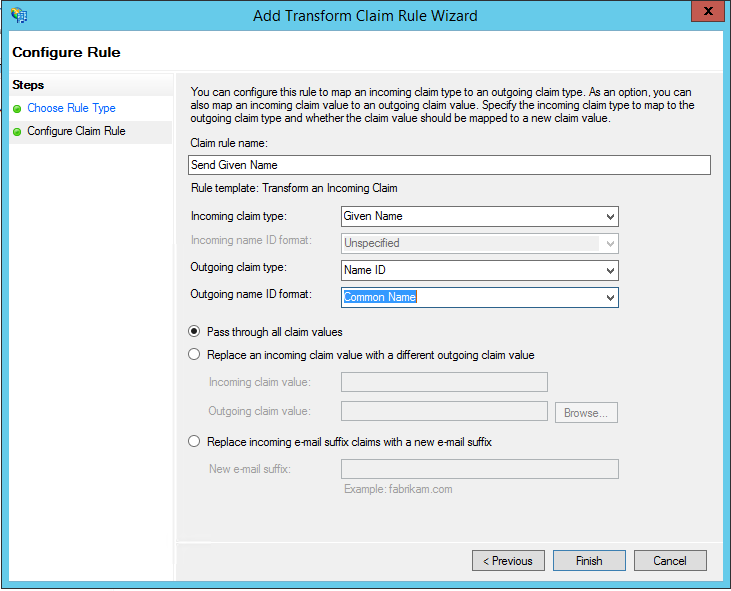
- Click Finish.