Create Custom Tabs (Screens)
Use the Screens menu to configure screen elements like custom tabs - Single Panel and three (Line Item) panel view, single and multiple forms and form buttons.
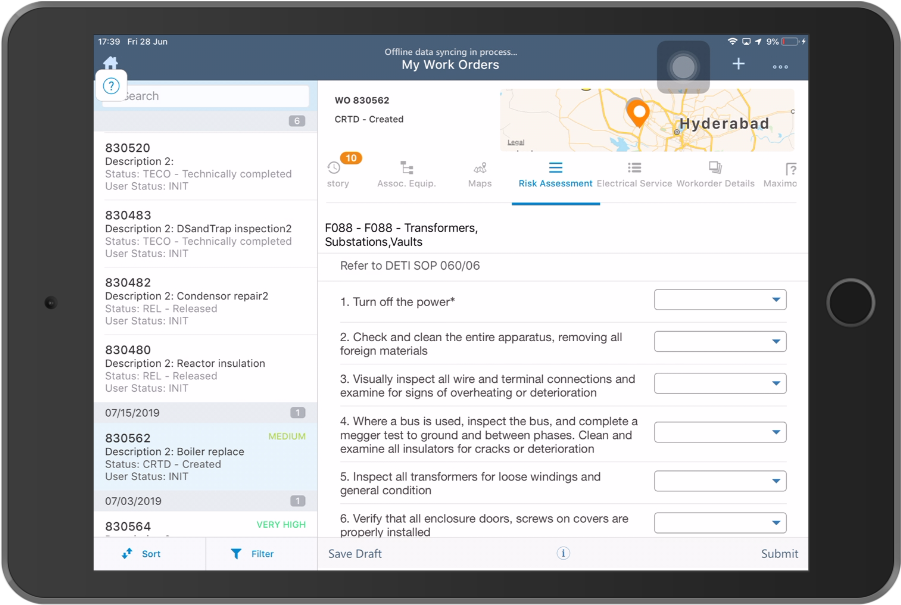
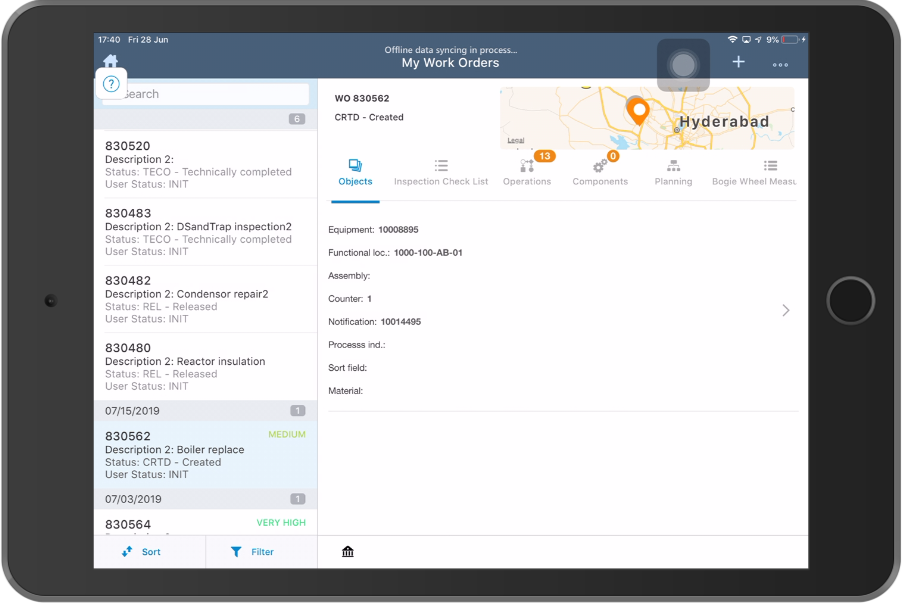
You can assign a form or tab to the Work Order or Notification to help field technicians with checklist or capture measurement data. The corresponding table in SAP NetWeaver Gateway is /INVCEC/SCRCONF. Basic application configurations are updated in this table using the mWorkOrder Add-on / transport and you can update or enhance them using RACE™.
The following screens shows the custom form and tab on Work Order details screen configured using RACE™ Screens menu.
To create custom screens using RACE™:
- Click Screens on the left panel.
-
Click the Add
 icon next to the search
field and click Create Screen.
You can also click the Copy
icon next to the search
field and click Create Screen.
You can also click the Copy button on the details
pane of an existing Screen configuration to populate the properties in the
Create Screen section.
button on the details
pane of an existing Screen configuration to populate the properties in the
Create Screen section. -
In the Create Screen section, enter the following information:
Table 1. Dynamic Screen configuration attributes Field Description Module Name Select the module where the dynamic screen or element is configured.For example, Work Order. Screen Name Select the screen within the module where the dynamic screen or element is displayed. Screen Type Type of screen to configure such as Create Screen (for new record), Detail Screen, List Screen or Dynamic Tab. Screen Area Position of the screen such as header, footer, and body where the dynamic form/tab is displayed. Element Element to be displayed on the screen such as Tab, Form Tab or Button. Element Type The sub-type of Element such as Multi-Form Tab, Line Item Tab or Draft or Submit Buttons. Sequence No. Define the sequence or position of the form/tab or element on the application UI. UI Label Enter the text to be shown on the application UI. UI Position Define alignment for form/tab or element on the screen such as Center, Left or Right. Action Define the screen navigation for the element. Action Type Define the type of the action to be completed for the screen navigation by the element. Style Tap to define Style properties for screen element like Icon, Icon Color, Background Color and Text Color in the Select Styles window that appears. Layout Select the Layout order (Horizontal or Vertical) for the element. Data Provider Define the source to retrieve data for the element. Data Provider Key Specify the fields to retrieve data from the data provider. Active To enable or disable the dynamic screen or element. Form Name Select the Form from where the fields on the Dynamic Screen appear. -
Click Create.
Note: For recommended settings, see the Dynamic Screens RACE™ Preset Configuration spreadsheet. This spreadsheet contains a list of Screens with attributes like Module Name, Screen Type, Screen Area, Layout Type, Element and Element Type.
Following are a few examples to configure Dynamic Screen and components:
- To configure Risk Assessment form for Work Order module, do these
configurations:
Table 2. Risk Assessment form for Work Order Field Value Module Name WORKORDER Screen Name RISKASSESS (as configured in Modules and Screens section) Screen Type Dynamic Tab Screen Area Body Element Tab Element Type Form Tab Note:- Set this field to Multi-Form Tab to save revision history for the form.
- For Custom tabs, select the Element Type as Tab (Single panel tab) or Line Item Tab (Three panel view).
- To configure Button on dynamic screen, do these configurations:
Table 3. Configure Button for Form Field Value Module Name WORKORDER Screen Name RISKASSESS (as configured in Modules and Screens section) Screen Type Dynamic Tab Screen Area Footer Element Button Element Type Select the button type such as Save, Submit or Help.
- To configure Risk Assessment form for Work Order module, do these
configurations: