Establish a Connection with Enablon for EHS Incident Management
If an Environment, Health, and Safety (EHS) issue is raised in the mRounds application, the details are automatically transferred to the Enablon incident management tool, creating a corresponding event. Additionally, if an SAP notification is generated for the same issue, mRounds sends the notification number along with the issue details to Enablon.
To create a connection for Enablon connector:
- Click the Integrations Manager module on the left side pane.
-
Click the Add button in the Connections section on the left side.
Figure 1. Add Enablon Connection 
-
In the Add Connection window, do the following:
- Select Enablon Connector from the Select Connector drop-down.
- Enter the connection alias name in the Connection Alias field.
- Select the value from the Authorization drop-down such as, Basic,
Certificate, and API Key.Note:Fill the remaining fields that are displayed based on the selected value in the Authorization drop-down.
- Click Test Connection to test the connection.
- Click Save Connection if the connection is successful.Note:The connection will be successful only if there is no existing master data in the application.
The Connection is created successfully and you can see it in the Connections section.
In this section, you can,- Click the More icon next to the connection and select View Details to see the connection details.
- Click the More icon next to the connection and select Edit Connection to edit the connection details.
- Click the More icon next to the connection and select Delete Connection to delete the connection.
Configure EHS Notifications with Enablon
Once connected to Enablon, you can configure mRounds to automatically send EHS incident notifications to Enablon incident management tool. This streamlines data transfer, improves accuracy, and enhances real-time tracking and compliance.
To add an integration to Enablon:
- Click the Integrations Manager module on the left side pane.
- Select the EHS Connection in the Connections section.
-
Click Add Integration on the right side.
Figure 2. Add Integration Point 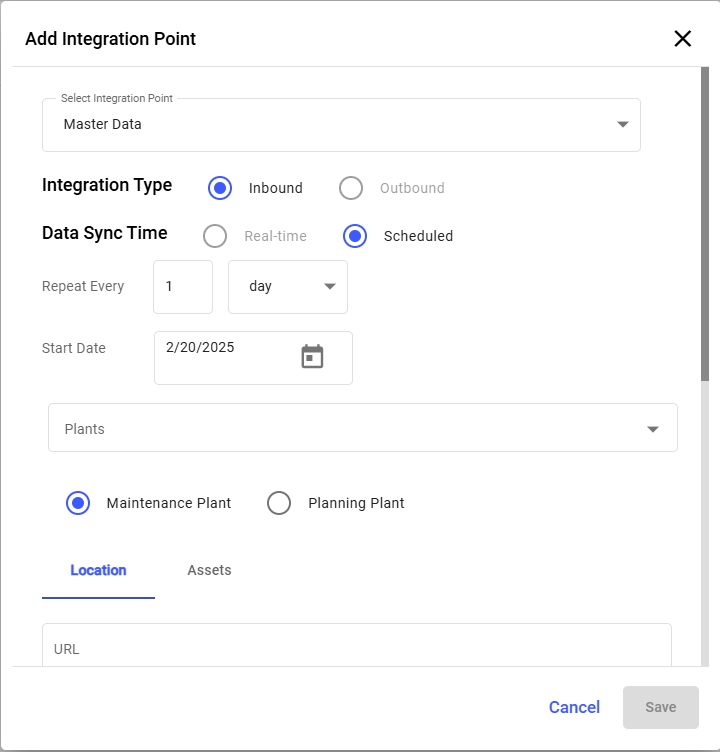
-
In the Add Integration Point window, do the following:
- Select the integration point (Master Data) from the Select Integration Point drop-down. and tap Done.
- Select Integration Type as Inbound.
- Select Data Synchronization as Scheduled.
- Select Repeat Every <number> <day, week, month or year>.
- Select Start Date.
- Select plant from the Plants drop-down where the location or asset residing.
- In the Location tab, enter the collection in the URL field.
- In the Column Configuration section, map the CBO data columns to SAP data columns.
- In the Assets tab, enter the collection in the URL field.
- In the Column Configuration section, map the CBO data columns to SAP data columns.
- Click Save.
The Integration Point is created and you can view it in the Integrations section.
The master data synchronization in the application occurs based on the configured schedule. You can also sync the data manually.