This section explains how to create an issue using AI assistance, allowing you to
report problems or incidents efficiently while receiving intelligent suggestions to capture
relevant details accurately.
To create an issue:
In the Issues screen, tap the Create icon.
In the Report Issue screen, use the Smart Input
Assistant (SIA) to describe the issue.
You can choose any of the following options:
Capture an Image using the Camera icon — the system analyzes the image
and suggests issue details.
Type the issue details such as equipment, functional
location, and severity directly into the AI text box.
Use Voice Input by tapping the Mic icon and speaking your description —
SIA transcribes and interprets the input.
These flexible options help you report issues quickly and accurately,
even in high-pressure field conditions.
Figure 1. Report Issue
Note:
Switch Is it a Breakdown Issue? toggle on top
if it is an emergency issue.
Tap the Enter icon next to the text
box.
Select the Equipment and the Functional
Location and click Next.
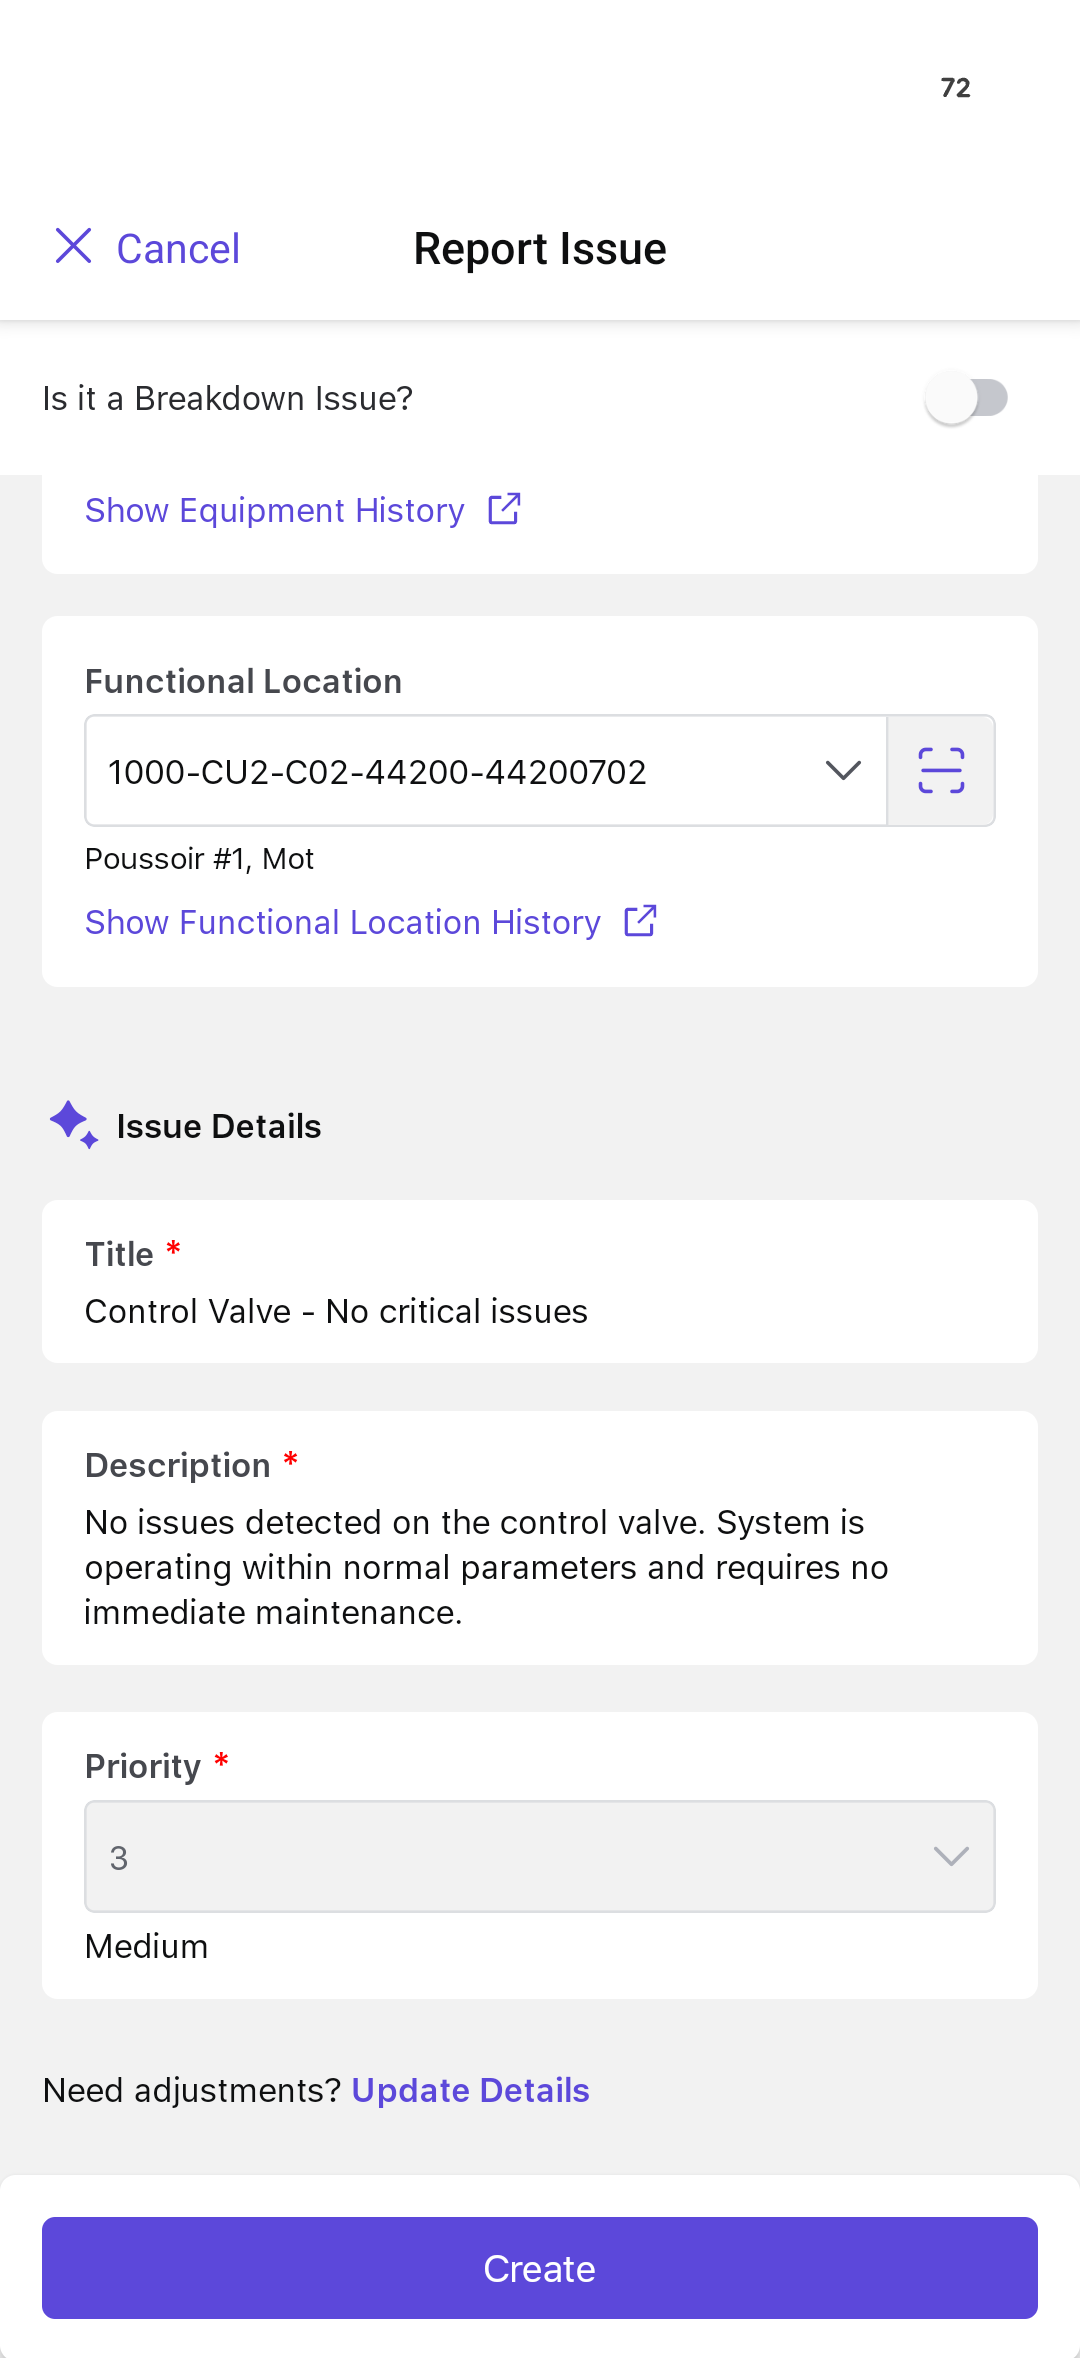
AI analyzes the provided details, retrieves the past asset information, and
suggests relevant details based on historical data as follows:Figure 2. Generated Issue Details
Equipment: The machine or asset requiring maintenance or
repair.
Functional Location: The area where the equipment is
located.
Note:
To change the Equipment and
Functional Location details, tap
Change.
Title: Title or a brief description of the issue.
Description: A detailed explanation of the issue.
User Status: Tap to change the status of the issue—for example:
INIT, APPR, RJEC, CLSD, and others.
Maintenance Plant: Populates based on the selected Equipment or
Functional Location.
Planning Plant and Planning Group: Populate automatically based
on the rules.
Code Group: Displays the issue category (e.g.,
Reactor).
Code: Shows the reason within the category (e.g., Reactor
Corrosion).
Note:
Code Group values load
dynamically based on the selected Equipment (EQ), Functional
Location (FL), or Issue Type.
Reported By: Populates automatically with the logged-in user's
full name.
Revision: Select the relevant revision value:
Apply with Date Changes: Automatically updates the
Required Start Date and End Date.
Apply without Date Changes: Keeps the original dates
unchanged.
Priority: The urgency of the issue.
Note:
To change the Issue details, tap Update
Details.
To change Priority:
Tap on Priority.
In the Priority Determination (risk assessment)
screen, select the probability of occurrence of the scenario under each
category.
People: Helps you analyze the impact of the incident on
people.
Assets: Helps you analyze the impact of the incident on
the asset.
Likelihood: Probable occurrence of the scenario.
Environmental: Helps you analyze the impact of the
incident on the environment.
Note:
Tap the References link below
the Priority to view the information the AI used to determine
the priority.
The SIA automatically calculates the
Overall Priority (Low, Medium, or High)
based on the risk level identified for the above
categories.
Tap Done.
Figure 3. Priority Details
Note:
You can also manually select the Priority value from the drop-down,
instead of relying on the Risk Assessment Matrix for automated
determination.
Tap Create.
Figure 4. Final Issue Details
If there are existing issues associated with the same equipment, a pop-up
appears with the following options:
View Issues: Select this to see existing issues.
Create Anyway: Select this to create a new issue.
Cancel: Select this to stop creating an issue.
Note:
This helps avoid duplicate reports. Earlier, the same issue was often
logged more than once—like two technicians spotting the same oil leak at
different times and both creating separate issues for it. This caused
confusion for planners, added extra work, and sometimes led to the same
problem being fixed twice.
The issue summary is displayed after selecting the Create Anyway option. In
this screen, you can:
Tap More > Edit Issue on the top-right corner to edit the
issue details.
Note:
You can edit the issue until
its status changes to Completed or Rejected.
Tap Show Equipment History to view the equipment history
details.
Tap Show Functional Location History to view the functional
location history details.
Add the following details:
Attachments
Items
Causes
Activities
Tasks
Tap Report to create or report the issue.
A message, Issue <issue title> has been reported successfully, is
displayed.
 icon.
icon.
 icon — the system analyzes the image
and suggests issue details.
icon — the system analyzes the image
and suggests issue details. icon and speaking your description —
SIA transcribes and interprets the input.
icon and speaking your description —
SIA transcribes and interprets the input.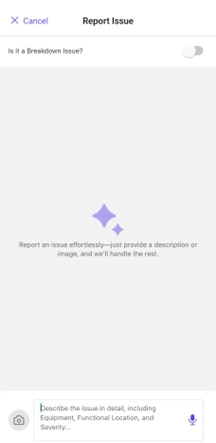
 icon next to the text
box.
icon next to the text
box.