Generate and Print Barcode Labels
Use the Label Printing module to generate and print barcode labels for Outbound Delivery-Handling Unit, Purchase Order/Stock Transport Order, Bin and Return Delivery.
- Enter the values that need to be displayed on the barcode label such as PO#, Material#, Batch#, and so on.
- Select a field for which the barcode label should be generated.
- Configure these parameters for a label using RACE:
- Barcode Type
- Barcode Position
- Elements of Barcodes
- No. of Labels
- Orientation (landscape)
- Configure screen and fields using RACE to print custom labels like Material Label. See RACE configurations for mInventory Guide.
To print barcode labels:
- In the Home screen, tap Label Printing.
-
Select the Label Type:
Table 1. Label Types Name Description OD-HU Label Printing Outbound Delivery-Handling Unit PO/STO Label Printing Purchase Order/Stock Transport Order Bin Label Printing Bin Label Printing RO Label Printing Return Delivery Material Label Printing Material Label Printing Figure 1. Label Printing Details 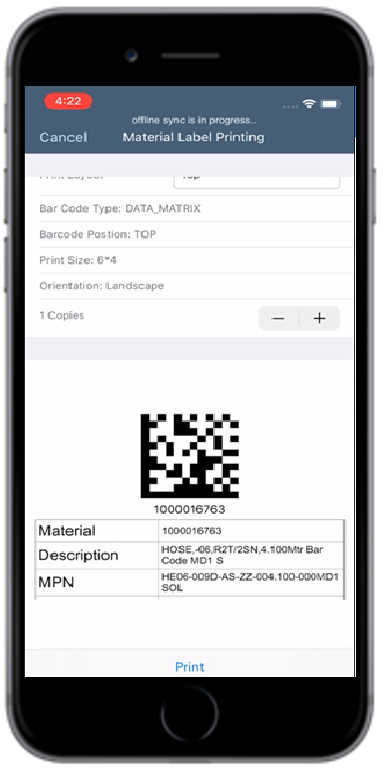
-
Enter this information for the label type:
- OD-HU Label Printing
- Delivery: Tap to enter the delivery number.
- Material: Tap to enter or tap the drop-down to select the material.
- Material Desc: This value is auto-populated based on Material.
- Handling Unit: This value is auto-populated if the delivery number is linked with the Handling unit.
- PO/STO Label Printings
- Purchasing Document Number
- Batch Number
- Item Number
- Material Number
- Bin Label Printing: Storage Type.
- RO Label Printing: Delivery.
- Material Label Printing
- Material
- Description
- MPN
- MPN Name
Based on these values, the layout preview details are displayed in tabular format.
Note: You can scan existing barcode labels, capture data, and use the data to generate the new barcode labels for any module. This is configured from RACE. Tap the Scan button, scan a barcode label and the above data is automatically captured in the fields. - OD-HU Label Printing
-
Enter these print parameters:
- Print Layout: Tap the drop-down to select the print layout, such as Top, Right, Left, and Bottom.
- Barcode Type: This field is auto-populated and grayed out.Note: You can configure Barcodes like GS1, QR Code, and Data Matrix using RACE™. See, Configure mInventory using RACE™ guide for details
- Barcode Position: This field is auto-populated and grayed out.
- Print Size: A standard print size, as per RACE configuration, is displayed. This field is auto-populated and grayed out.
- Orientation: This field is auto-populated with a value Landscape and grayed out, as per RACE configuration.
- Copies: Tap the
 icon to modify the number of copies to
print.
icon to modify the number of copies to
print.
-
Tap Print.
Double tap on the barcode preview to view the label in full screen. You can also zoom-in and zoom-out.