Conduct Inspections
Inspections provide detailed tasks for asset inspection checks, guiding technicians to follow steps for executing asset maintenance tasks and capturing data.
To inspect an asset assigned to you:
- In the Inspections screen, tap the My Inspections tab.
-
Select an inspection from the assigned inspections list.
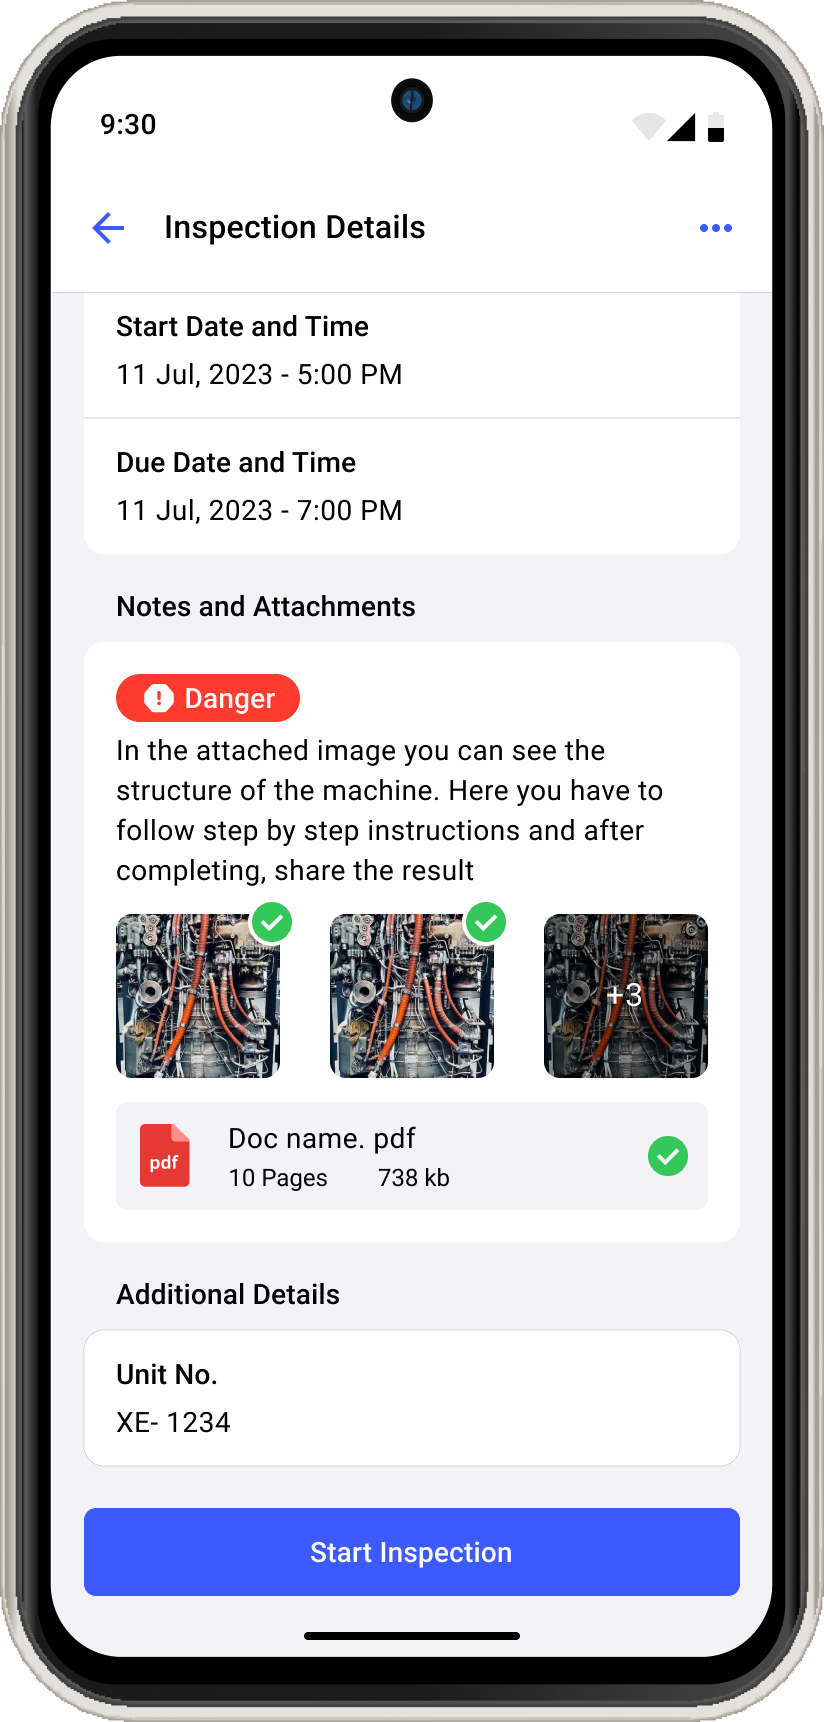
The Inspection Details screen is displayed. In this screen, you can view round details, relevant notes & attachments, and so on.
Figure 1. Start Inspection 
-
Tap Start Inspection.
The timer starts to record the duration of the inspection execution.
The Asset Details screen with the list of questions is displayed.Productivity Hacks:- Navigate through the inspection using the
 Previous and Next
  icons and execute questions.
 - View only open questions using Show Open Questions Only slider.
- Navigate through the pages using Page 1, Page 2, Page 3, and so on buttons.
- Navigate through the inspection using the
-
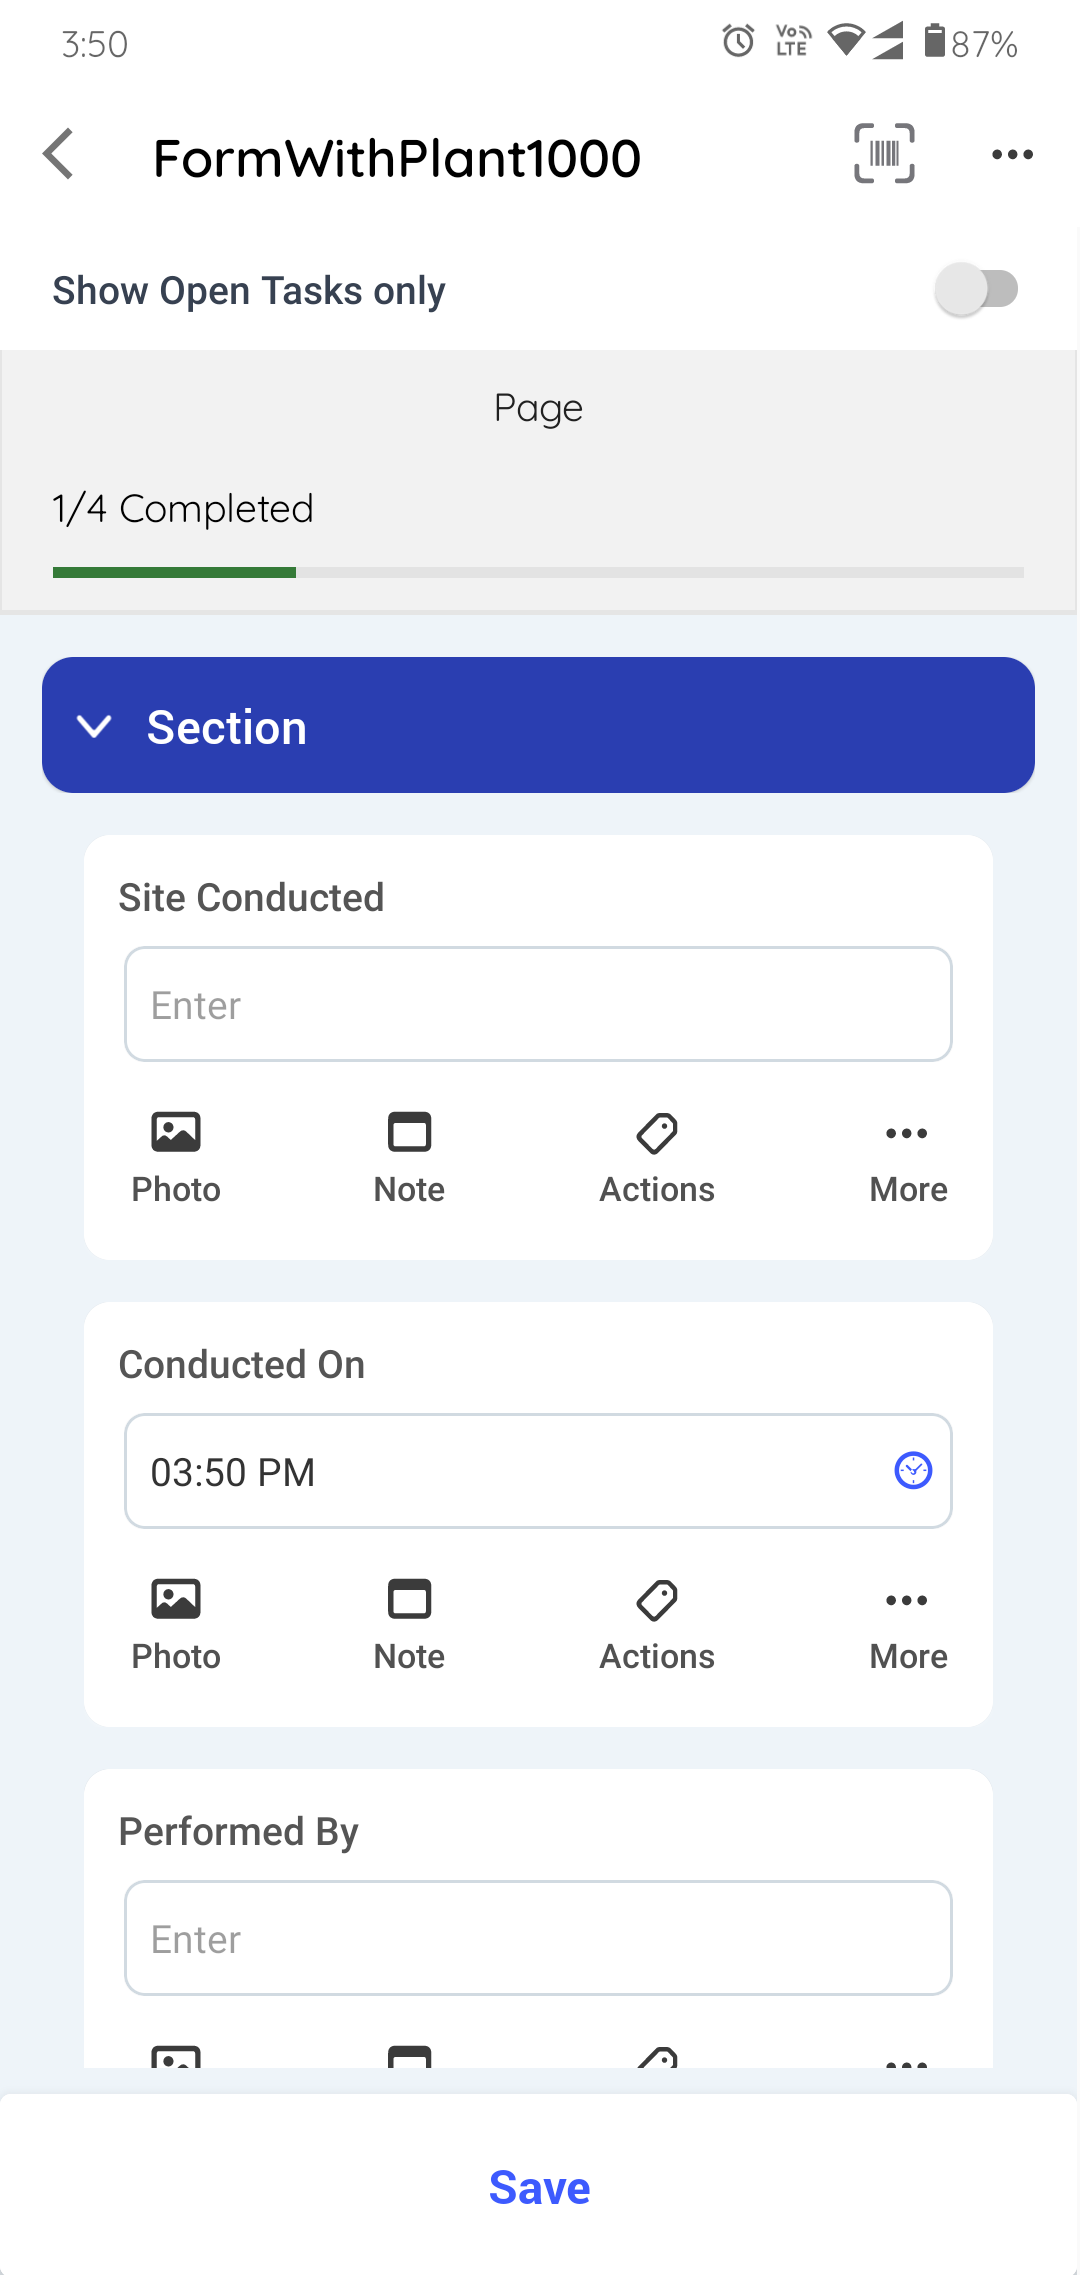
Expand each section in a page to fill the details in the question as you do
inspection.
Figure 2. Expand Sections 
-
Fill the details in the question using any of the following choices.
- Read Only Field
- Text Answer
- Number
- Check box
- Scan
- Date and Time
- Slider
- Geo Location (To capture an asset location)
- Date Range
- Photo
- Signature
- Hyperlink
- Instructions
- Multiple Choice
- Global Picklist
Note:You can enter decimal and negative values when filling questions that have a number response type.
Productivity Hacks:- View the calculated value or result in the numeric response field based on the pre-configured formula in the Web application. For more information, see Add Formulas to fields.
- Tap the Attachments
icon to add photos, videos, audios (up to 1 minute), and documents (PDF, Word, or Excel) of an asset or equipment.
Note: You can view and access these attachments as links in the generated PDF after submitting the inspection. Click the link to download the attachment. - Tap the Note
 icon to add notes or additional
information.
 - Tap the Actions
 icon to create an action
for the asset. For more information, see Create an Action.
 - Tap the More
 icon > Create
Issue to create an issue for the asset. For more
information, see Create an Issue.
When you tap Create Issue, a pop-up with following options is
displayed:
icon > Create
Issue to create an issue for the asset. For more
information, see Create an Issue.
When you tap Create Issue, a pop-up with following options is
displayed:- Show Issues: Tap the option to view the history or previously created issues against the asset/location.
- Create New Issue: Tap the option to create or raise a new issue.
- Cancel: Tap the option to cancel the issue creation process.
- Tap the More
 icon > Show
Additional Details to create an issue for the
asset.
- Tap Page 1, Page 2, or Page 3... to navigate to the next page.
-
Tap the Save button if you want to save and update the
form details later.
A message "Inspection Saved Successfully" appears, and the status of the inspection is changed to In Progress. This saved inspection appears in the My Forms tab under the In Progress section.
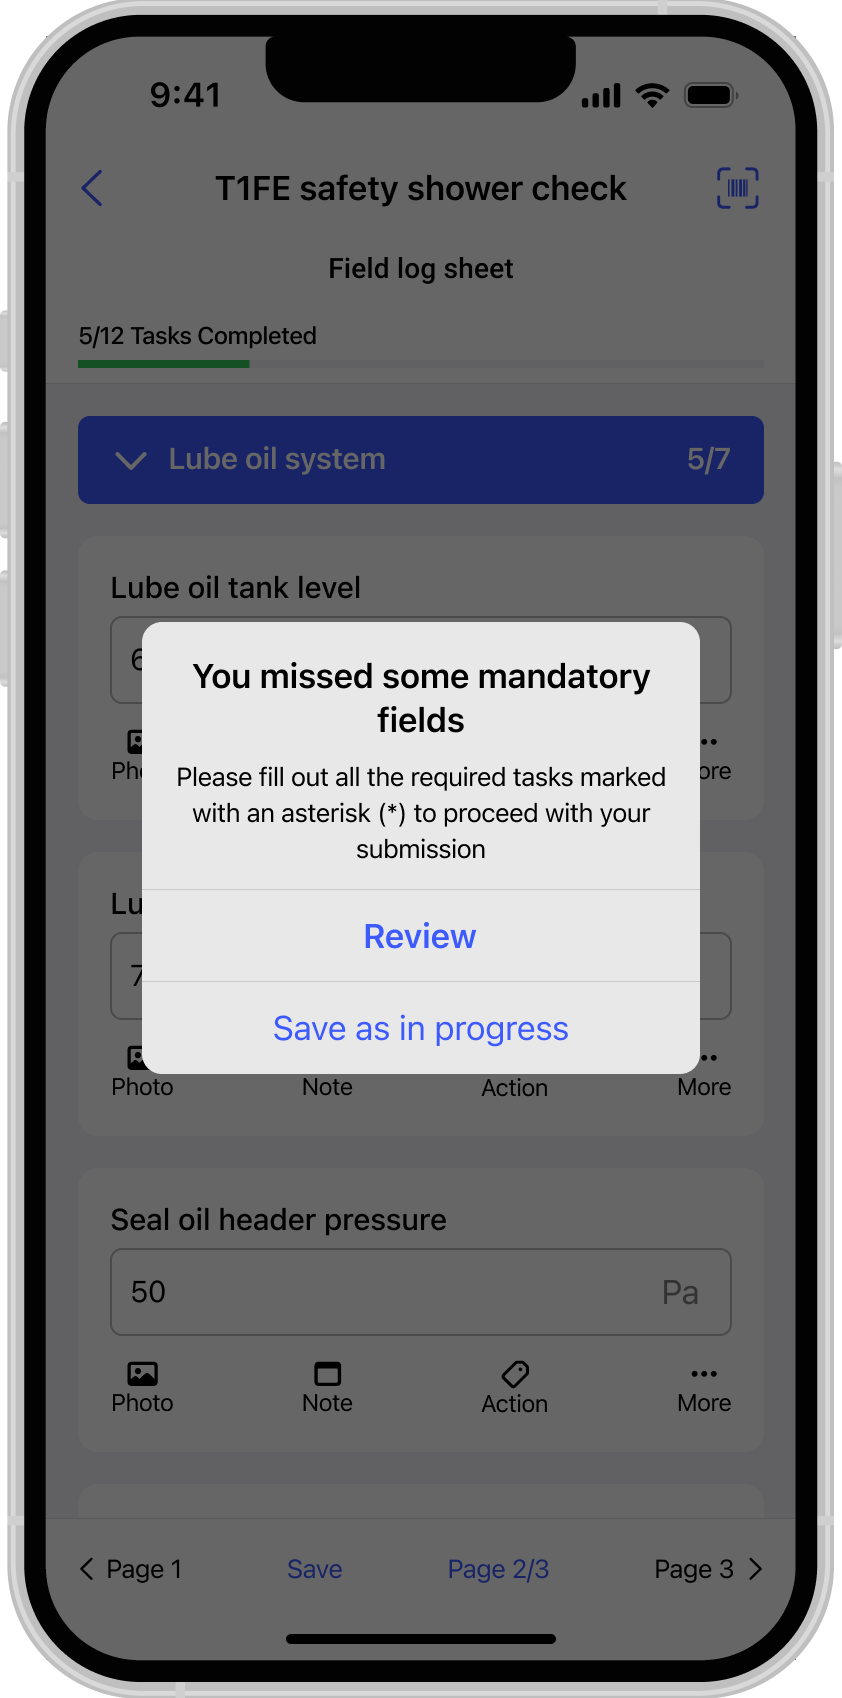
Note: If there are pending or open tasks, data in the fields not filled in, or if the inspection is partially completed, a warning message “You missed some mandatory fields” is displayed. Tap Review to review the pending tasks or fields or tap Save as in Progress to save the inspection and update it later.Figure 3. Submit Inspection 
- Tap Submit after filling in all the details.
-
In the Submission Confirmation pop-up, tap the Submit
button after filling in all the details.
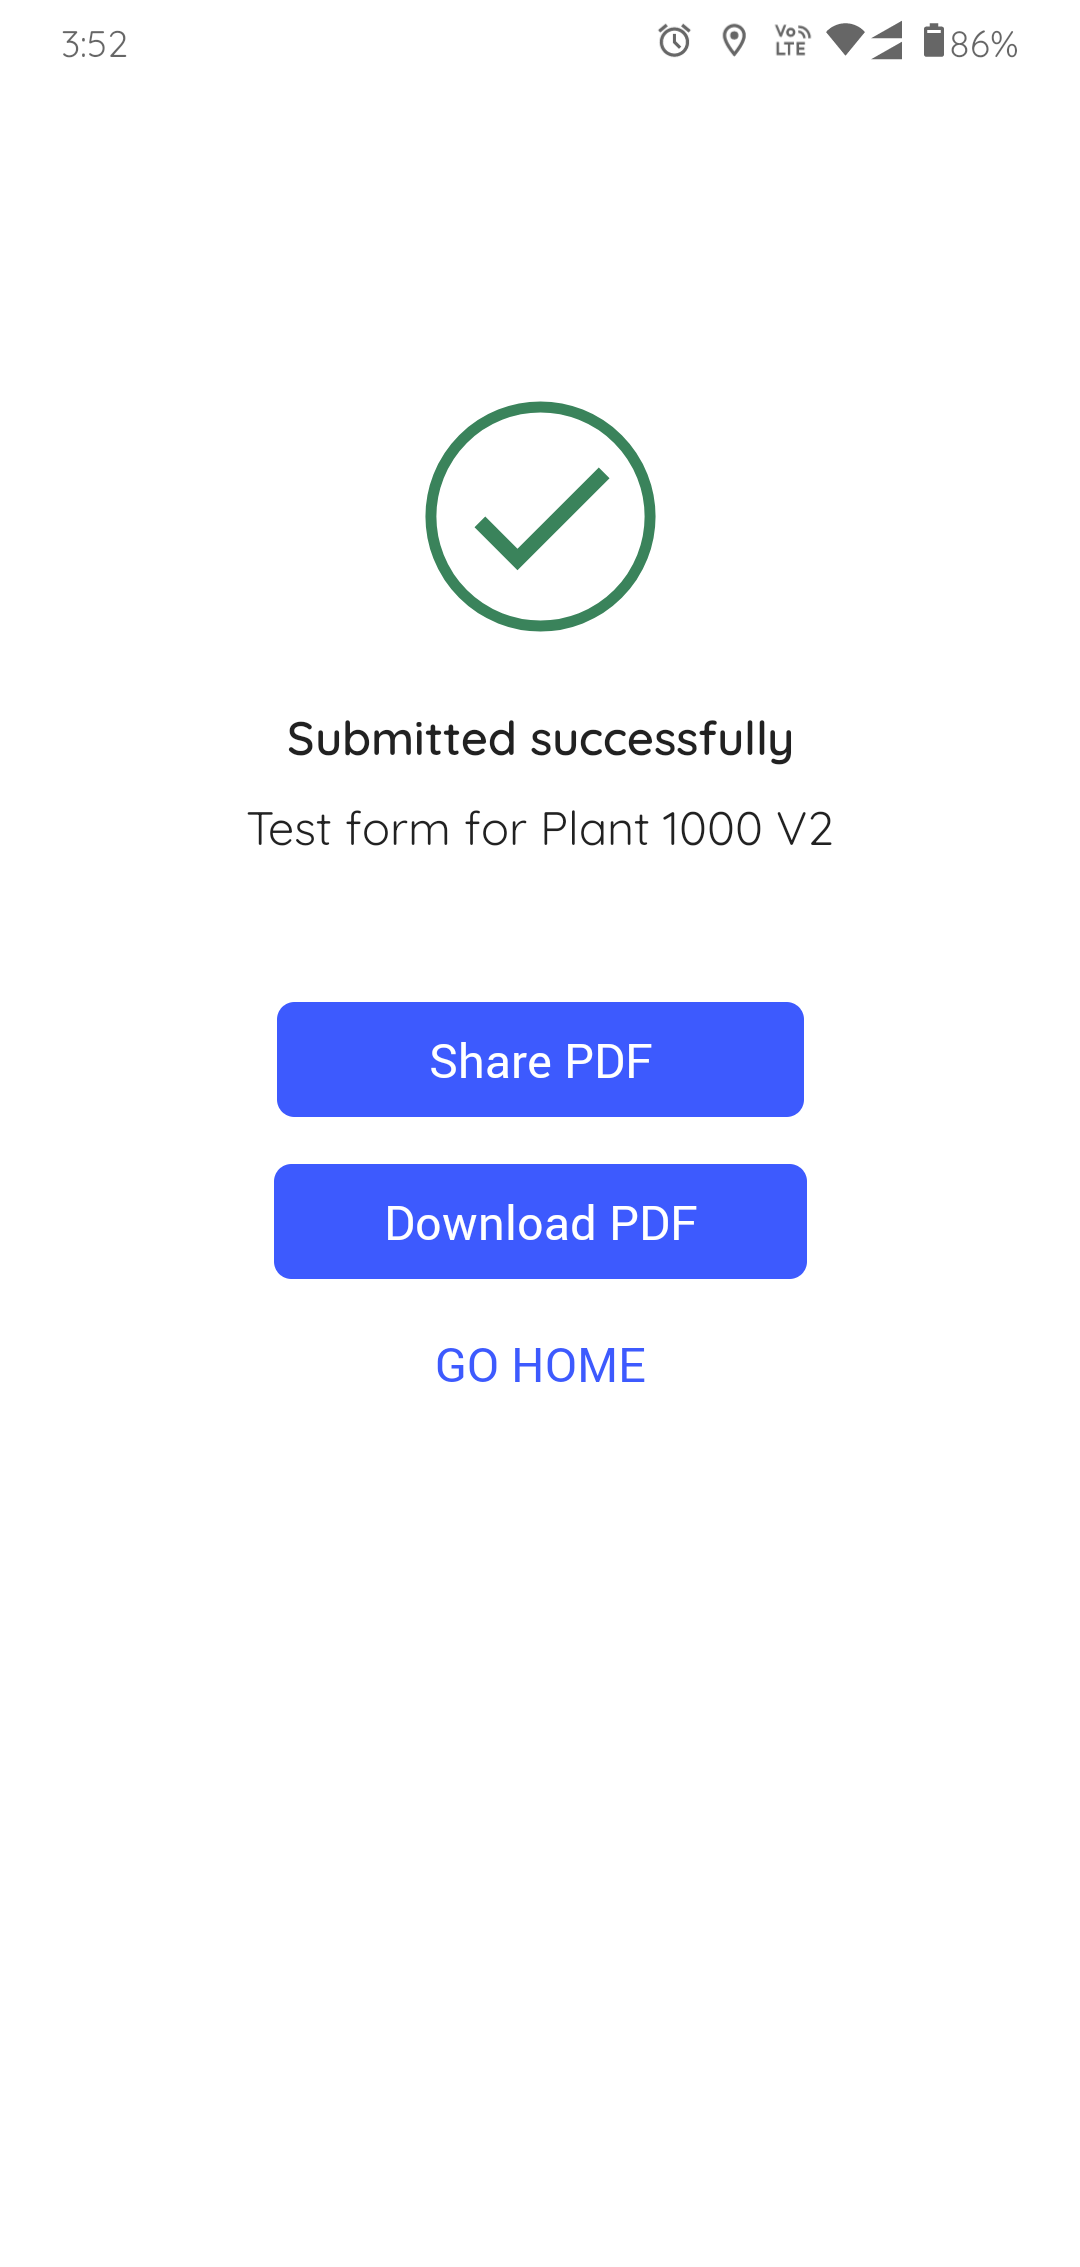
A message "Inspection Submitted Successfully appears" with the Share PDF and Go Home buttons. The timer stops once the inspection is submitted and you can view the duration of the inspection execution
Figure 4. Submitted Inspection 
