Create a round plan and Publish
Create round plans for asset maintenance and publish them. Only the published rounds can be scheduled and assigned to operators.
-
Click Create New on right side in the My Plans screen.
Figure 1. Fill Plan Details 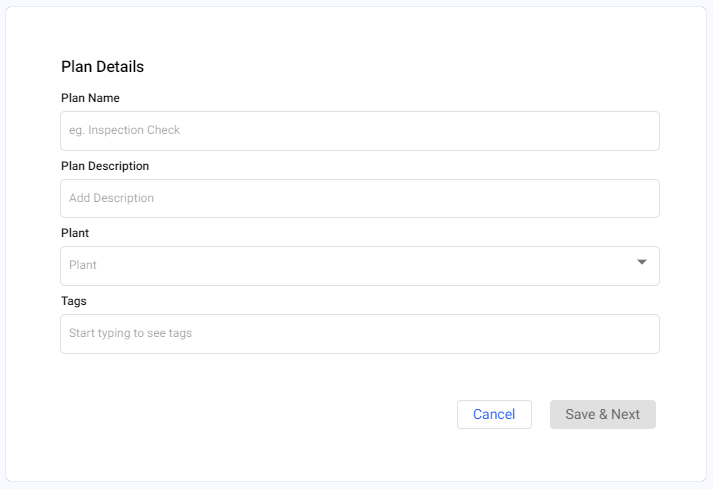
-
Fill the following in the Plan Details screen.
Table 1. Plan Details Screen Fields Field Description Plan Name Enter a name to identify the plan. For example, Equipment Inspection Description Add a short description Plant Select a plant form the drop-down Tags Add relevant tags - Click Save & Next.
-
In the Select Locations window, select locations and click
Next.
Figure 2. Select Location 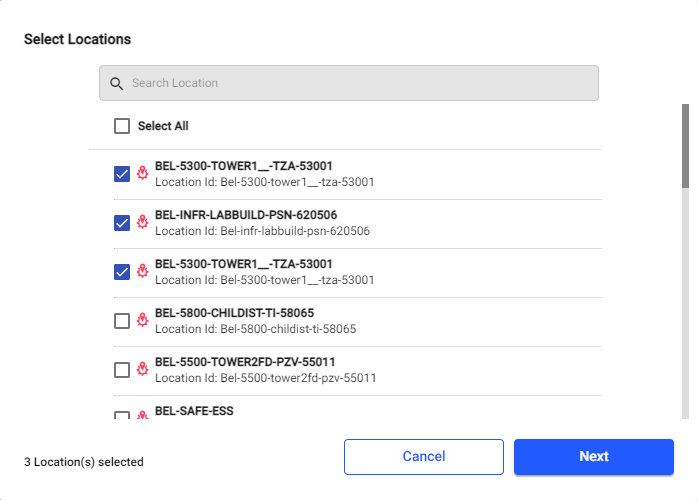
-
In the Select Assets window, select assets and click Add.
Figure 3. Select Asset 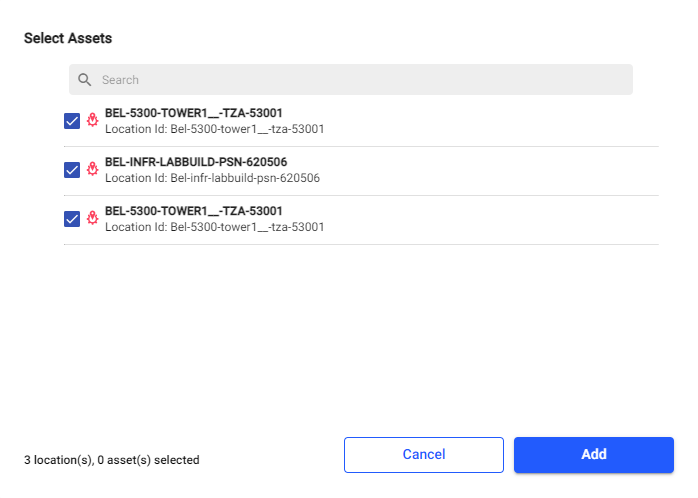
The selected location and assets hierarchy is displayed on the left side.
Figure 4. Location and Asset Hierarchy 
-
In the Create round plan screen, select the location or asset on the left side,
create a round plan with multiple sections, add tasks and response types:
Note:
- You can add locations and assets from the left side pane by clicking
the Add Locations/Assets
 button. You can also drag and drop
locations/assets to either hierarchy or a flat list. Locations and
Assets hierarchy appears as route plan.
button. You can also drag and drop
locations/assets to either hierarchy or a flat list. Locations and
Assets hierarchy appears as route plan. - View the locations and assets either in hierarchy
 or flat list mode.
 - Click
 to see the locations and assets as a
route plan.
to see the locations and assets as a
route plan. - To view locations and assets hierarchy, click the More
 icon and select Show Hierarchy. You an also copy and
delete the locations and assets.
icon and select Show Hierarchy. You an also copy and
delete the locations and assets. - To add task, click Add Task
 button. When you click the button, the
screen displays the following options,
button. When you click the button, the
screen displays the following options,- Type Task: Enter the task in the text box.
- Responses: Select the relevant response type from the drop-down. For information about each response type and where it could be used, see Pointers for creating an effective round plan.
- Add Logic: Click Add Logic to create a logical question along with actions. This logical question is more likely of multiple-choice responses like Yes or NO. For more information, see Conditional Logic.
- Required: Select the check box to make the question mandatory to fill.
- Type: Select or enter the values based on the selected Response type.
- To add more sections, click the Add Section button.
- You can copy or delete the section by clicking the more option on the right-side of the section.
- To add more pages, click the Add Page button.
- You can delete the page by clicking the More icon on the right-side of the page.
- You can add locations and assets from the left side pane by clicking
the Add Locations/Assets
-
Click the Preview button to preview.
Figure 5. Round Plan Preview 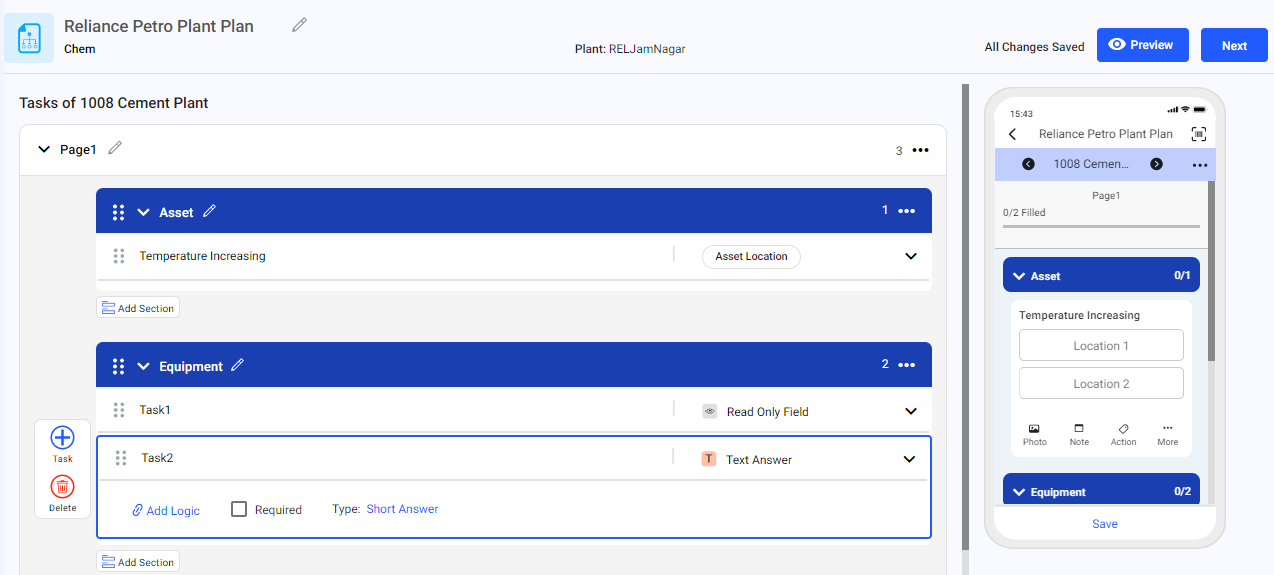 You can see the preview of the round plan in the mobile application on right side.
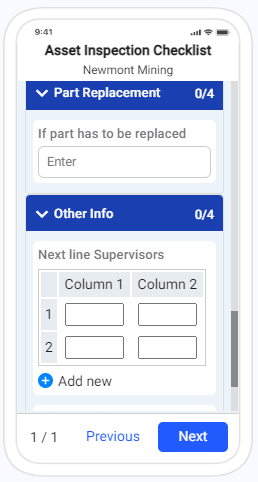
-
Click Next to view the preview in PDF format that is generated once the
round plan is filled and submitted by the Operator from the mRounds
application.
Figure 6. Round Plan PDF Format 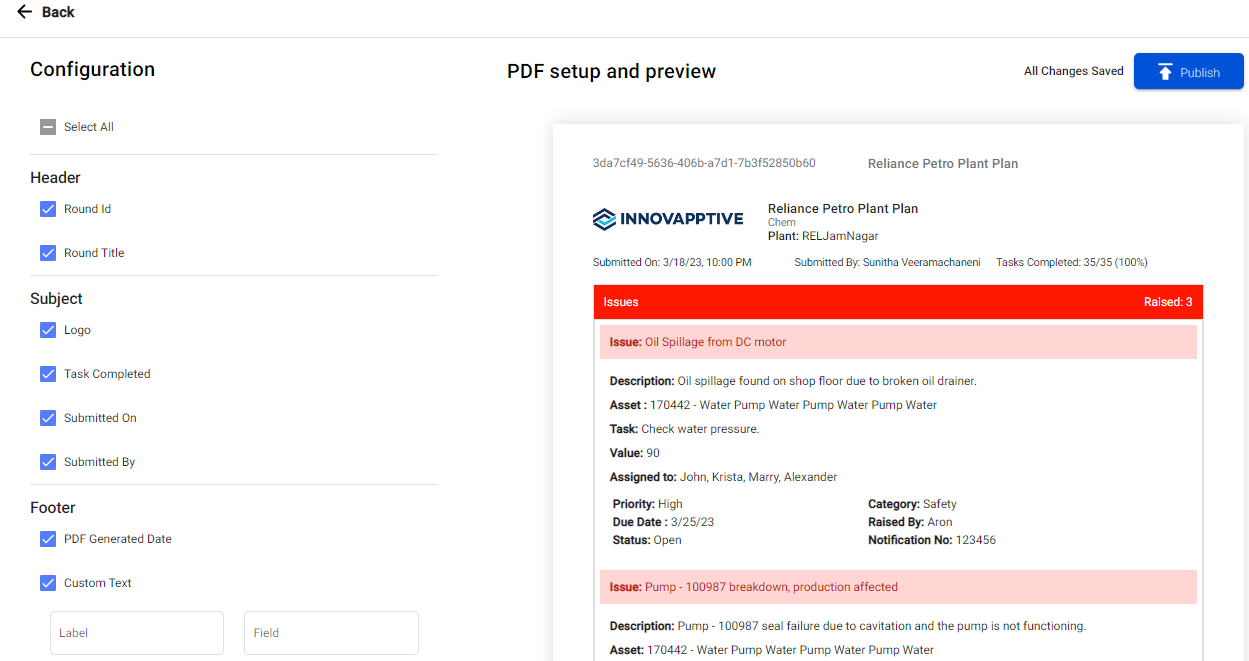
The PDF can be configured by toggling the visibility of the various elements present in the Header, Subject, Footer, and Body Content.
-
Click Publish.
The round plan is published, and you can see the round in the My Plans screen with Published status and in the Scheduler screen with Schedule option.