Author forms and publish
Create forms with pages, sections, and questions within sections, and publish them. Technicians use the published forms while conducting inspections to fill data and submit them based on the use case using the mobile application.
To create a form:
- Expand the Forms module and click My Forms on the left-side pane.
-
In the My Forms screen, click Create New and select Create
Manually.
The Form Details screen is displayed.
Figure 1. Fill form details 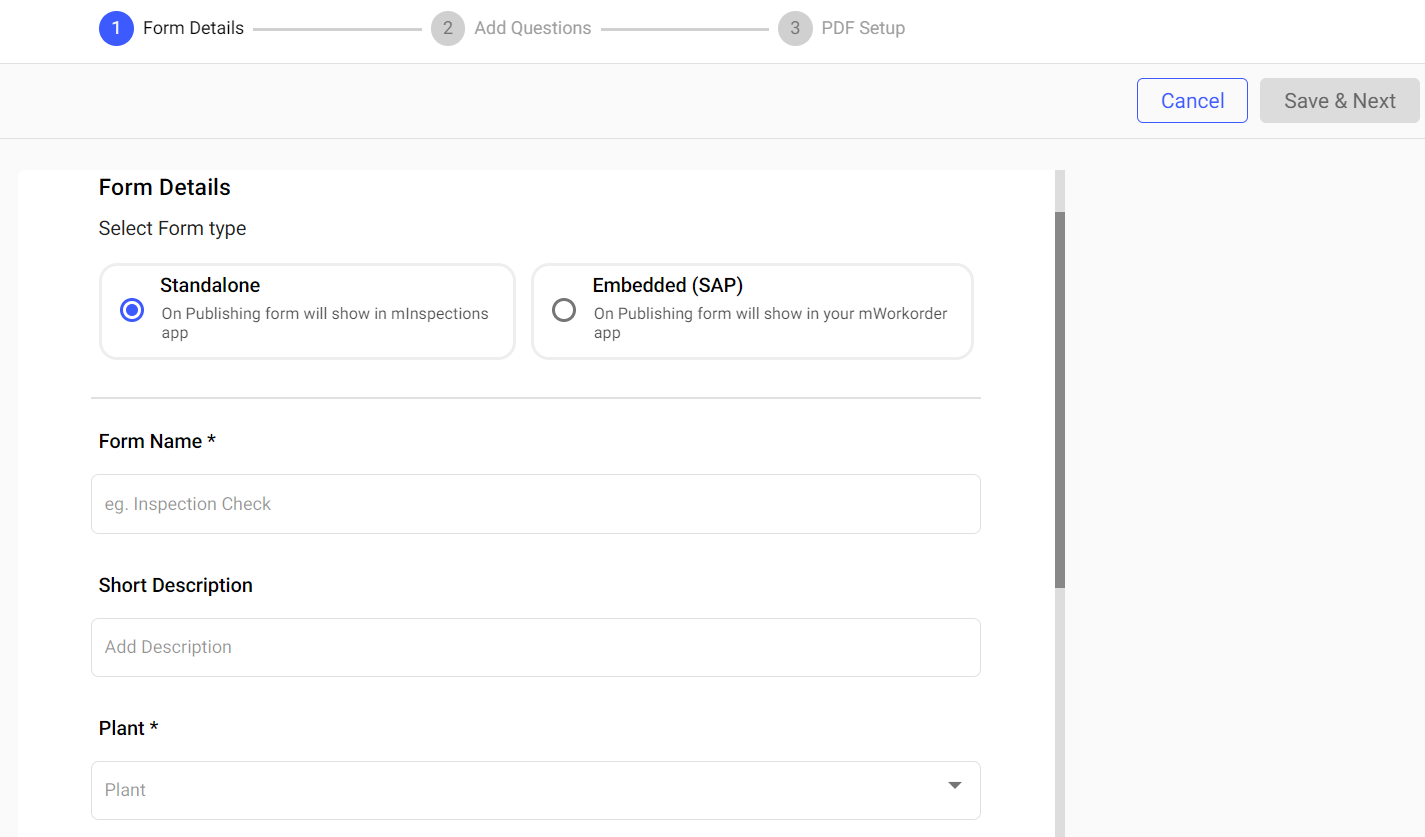
-
In the Form Details screen, fill in the following details.
Table 1. Form Details Screen Fields Field Description Form Type Select form type Standalone or Embedded. Note:If you select Standalone, the form is displayed in the mInspections application after publishing.
If you select Embedded, the form is displayed in the mWorkOrder application after publishing.
Form Name Enter a name to identify the form. For example, Equipment Inspection. Short Description Add a short description about the form. Plant Select the relevant plant from the drop-down. Tags Add relevant tags. Notes and Attachments Add attachments such as dos and do nots, safety measure documents, etc. You can view additional notes and attachments such as safety instructions or manuals on mobile application in offline mode and refer to them while executing the inspections in areas with poor or no network connectivity. Additional Details Add additional details or fields. - Click Add.
- Enter Label and Value.
Note: You can add additional fields to provide situation-specific information that can be referenced by the technician in the mobile application. You can configure the label and values for these attributes, with a maximum of 25 characters for the label and 40 characters for the value. You can update and delete the field values at any time, even after inspections are created and scheduled. -
Click Save & Next.
-
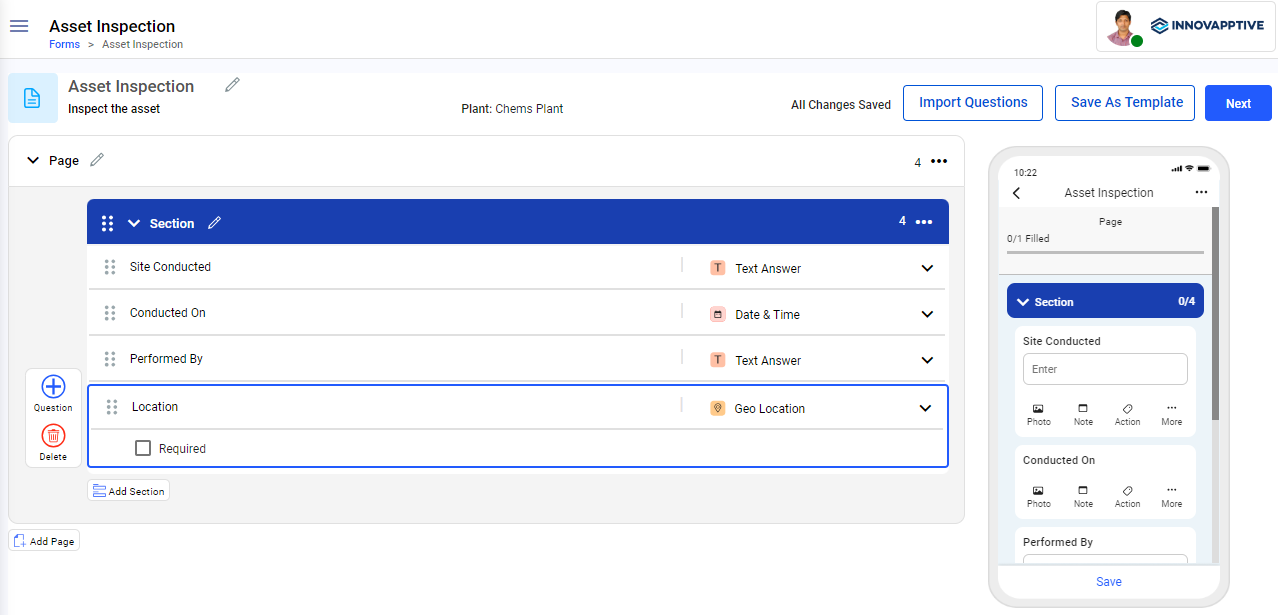
In the Create Form screen, create a form with multiple sections, add question
and response types:
Note:
- To add multiple questions, click the Question
 button. When you click the button, the screen displays the following
options,
button. When you click the button, the screen displays the following
options,- Type Question: Enter the question in the text box.
- Responses: Select the relevant response type from the drop-down. For information about each response types, see Pointers for creating an effective form.
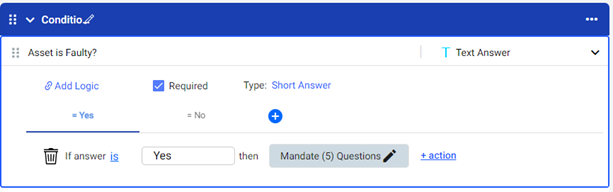
- Add Logic: Click Add Logic to create a logical question along with actions. This logical question is more likely of multiple-choice responses like Yes or No. For more information, see Conditional Logic.
- Required: Select the check box to make the question mandatory to fill.
- Type: Select or enter the values based on the selected Response type.
- History: Select the check box to see the last five transactions. This option is available only for Number and Slider response types.
- To add more sections, click the Add Section button.
- You can copy or delete the section by clicking the More
 icon on the right-side of the
section.
icon on the right-side of the
section.
- You can copy or delete the section by clicking the More
- To add more pages, click the Add Page button.
- You can delete the page by clicking the More
 icon on the right-side of the
page.
icon on the right-side of the
page.
- You can delete the page by clicking the More
- To add multiple questions, click the Question
-
Take the following example to create a form,
- Add or update the title of the form with a short description. For example, Equipment Inspection.
- Add Section name inside the Page 1. For example, Inspection.
- Add questions under the section with different response types and conditional logics.
- Add logic to check whether the readings are correct.
- Enter the question as Asset is faulty?
- Select the Text Answer value from the Responses drop-down next to the question.
- Select the Required check box if the value is required.
- Click Add Logic.
- Select Yes or No from the logic. If the answer is Yes, then you can select the Mandate Questions and then the select the question Check the Buttons from the list to take necessary action.
-
Click the Preview button to see the form preview.
You can see the preview of the form in the mobile application on the right side.
-
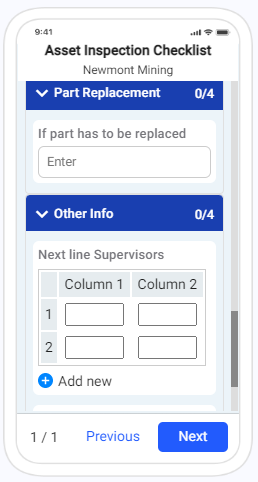
Click Next to view the preview in PDF format that generates once the
inspection data is filled and submitted by the technician from the mInspections
application.
Figure 2. Form in PDF Format 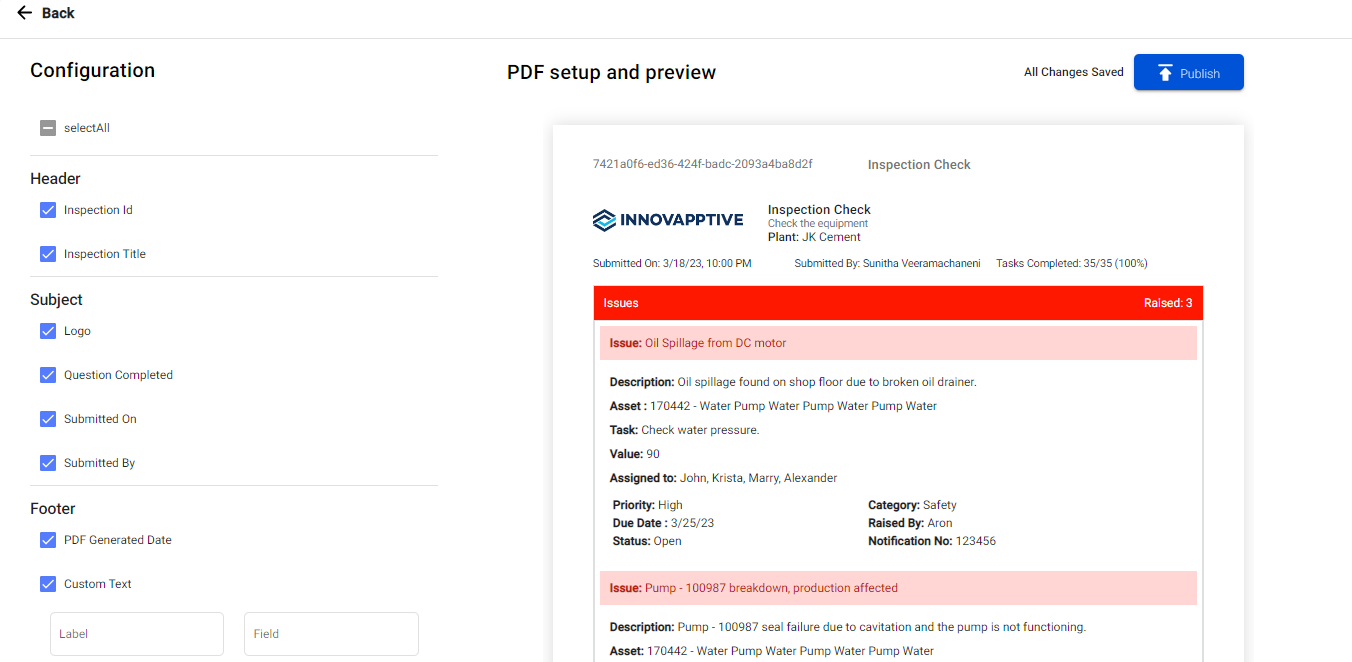
You can configure the PDF as needed. For more information, see Configure and comprehend PDF preview details.
-
Click Publish.
The form is published, and you can see the published form in the My Plans screen with Published status and in the Scheduler screen with Schedule option.