Blind Inventory Audit
To create a Blind Inventory Audit:
- In the Home screen, tap Consignment Audit.
-
Tap Blind Inventory Audit.
Figure 1. Blind Inventory Audit Details 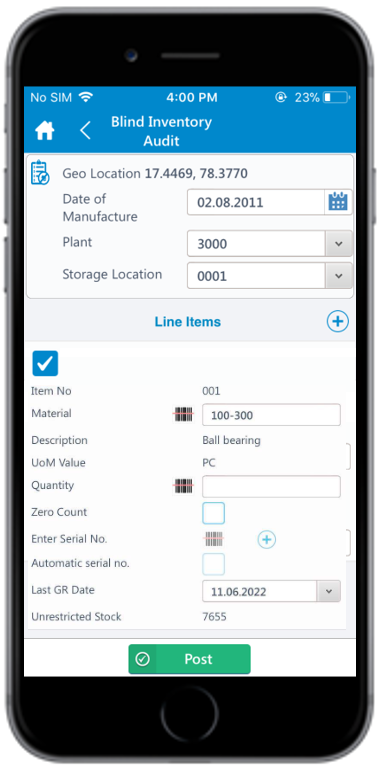
-
Enter the required information in the following fields:
- Geo Location: The current GPS location is auto generated.
- Date of Manufacture: Tap the field to select the date of manufacture.
- Plant: This is auto-populated. Tap the field to edit the Plant number.
- Storage Location: This is auto-populated. Tap the drop-down to select Storage location from the displayed list.
- Date of Last count: Tap the field to select the date of last count.
- Line Items: A default line item is displayed on the
Blind Inventory Audit screen. Tap the
Add icon in the Line Items section to
add more line items.
- Tap the checkbox to select the line item.
- Item No: The line item number is auto-populated and grayed out.
- Material: Tap the Scan icon to scan the Material
or tap the field to enter the Material Number. Note:You can enable Combo Scan for this scan field. Combo Scan helps you scan the barcode, capture data, and navigate automatically to the transaction screen related to the value. For information, see the Configure mInventory using RACE™ guide.
- Description: Corresponding description is auto-populated and grayed out.
- UoM Value: Corresponding unit of measurement is auto-populated and grayed out.
- Quantity: Enter the item quantity.
- Zero Count: Select this checkbox to zero the quantity. If selected, the Quantity field is set to zero.
-
Tap Post.
A pop-up window appears asking you to confirm the posting of the record.
-
Tap Yes to post the record.
A message appears confirming that the record is successfully created.