Execute Operations
After collecting the required permits and components, begin execution of assigned operations. Once an operation is completed, confirm its completion by updating the system with relevant details such as start and end times, crew ID, and task summary.
To execute operations:
- Navigate to the Work Orders screen.
- Open the assigned work order.
- Tap the Operations tab.
-
Select the operation from the list that is assigned to you.
Tip: If you see an urgent unassigned operation you can help with, tap Assign to me to claim it, then Start
On this screen, you can:- View the operation number with description.
- Select the drop-down next to the operation number to switch between operations.
- Tap the More icon and select Measuring Point History to view the past measuring points history.
-
Tap Start Operation.
Figure 1. Start Operation 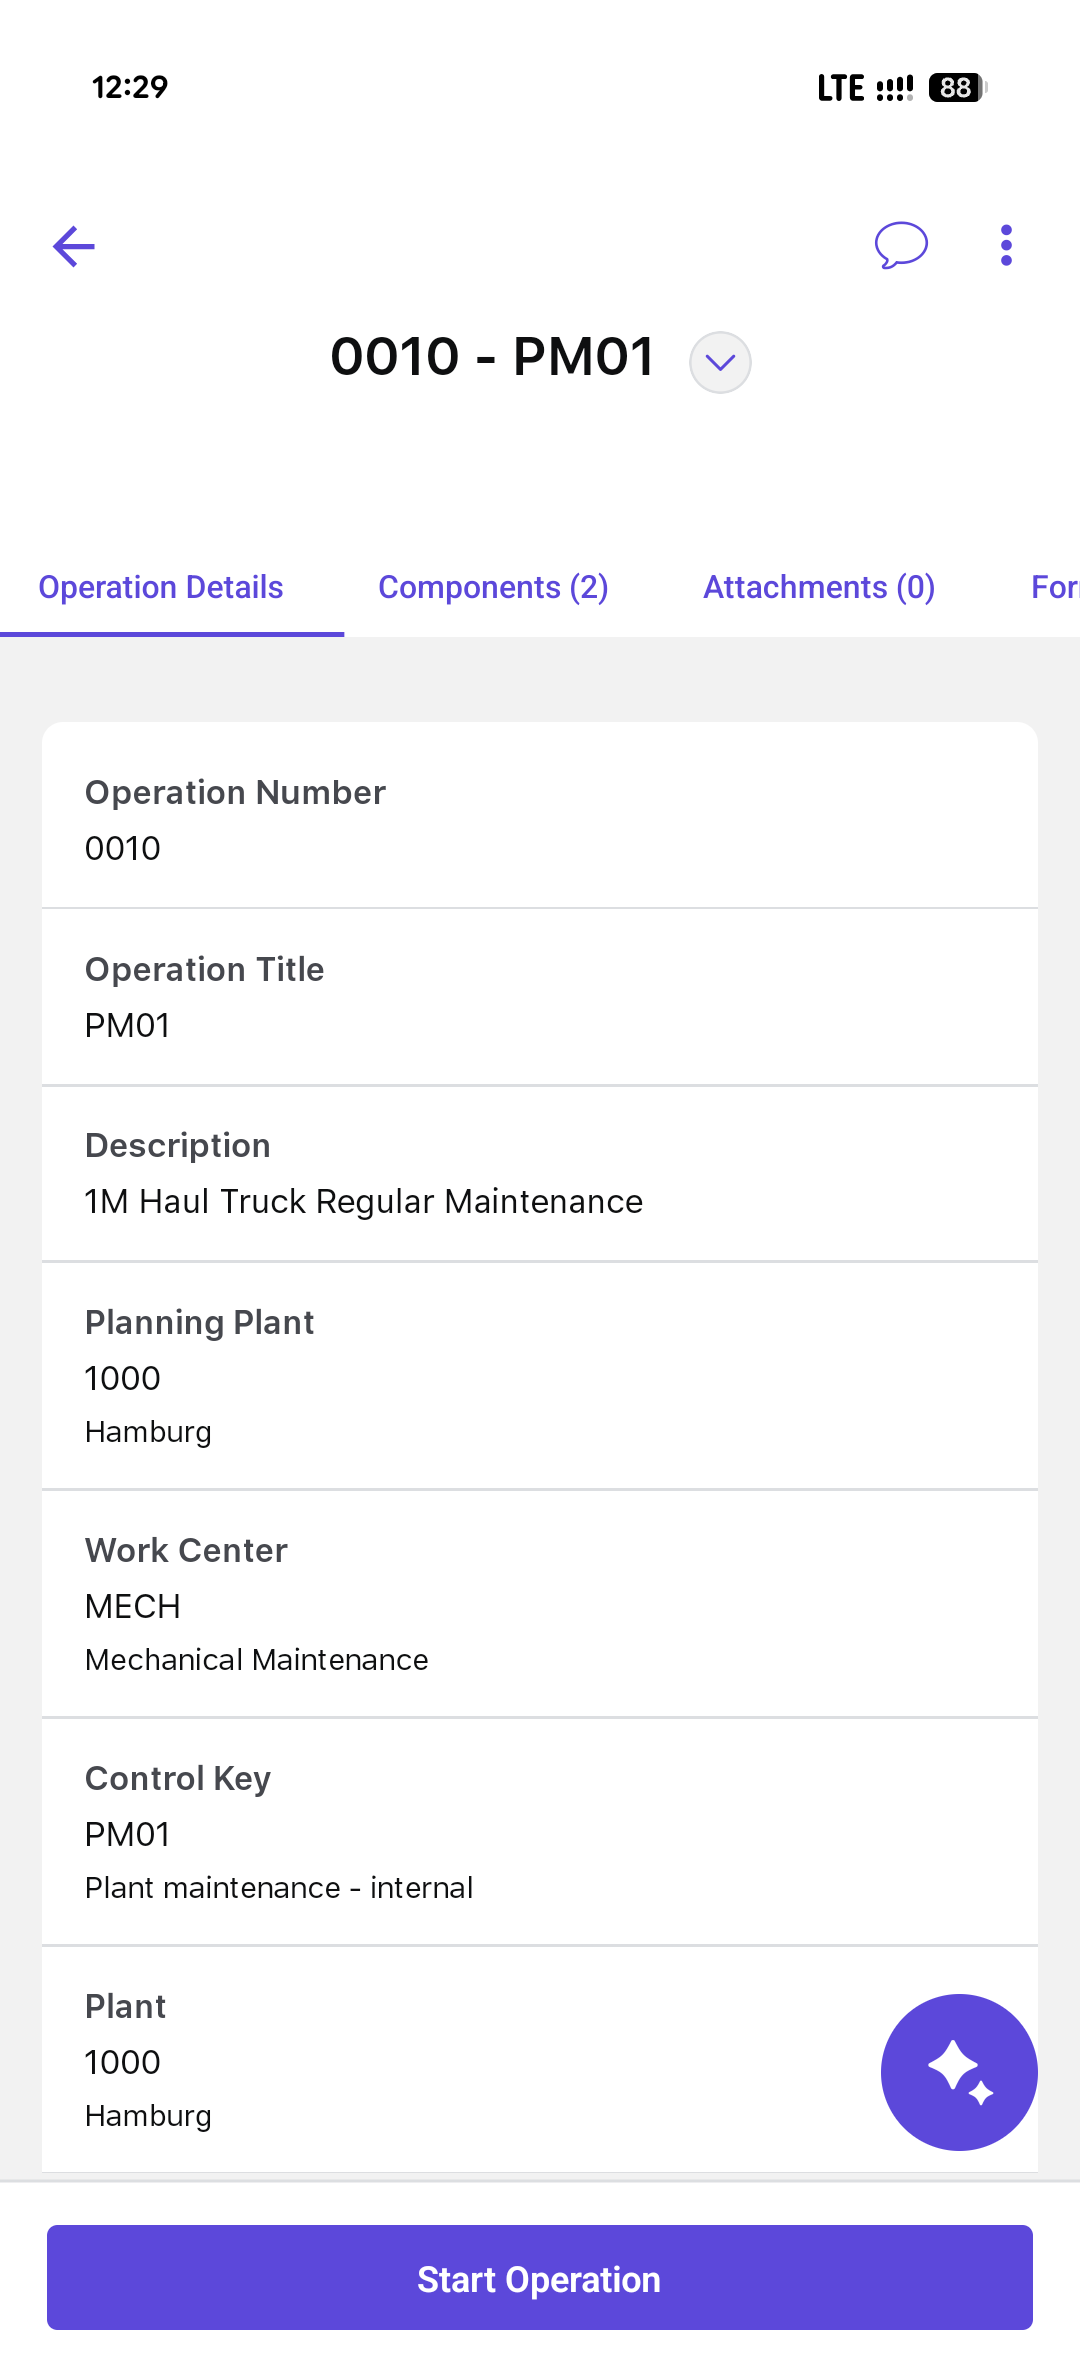
This action sets the status to In Progress and starts the auto timer.
What is the Auto Timer?
The auto timer tracks your wrench time—the actual time you spend working on the operation. Supervisors use this to compare planned vs. actual time, which improves scheduling accuracy and resource planning.
For example, if a task was planned for 1 hour but actually took 2, the system records that automatically. This helps your supervisor adjust future task durations or investigate delays if needed.
Need to Step Away?- Pause Work: If you need to temporarily stop working—like waiting for tools or parts—tap Pause. This pauses the auto timer and updates the status to On Hold. Pausing makes sure only your active work time is counted.
- Resume Work: When you're ready to continue, tap Resume Work. The timer restarts, and the status switches back to In Progress.
Note:If the auto timer is disabled, you’ll need to manually enter your work time when submitting your timesheet. - Execute the operation by performing the assigned tasks.
-
Tap End Operation once the operation is completed.
Figure 2. End Operation 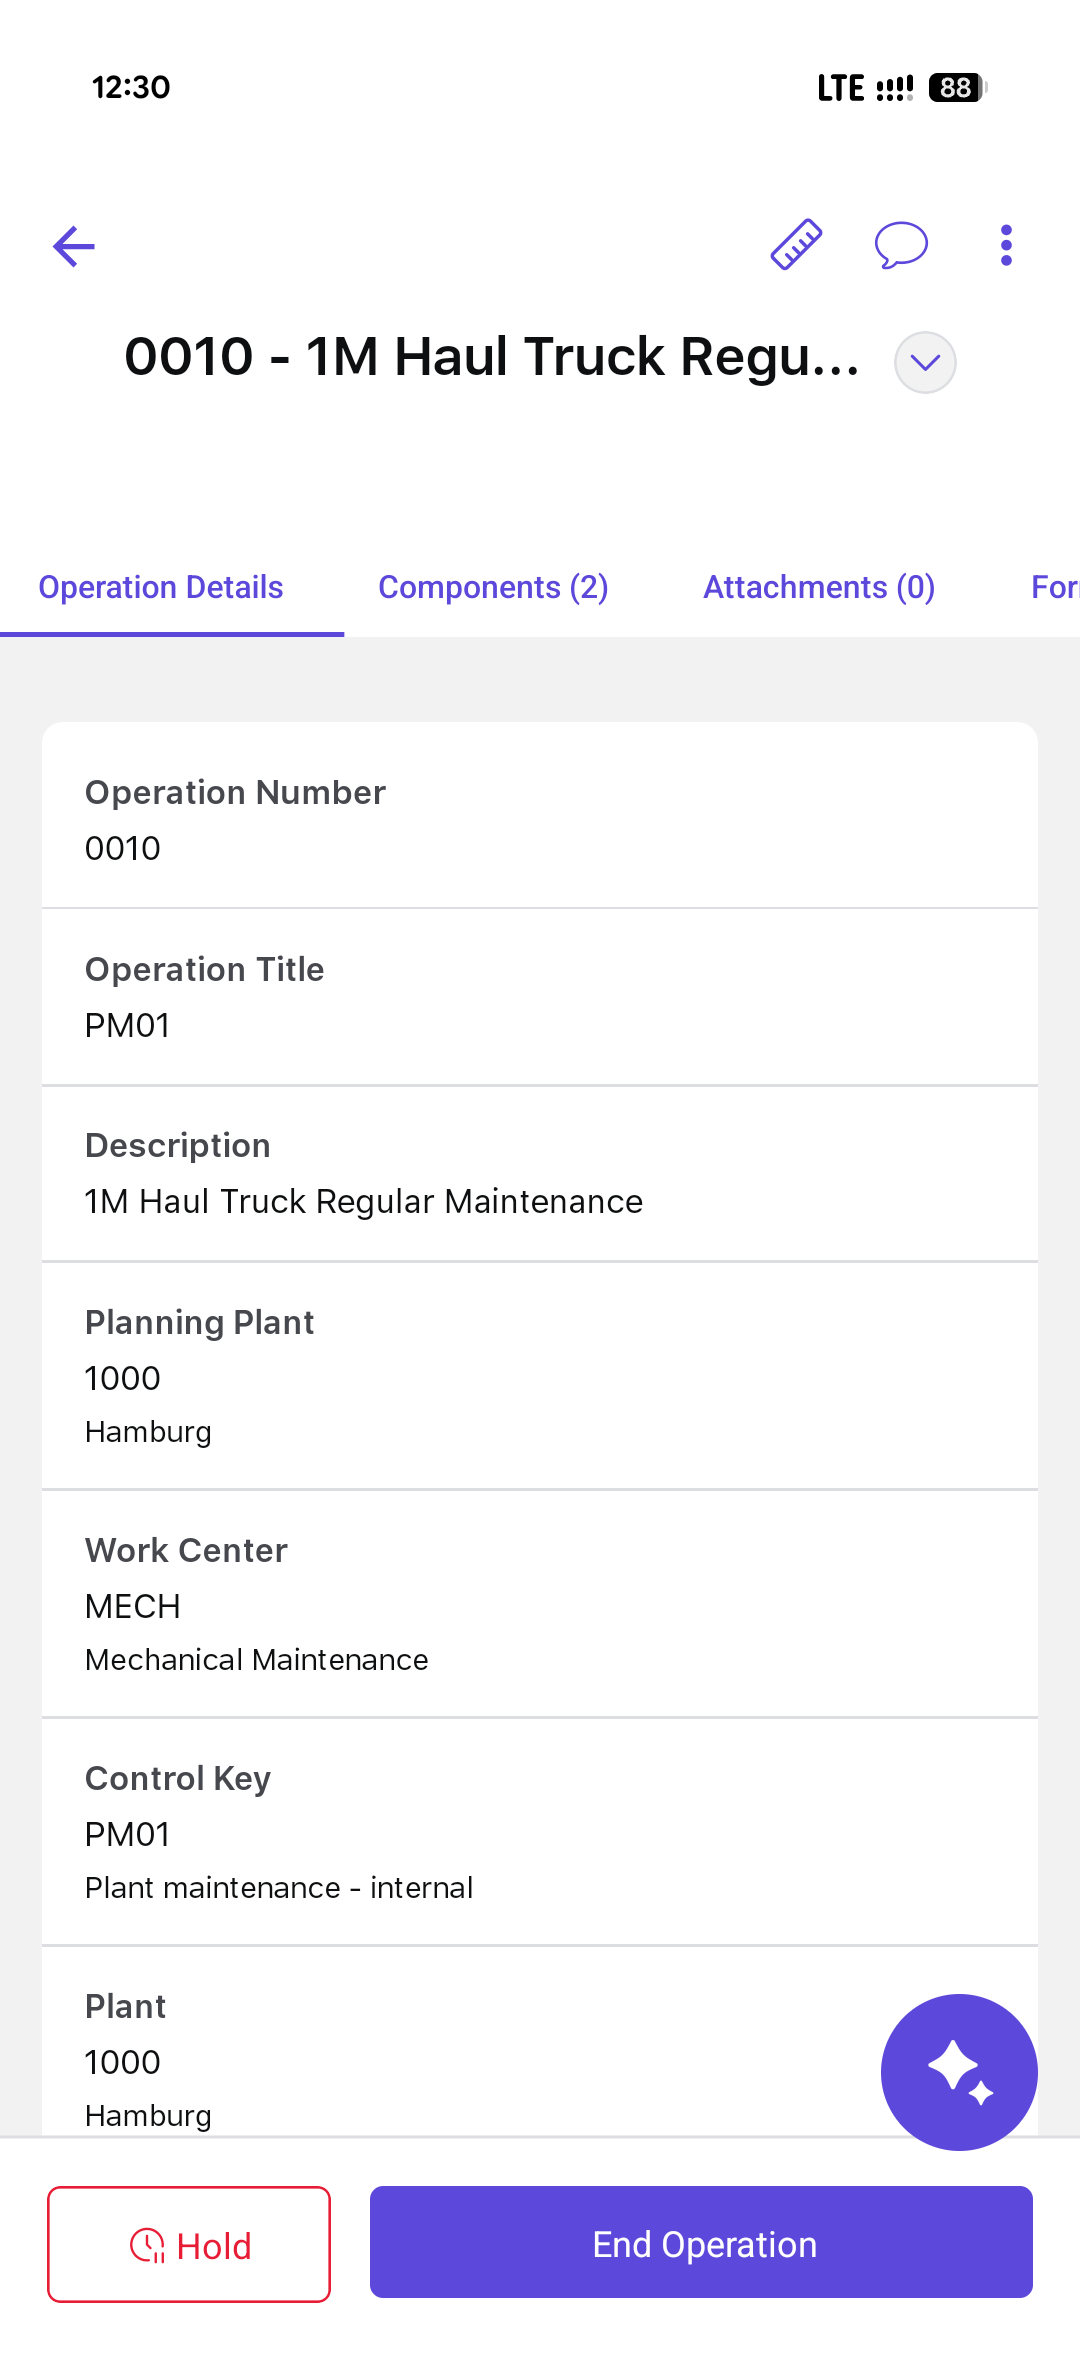
-
In the End Operation screen, review the following details
and submit timesheet:
- Technician: Select technician from the list, if not automatically selected.
- Data Entry Profile: Select data entry profile from the list.
- Actual Start Time: Select Actual start date and time.
- Actual End Time: Select Actual end date and time.
- Total Duration: Default
- Comments: Add comments if any.Note:If you are the last technician to complete the operation, select the No Remaining Work and Final Confirmation checkboxes. For more information, see Submit Timesheets.
- Tap Submit.
Figure 3. Log Timesheet 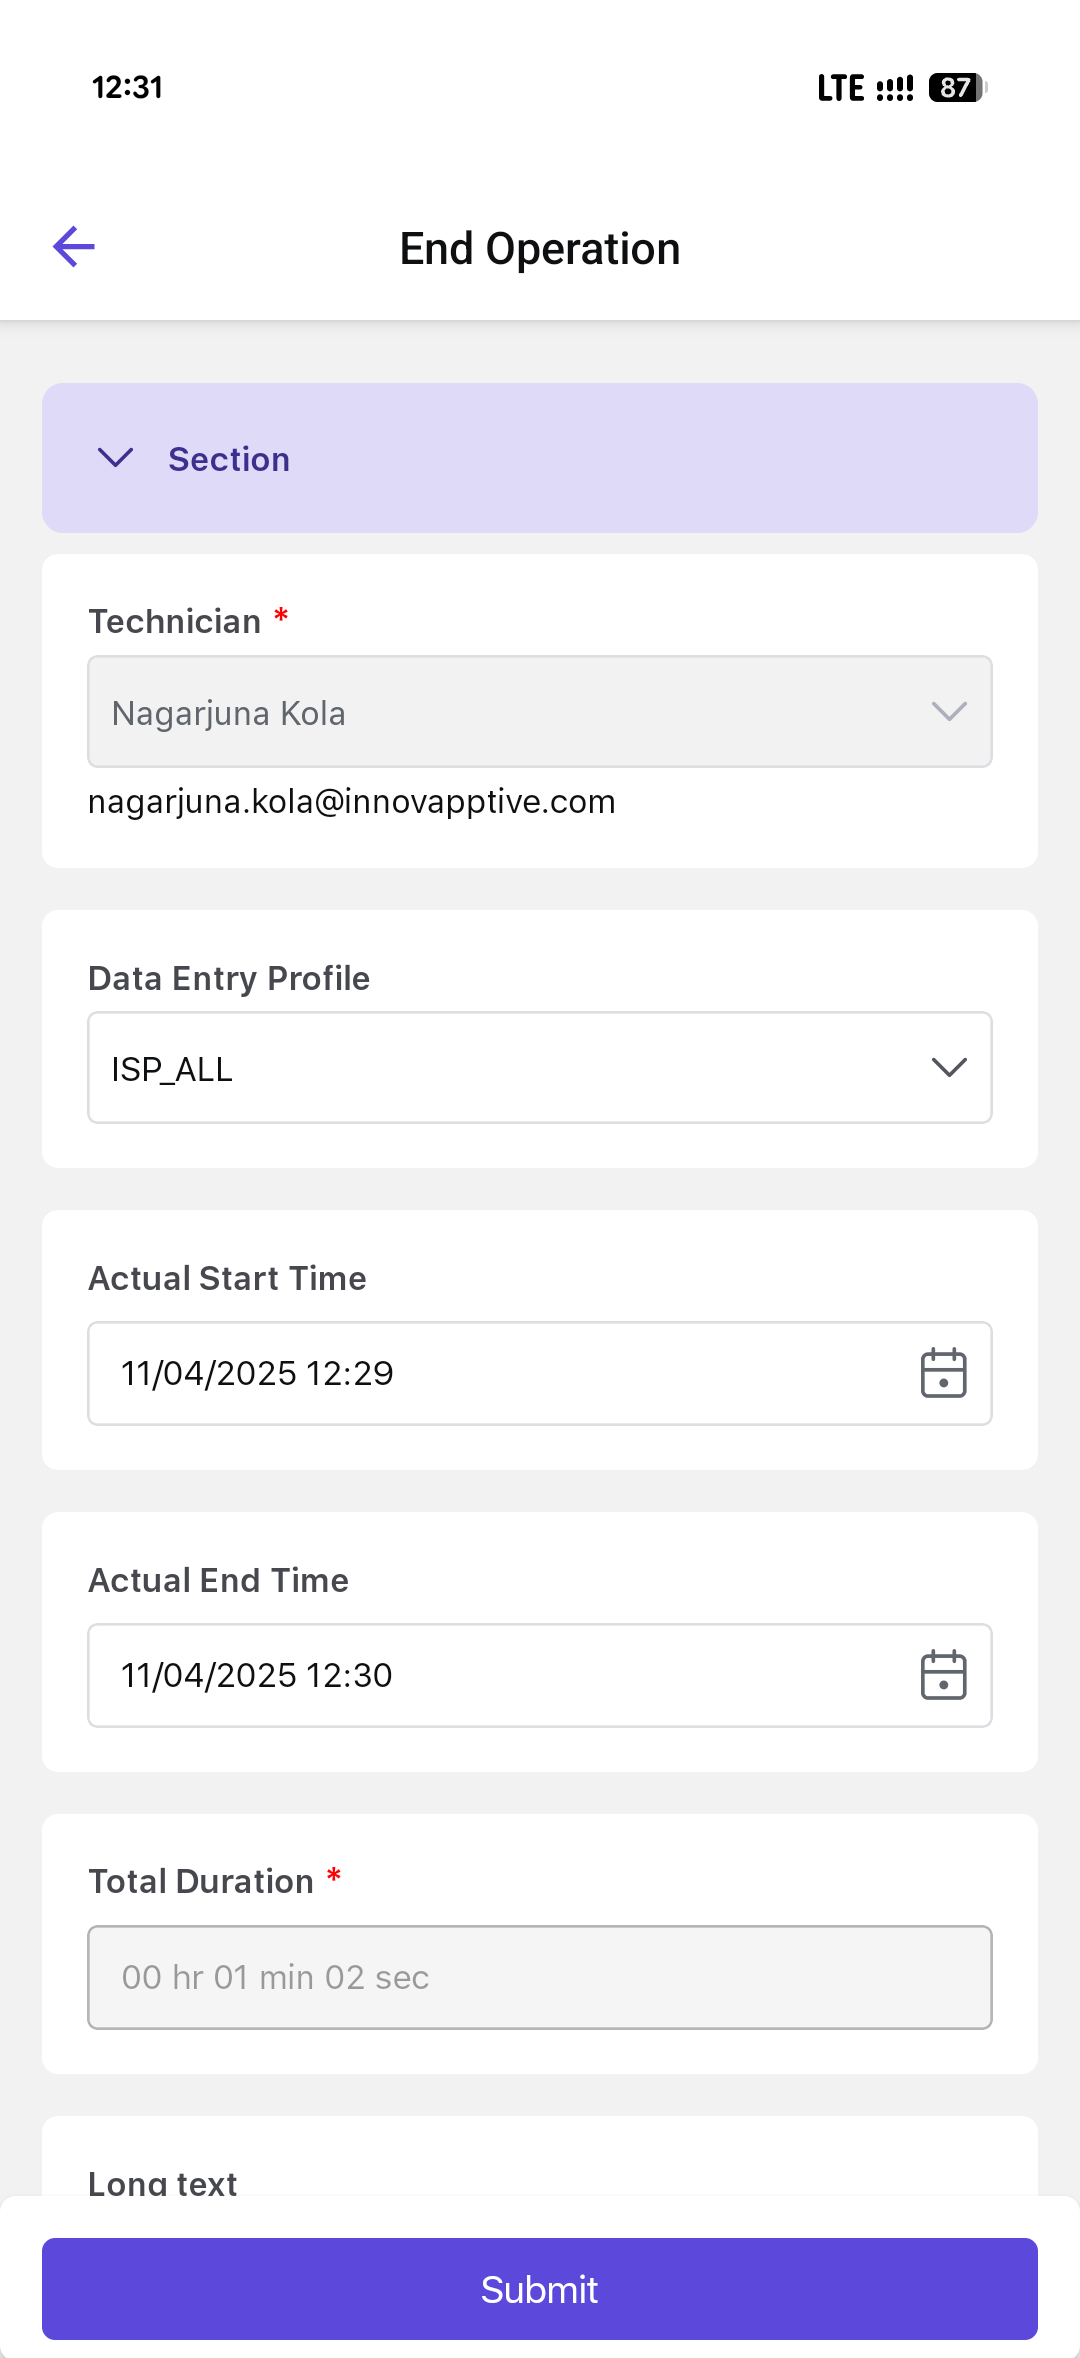
A message, Operation(s) <name> has been completed successfully, is displayed.If you attempt to start another operation without completing the current one, it prompts you to put the current operation on hold and proceed further.
Note:You can either confirm an operation without submitting a timesheet or submit a timesheet without confirming the operation.