Create a Risk Matrix
To create a risk matrix:
- Navigate to RACE and select Risk Matrix.
-
Click Create Matrix.
Figure 1. Create Risk Matrix 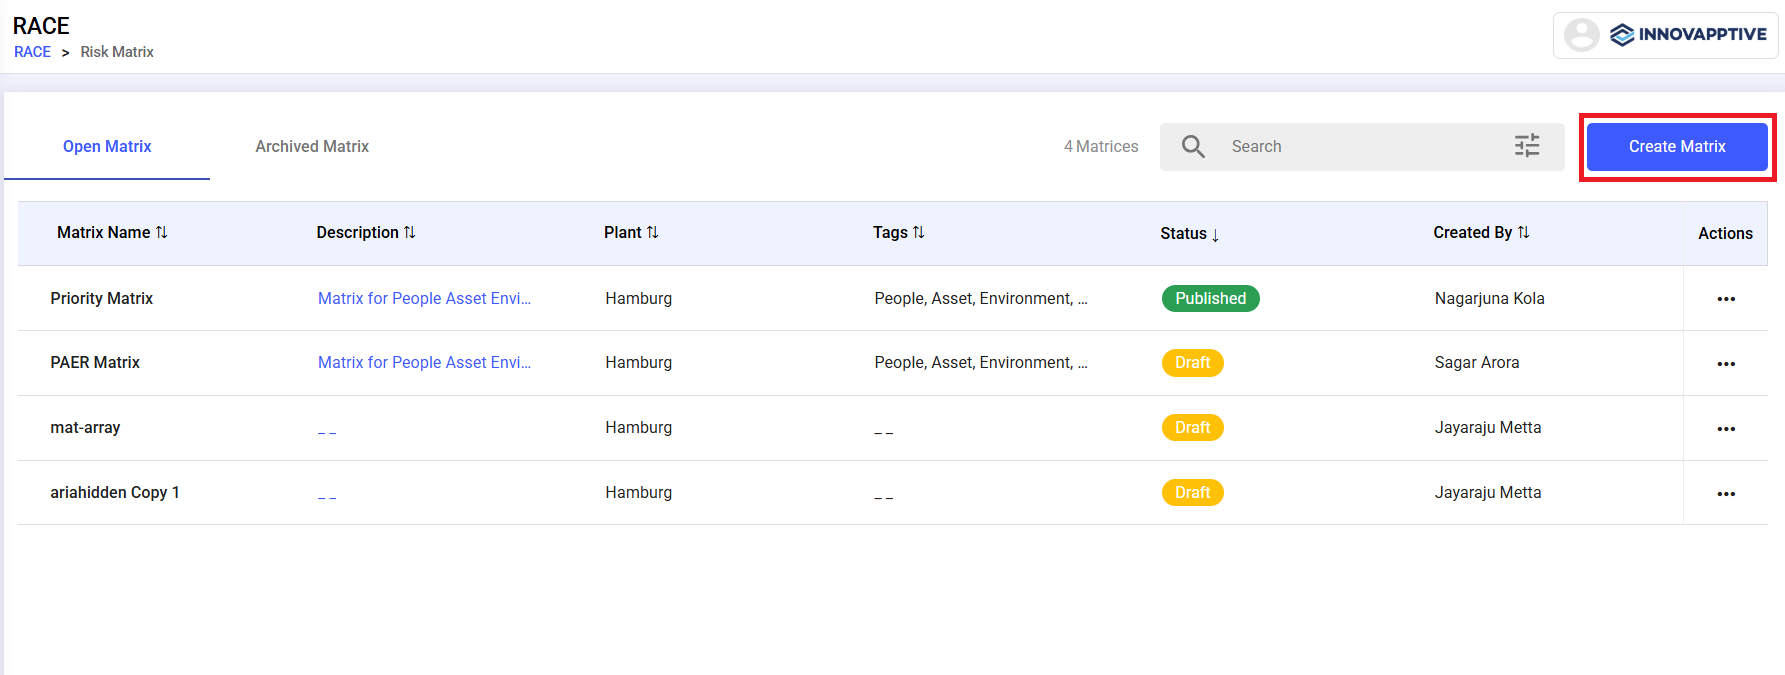
-
In the Risk Matrix Details screen, enter Matrix
Metadata:
- Matrix Name
- Matrix Description
- Plant
- Tags
- Define matrix components (e.g., Consequences, Likelihood)
- Click Next.
Figure 2. Risk Matrix Details 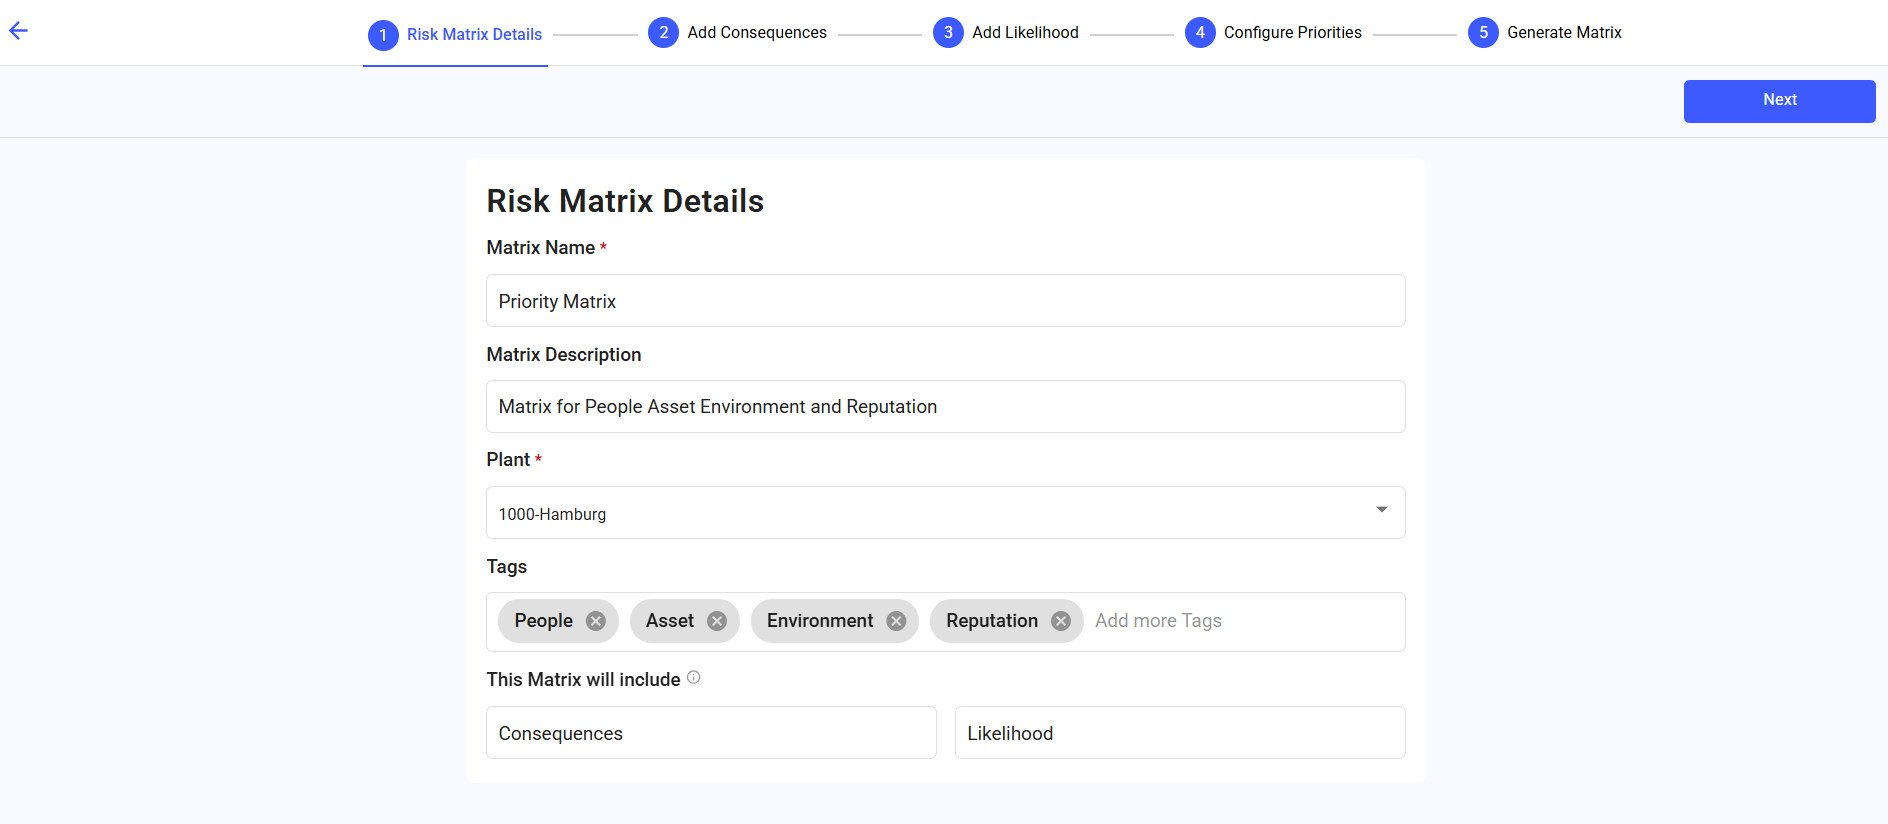
-
In the Add Consequences screen, add consequences,
- Click the + Add Consequences button at the right-side.
- Select the relevant color in the Color column.
- Define up to 5 consequence categories (e.g., People, Assets,
Environment).
- Add an evaluation question for each category.
- Define severity levels (0–5) with:
- A label
- A scenario
- A description
- You can add or remove levels as needed.
- Click Next.
Figure 3. Add Consequences 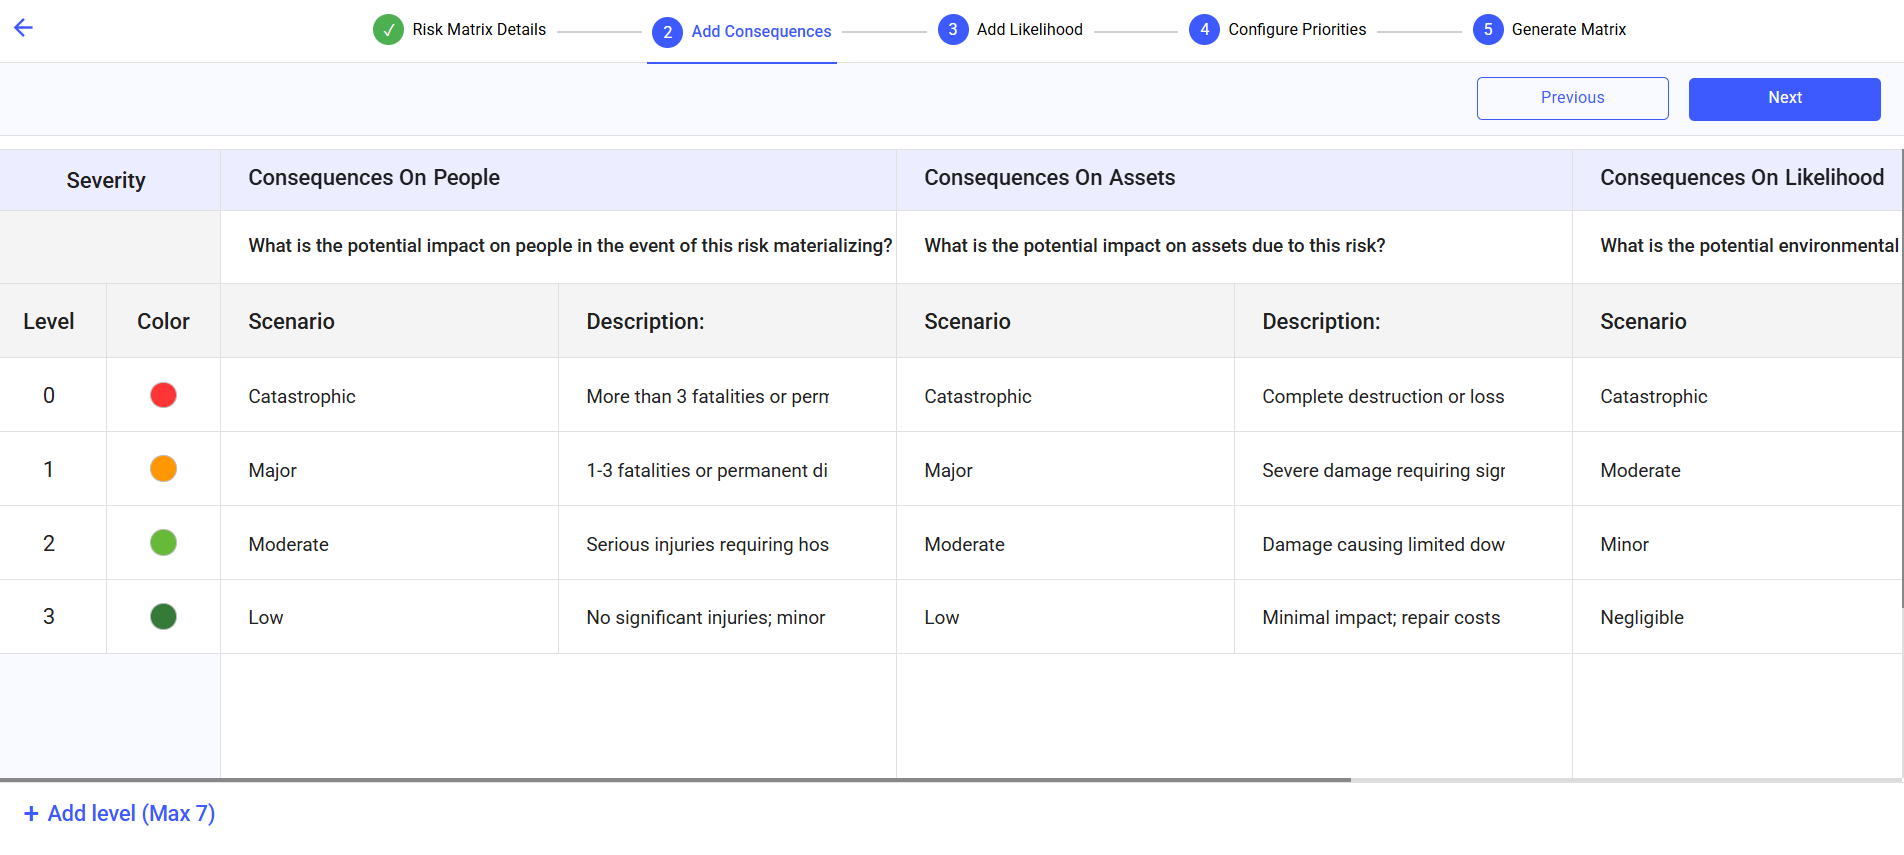
-
In the Add Likelihood screen, add Likelihood.
- Click + Add Case at the bottom.
- Select the relevant color in the Color column.
- Define scenario in the Likelihood of occurrence column.
- Add a description in the Description field.Note:You can add maximum 7 cases.
- Click Next.
Figure 4. Add Likelihood 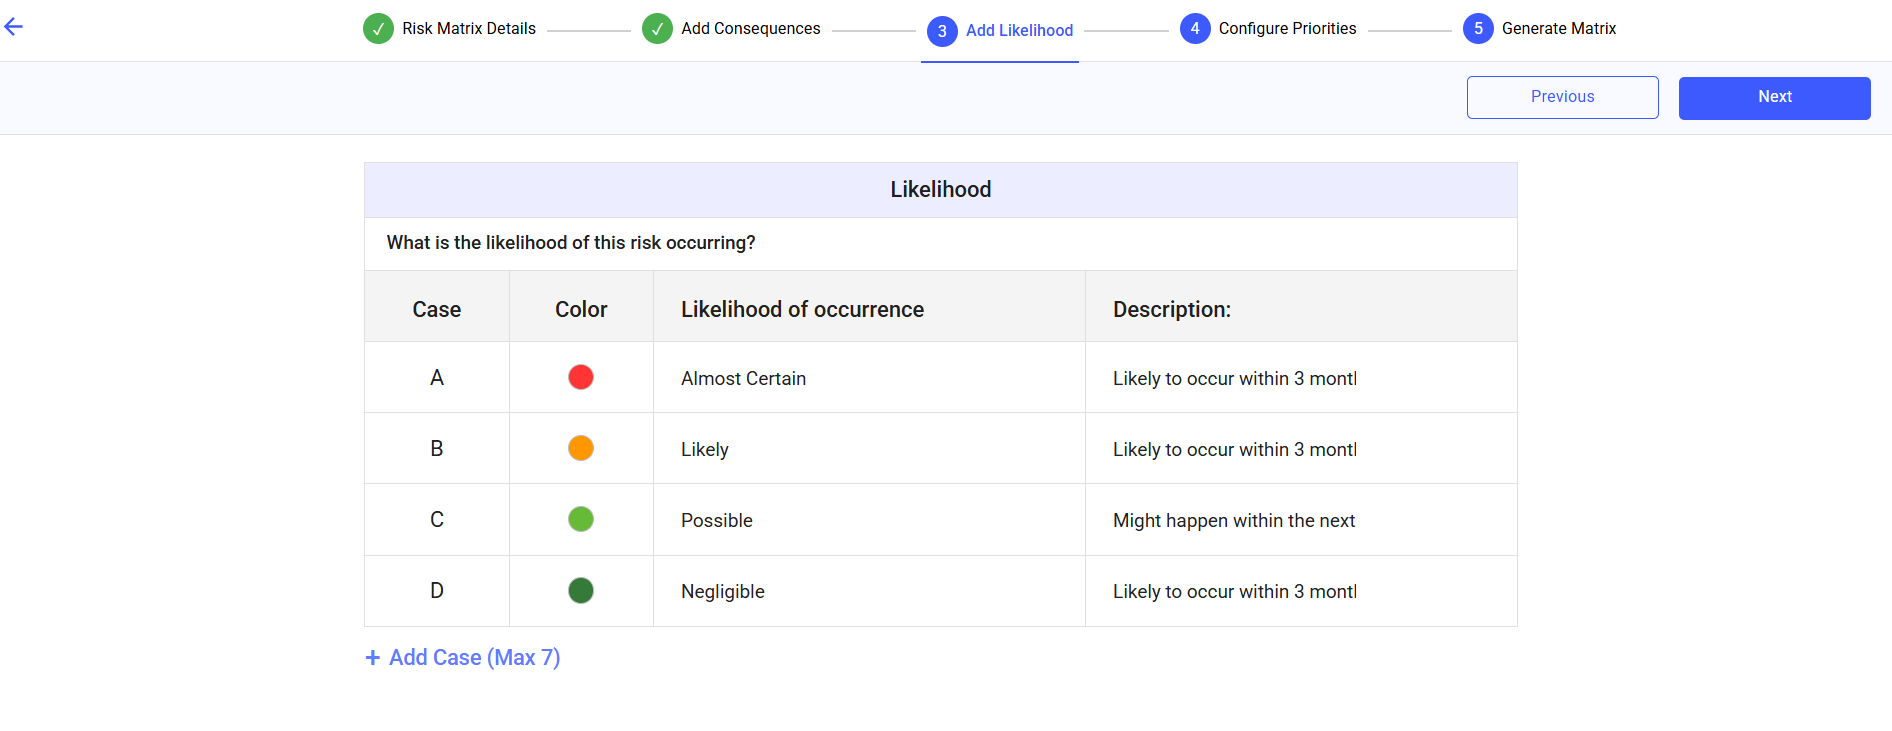
-
In the Configure Priorities screen, configure
Priorities.
- Click the + Add Results button at the bottom.
- Assign priorities (P0, P1, P2…) based on consequence and likelihood
combinations:
- Name the risk results.
- Set response timeframes (e.g., 1 Day, 2 Weeks).
- Rank results from highest to lowest if needed.
- Click Next.
Figure 5. Configure Priorities 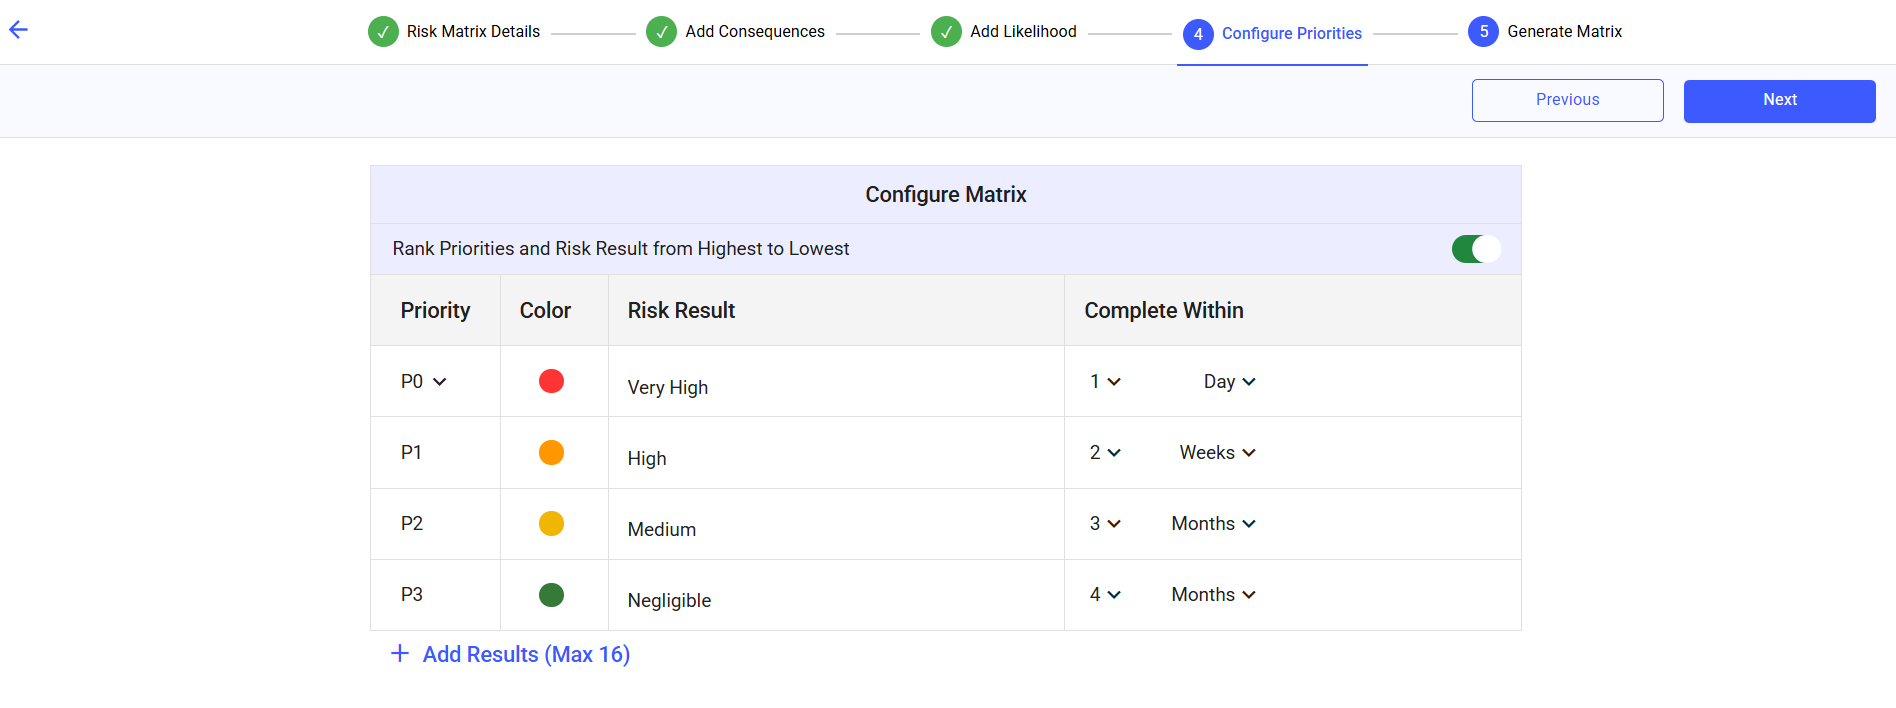
-
In the Generate Matrix screen, generate the
matrix:
- Review the color-coded matrix.
- Each cell represents a risk level (e.g., Very High, Medium).
- Click on the cell to change the risk level.
- Click Preview to view risk matrix appear in its
final form.
Figure 6. Matrix Preview 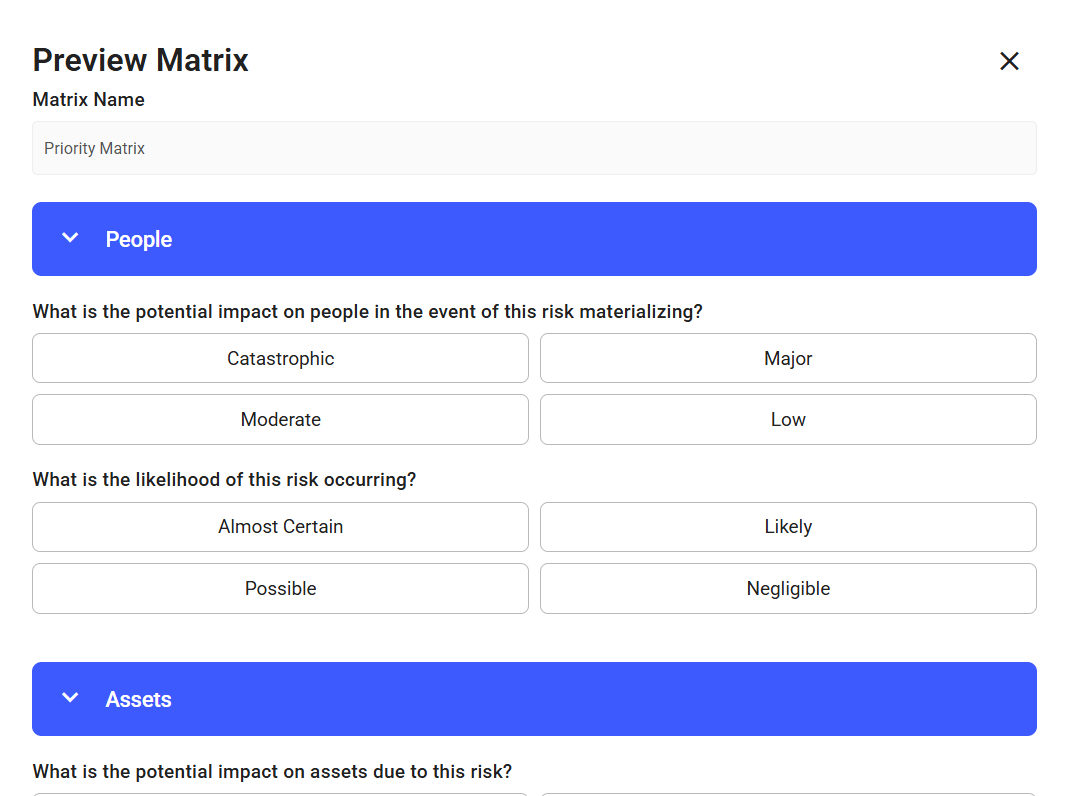
- Click Publish.
Figure 7. Generate Matrix 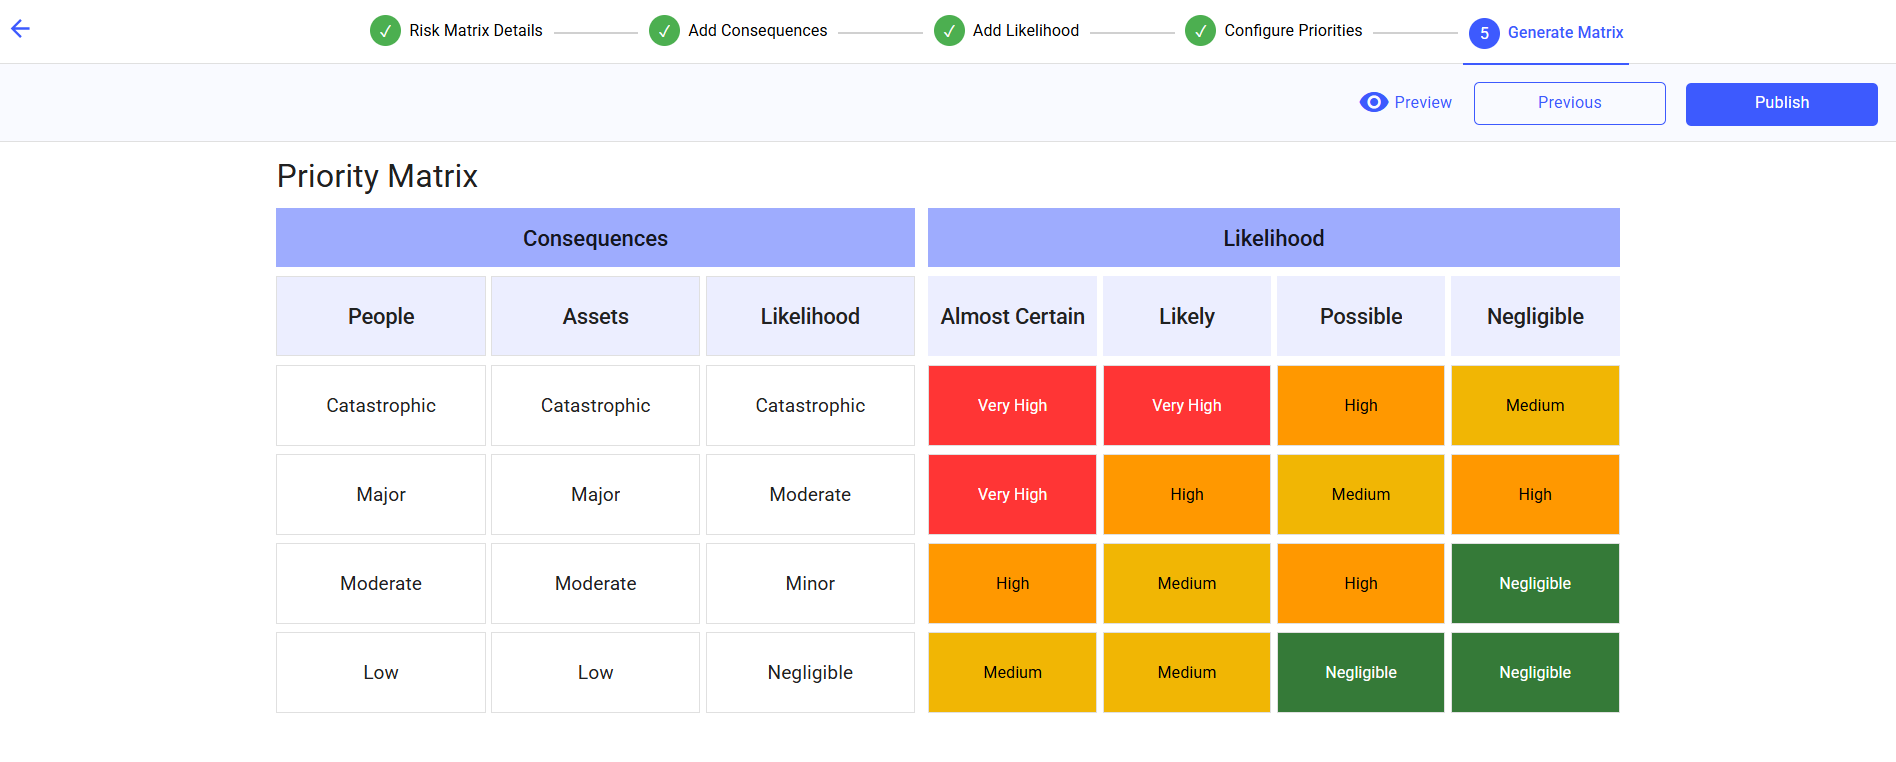
The matrix is now available for use in incident reporting or form configurations.
Use More icon to Edit, Copy, Preview, or Archive a matrix.