
Configure an Issue
Administrators can define:
- Custom fields to capture plant-specific data
- Default values to standardize entries
- Help texts to guide end users
- Auto-fill conditions to speed up data entry and reduce errors.
This ensures accurate, consistent, and efficient issue reporting across your operations.
To configure an issue:
- Click the Observations section on the left-side pane.
- Click the Issues tab.
- Click Configure Issue.
-
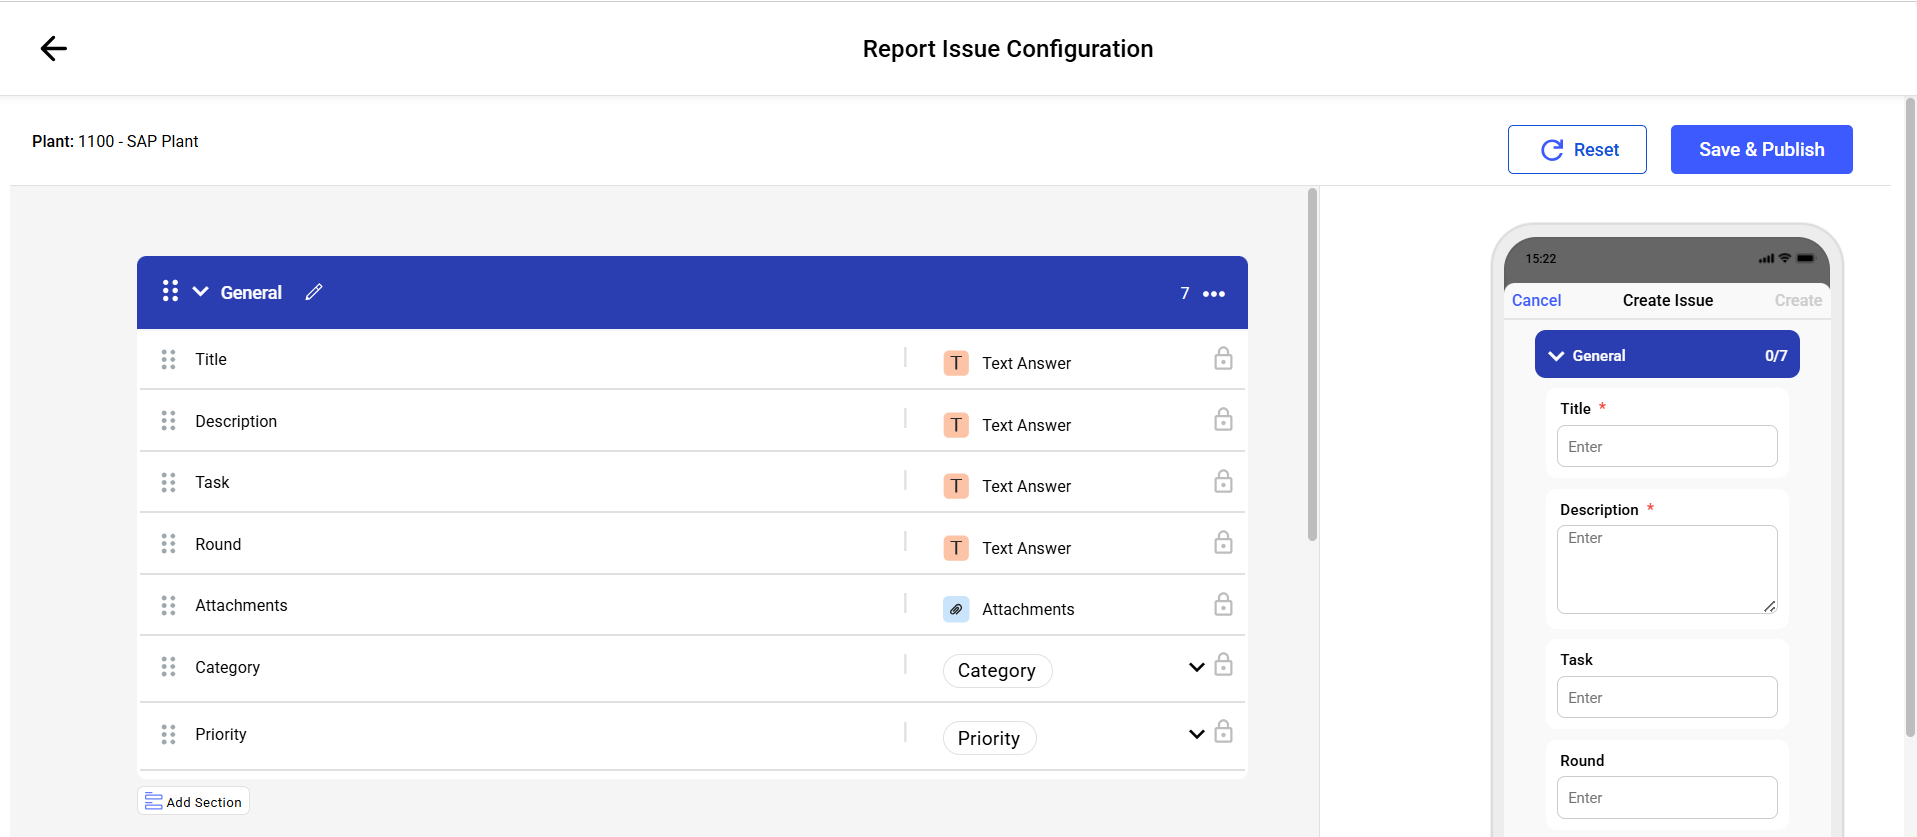
In the General section, customize, Issue Title,
Description, Photos, Priority, Category fields.
Configure an Issue
-
In the More Details section, adjust Plant, Unit,
Location, Asset, Assignee, Due Date and Time, New Custom Field and Status
fields.
- Add additional fields by clicking Add Field.
- Create new sections by clicking Add Section.
- Add or remove columns except for mandatory fields like Title, Unit (if enabled), Location/Asset, Priority, Status, Due Date, Assigned To.
- For any non-mandatory system field, custom field, or integration toggle
(such as Convert to ERP Notification), click Field Permissions to
control how that field behaves for specific roles:
- In the Field Permissions panel, select a role from the Select Role drop-down.
- Select a behavior (Hide, Read Only) from the Permissions drop-down.
- Click Save.
Figure 1. Field Permissions 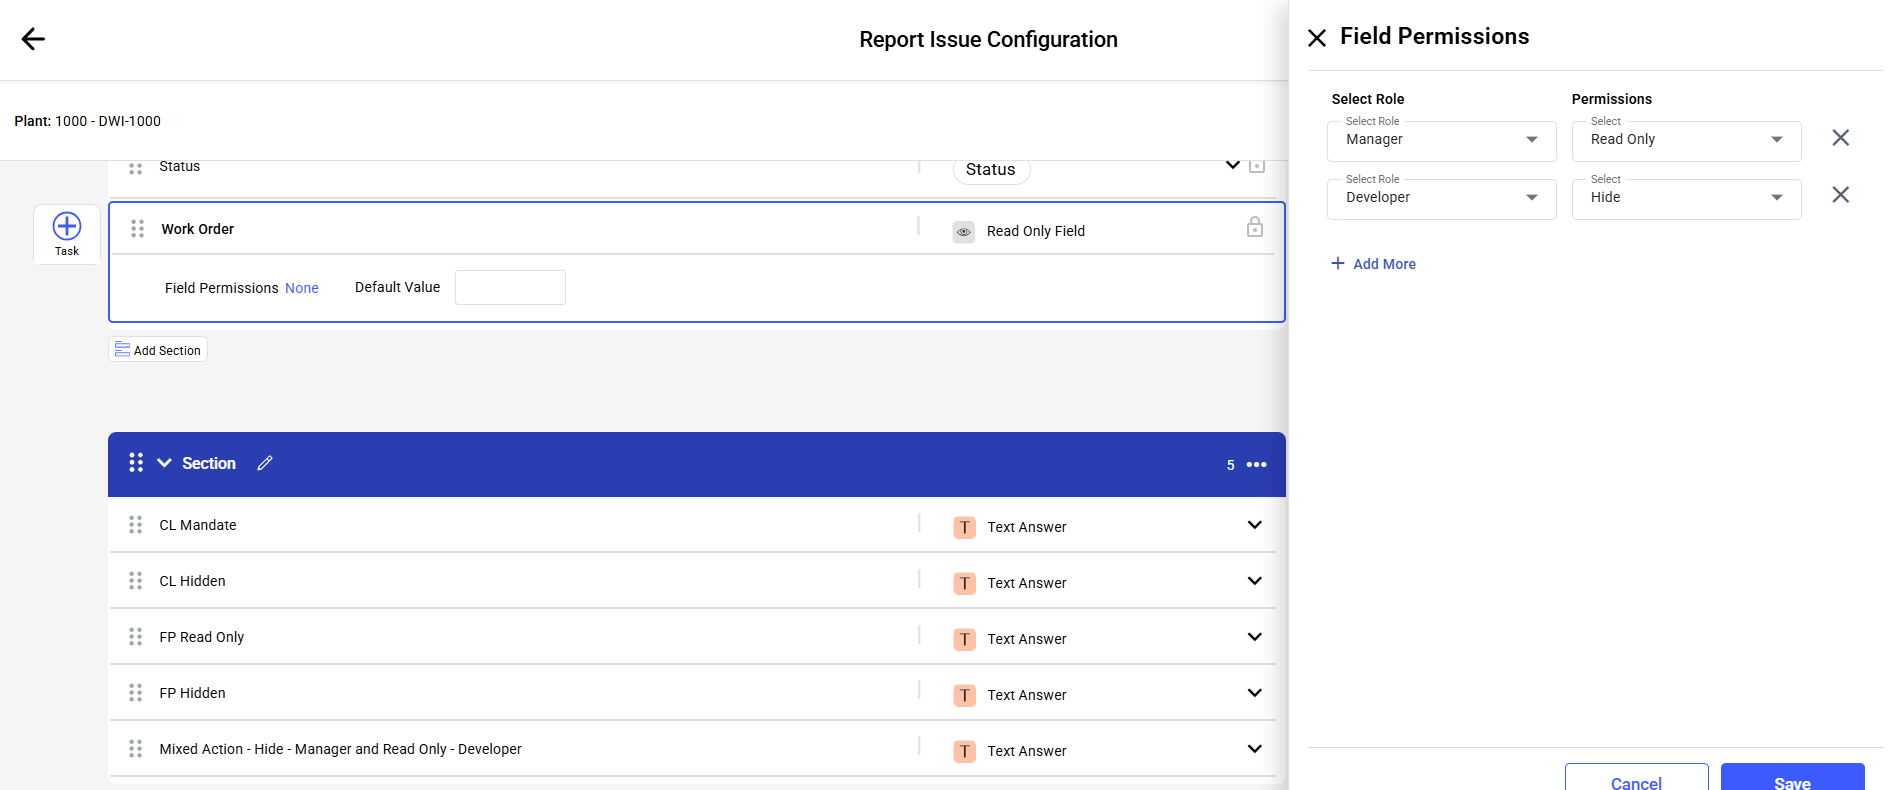
- New fields added during configuration appear as selection criteria in column configuration.
- Default configuration applies to newly created plants. You need to modify configurations to meet specific business needs.
- You can Copy configurations from one plant to another.
- When modifying one plant's configuration, you will be prompted to apply changes to all plants.
-
Click Save & Publish.
The right side of the screen displays a mobile preview of the "Create Issue" form, allowing you to verify the layout and functionality before publishing.