
Design and Publish Forms
Effective form management ensures standardized safety checks and compliance. Design and publish forms with required fields and validations for consistent execution.
Forms are configurable, reusable checklists (acknowledgements and inspection forms) that can be embedded into permits and JHAs to enforce mandatory safety and compliance checks before work proceeds. Administrators can create Forms either manually or using AI by converting existing documents into digital forms. Once published, Forms can be attached to relevant workflows to ensure consistent data capture, validation, and audit readiness across plants.
To create a form:
- Expand the EHS module and click Authoring.
-
Go to the Forms tab.
The Forms tab is displayed with a list of Form templates
- Click the Create Manually button at the top right (or click Create Using AI, if you want to generate a Form from an existing document).
- Create Form Template Manually.
-
In the Template Details screen, provide the following information:
Field Description Template Name Enter a unique name for the Form template Template Description Describe the purpose of the Form template. Plant Select the applicable plant. Type Select the Form type (for example, Acknowledgement, Audit, Checklist, JHA Questions, Atmospheric Logs, Zero Energy Test). Instance Type Defines how many times the form can be submitted when it is linked to a Permit or JHA. Select one of the following: - Single Instance - Only one submission of the form is allowed per permit/JHA. For example, a Signature Form or a one-time safety acknowledgement
- Multiple Instance - Several independent entries of the form can be created and submitted. for example, a Data Copy form completed once per component, or a checklist repeated for each crew member.
About Form Types- Acknowledgement - Captures worker acknowledgement of permit conditions and safety instructions.
- Audit - Records inspection and compliance verification details.
- Checklist - Captures predefined safety or operational checks.
- JHA Questions - Captures hazard, risk, and control-related questions for JHA.
- Atmospheric Logs - Records environmental monitoring readings.
- Zero Energy Test - Captures equipment isolation and zero-energy verification details.
- Contractor - Captures contractor details and compliance information.
-
Click Next.
Figure 1. Create Forms Manually 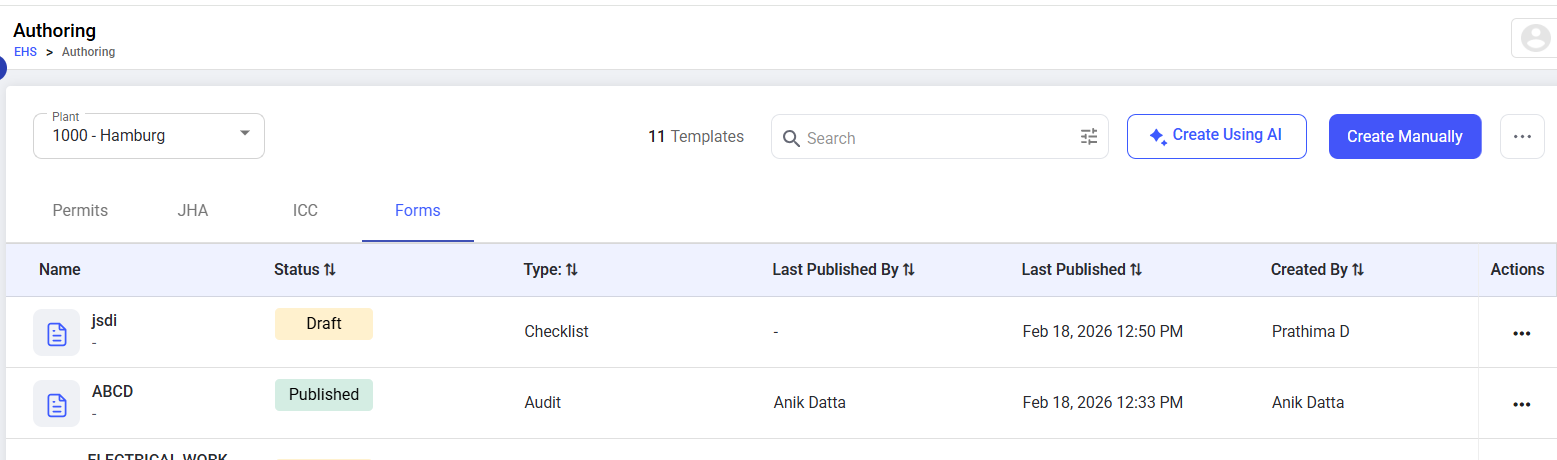
-
In the Template Configuration screen:
- Define the Form structure using Pages and Sections.
- Add fields (questions) within each section as required.
- Select appropriate response types (Text, Number, Yes/No, Pick List, Date, etc.).
- Mark fields as Required, if mandatory completion is needed.
- (Optional) Configure conditional logic to show or hide fields based on responses.
- (Optional) Configure Default Values, formatting, and localization for
fields.
Each Response Type defines the field or input format used across the platform’s authoring and execution modules
Response Type Description Supported Properties Text Free text input (e.g., title, descriptions). Add Logic, Default Value, Additional Details, Localization, Enable, Required, Type Number Numeric values field Add Logic, Default Value, Additional Details, Localization, Enable, Required, Unit, History, Range, Formula, and Unit of Measurement (UoM) Date & Time Calendar input for date & time values. Additional Details, Localization, Enable, Required, Date & Time Format Signature Captures digital signatures from users. Additional Details, Localization, Enable, Required Hyperlink Clickable link to web or document resources. Additional Details, Localization, Enable, Required, Add Link Add Photo Upload images for visual evidence. Additional Details, Localization, Enable, Required Field Logic and Settings- Set conditional logic (for example, show or hide fields or sections based on user responses), as described in the table below.
- Mark fields as Required, enable History, or apply Localization on
business and compliance needs.
Response Type Properties
Add Logic Enables conditional rules for a field (show/hide Field/Section, Raise Issue, Mandatory field/Section etc.) based on field values. Default Value Pre-fills the field with a value when the form loads in mobile application. Additional Details Allows admin to define character limit or extra metadata for users. Localization Allows admin to translate field labels into multiple languages. Enable Toggles whether the field is active and visible in the consumption. Required Marks the field as mandatory for submission. Input Data Allow admin to define collection of dataset for field. Unit Allows admins to select a unit of measurement (e.g., °C, Kg, hrs) to numeric fields. History Allows admin stores previous values entered in the field. Range Sets a minimum and maximum limit for values (typically in number or slider). Formula Supports calculated values based on other Numeric field inputs. Date & Time Allows admin to define which date format should be used in the consumption. Add Link Allows the field to point to an external URL or system reference. Type Defines the technical input format (e.g., string, number, object) – mostly system-managed. Upload Files Allows users to attach images, PDFs, or documents to the field. Add Tags Lets admin apply metadata tags for filtering, grouping, or analytics. - Use Preview to see how the form appears in the mobile app.
- Click Next.
- In the PDF Setup screen, configure the PDF layout as required (Logo, QR code, footer text, body content visibility).
- Click Publish.