Manage Localization
The Localization feature allows Admins to manage language translations for all Innovapptive products—both web and mobile. It’s particularly useful for aligning UI terms with local business terminology or translating content into regional languages.
To add a new language:
- Expand RACE and click Localization.
-
Click Add Language and select Add
Manually.
Figure 1. Localization Screen 
-
In the Add Language window, select the
Language and applicable
Products.
Figure 2. Add Language 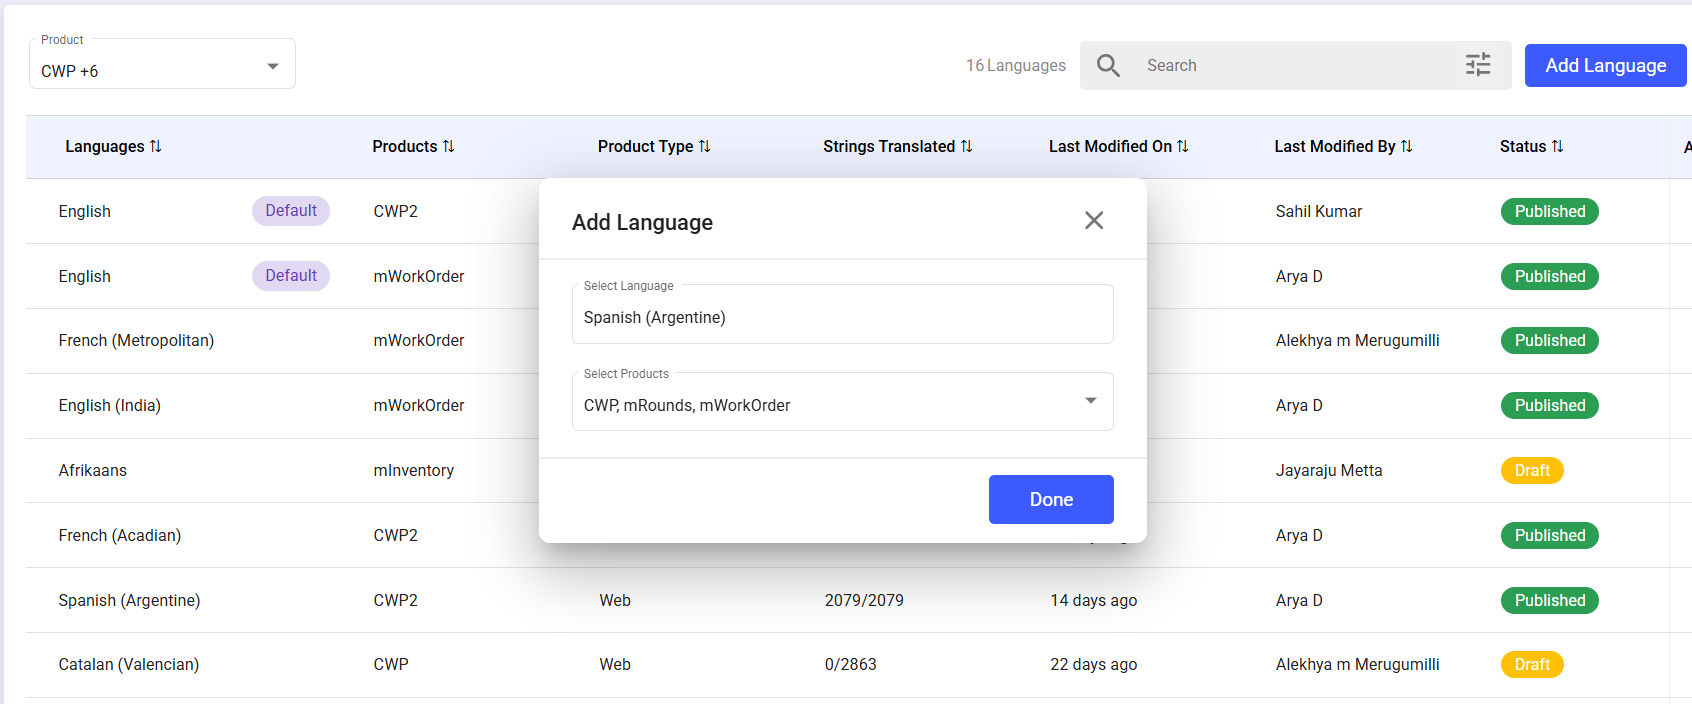
-
Click Done.
The newly created language is displayed in the list.
-
Click the More icon and select
Edit.
You can view the total translated string count for that product in its released version.
-
Translate all the strings for the selected language.
Figure 3. Translate Strings 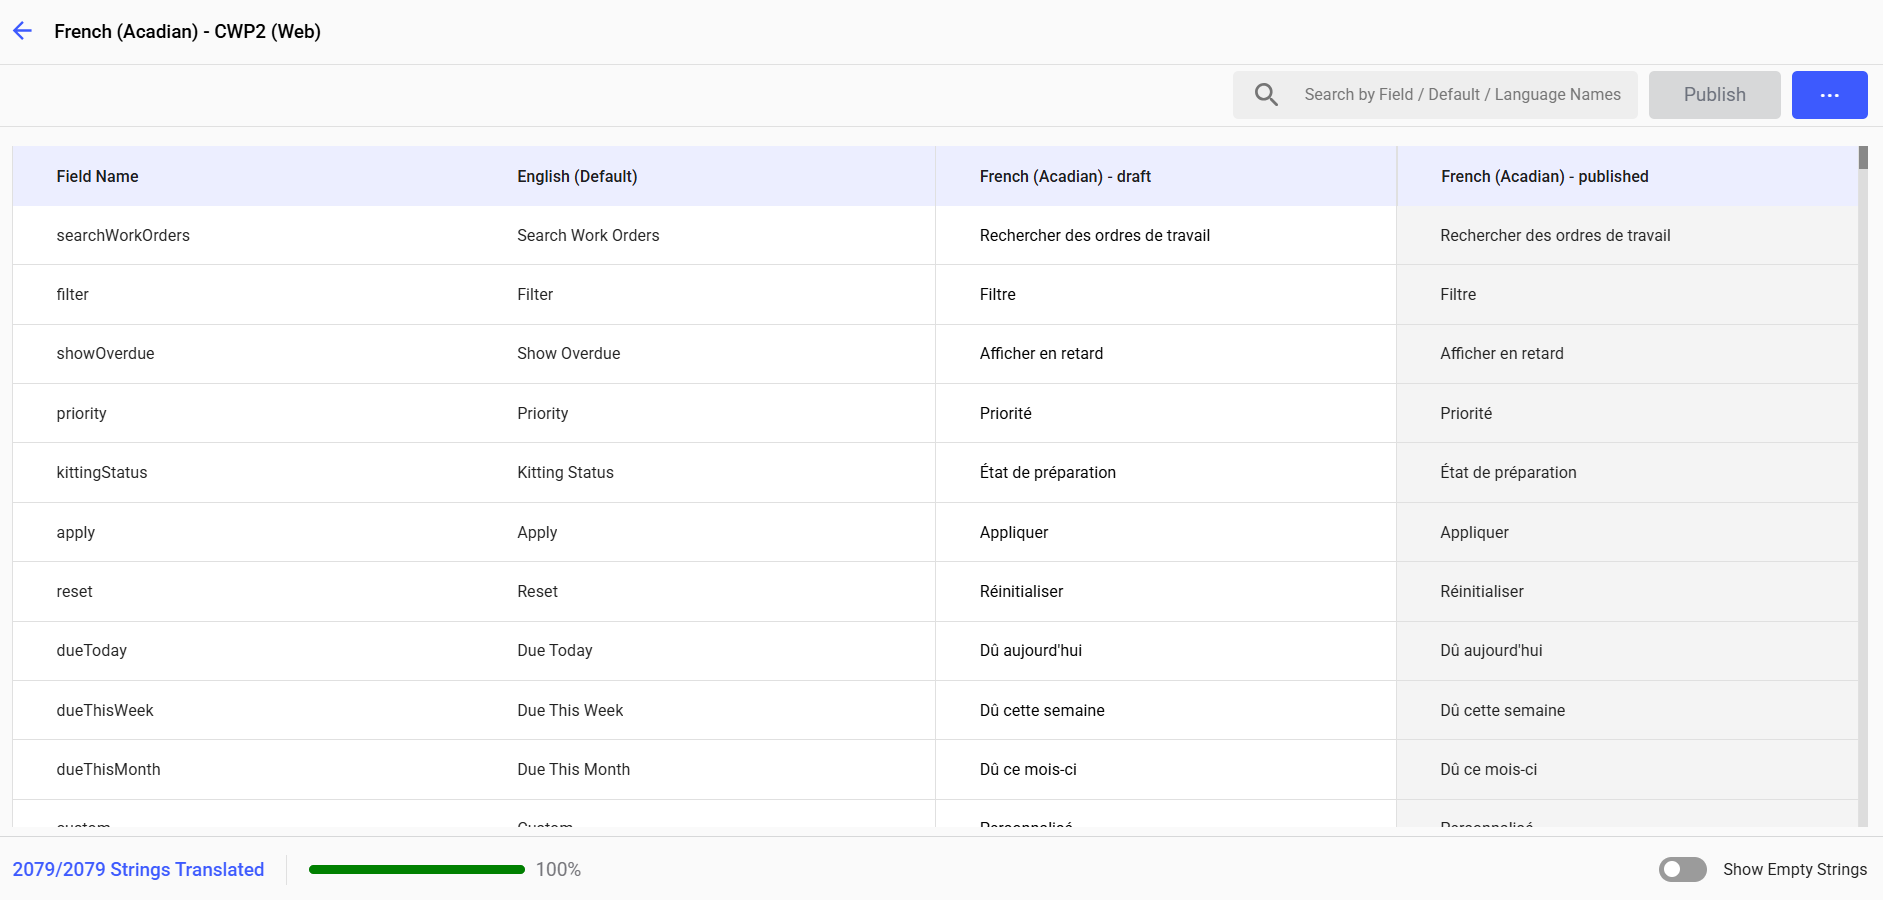
-
Click More icon on the top right.
- Select Clear All Strings to clear all strings at once.
- Select Refresh AI Translations to use AI suggestions and clear them if needed.
Note:Select the Show Empty Strings toggle at the bottom to quickly view the empty strings. -
Once all the strings are translated, click
Publish.
In the Localization screen, you can also,
- Select the Product drop-down to view All Products or individual products (e.g., CWP Web, iMaintenance Mobile, etc.) By default, the filter is applied to ‘All Products’, showing all languages across all products.
- Click on the Sort icon next to each column header to sort alphabetically, numerically, or by date.
- View the number of languages currently listed in the table (e.g., “18 Languages”) at the top.
- Use the Search bar at the top right to quickly find a specific language or product.
- Use the Filter icon to filter the list based on Last Modified On or Last Modified By.
- Click Add Language and select Upload Excel to upload translations via Excel templates.
- Click the More icon and select Download Excel Template to download the template.