
Create an Action
Create an Action when the configured workflow allows a follow-up activity to have its own owner, priority, and due date.
Use an Action for a separately assignable follow-up activity when permitted by the configured Issue workflow. To create an Action:
-
In the Actions screen, tap the Add Action
 button at the bottom.
-
In the Create Action screen, do the following:
- Enter the action title in the Title field.
- Enter the action description in the Description field.
- Tap the Add Photo button in the Photo field to add images.
- Select the Priority as
High, Medium, or
Low.
Figure 1. Create Action 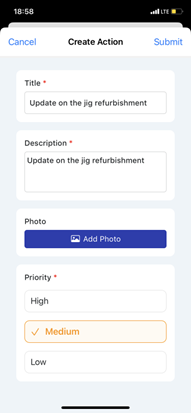
- Expand the More Details section, do the
following:
- Select the Plant,
Unit,
Location, and
Asset from the respective
dropdowns.Note:The Plant and Unit values auto-populate if they are already selected in the User Preferences screen.
Scan the asset and the app automatically adds these details.
- In the Assign to drop-down,
- Choose Users and select users or
operators from the list.
Or
- Choose Usergroup and select user groups from the list.
- Tap Save.Note:Actions assigned to both User and Usergroup are displayed in the My Actions tab for every user.
- Choose Users and select users or
operators from the list.
- Select the Due Date and Time.
- Select the Status such as Open, In-Progress, or Resolved.
- Select the Plant,
Unit,
Location, and
Asset from the respective
dropdowns.
Figure 2. More Details 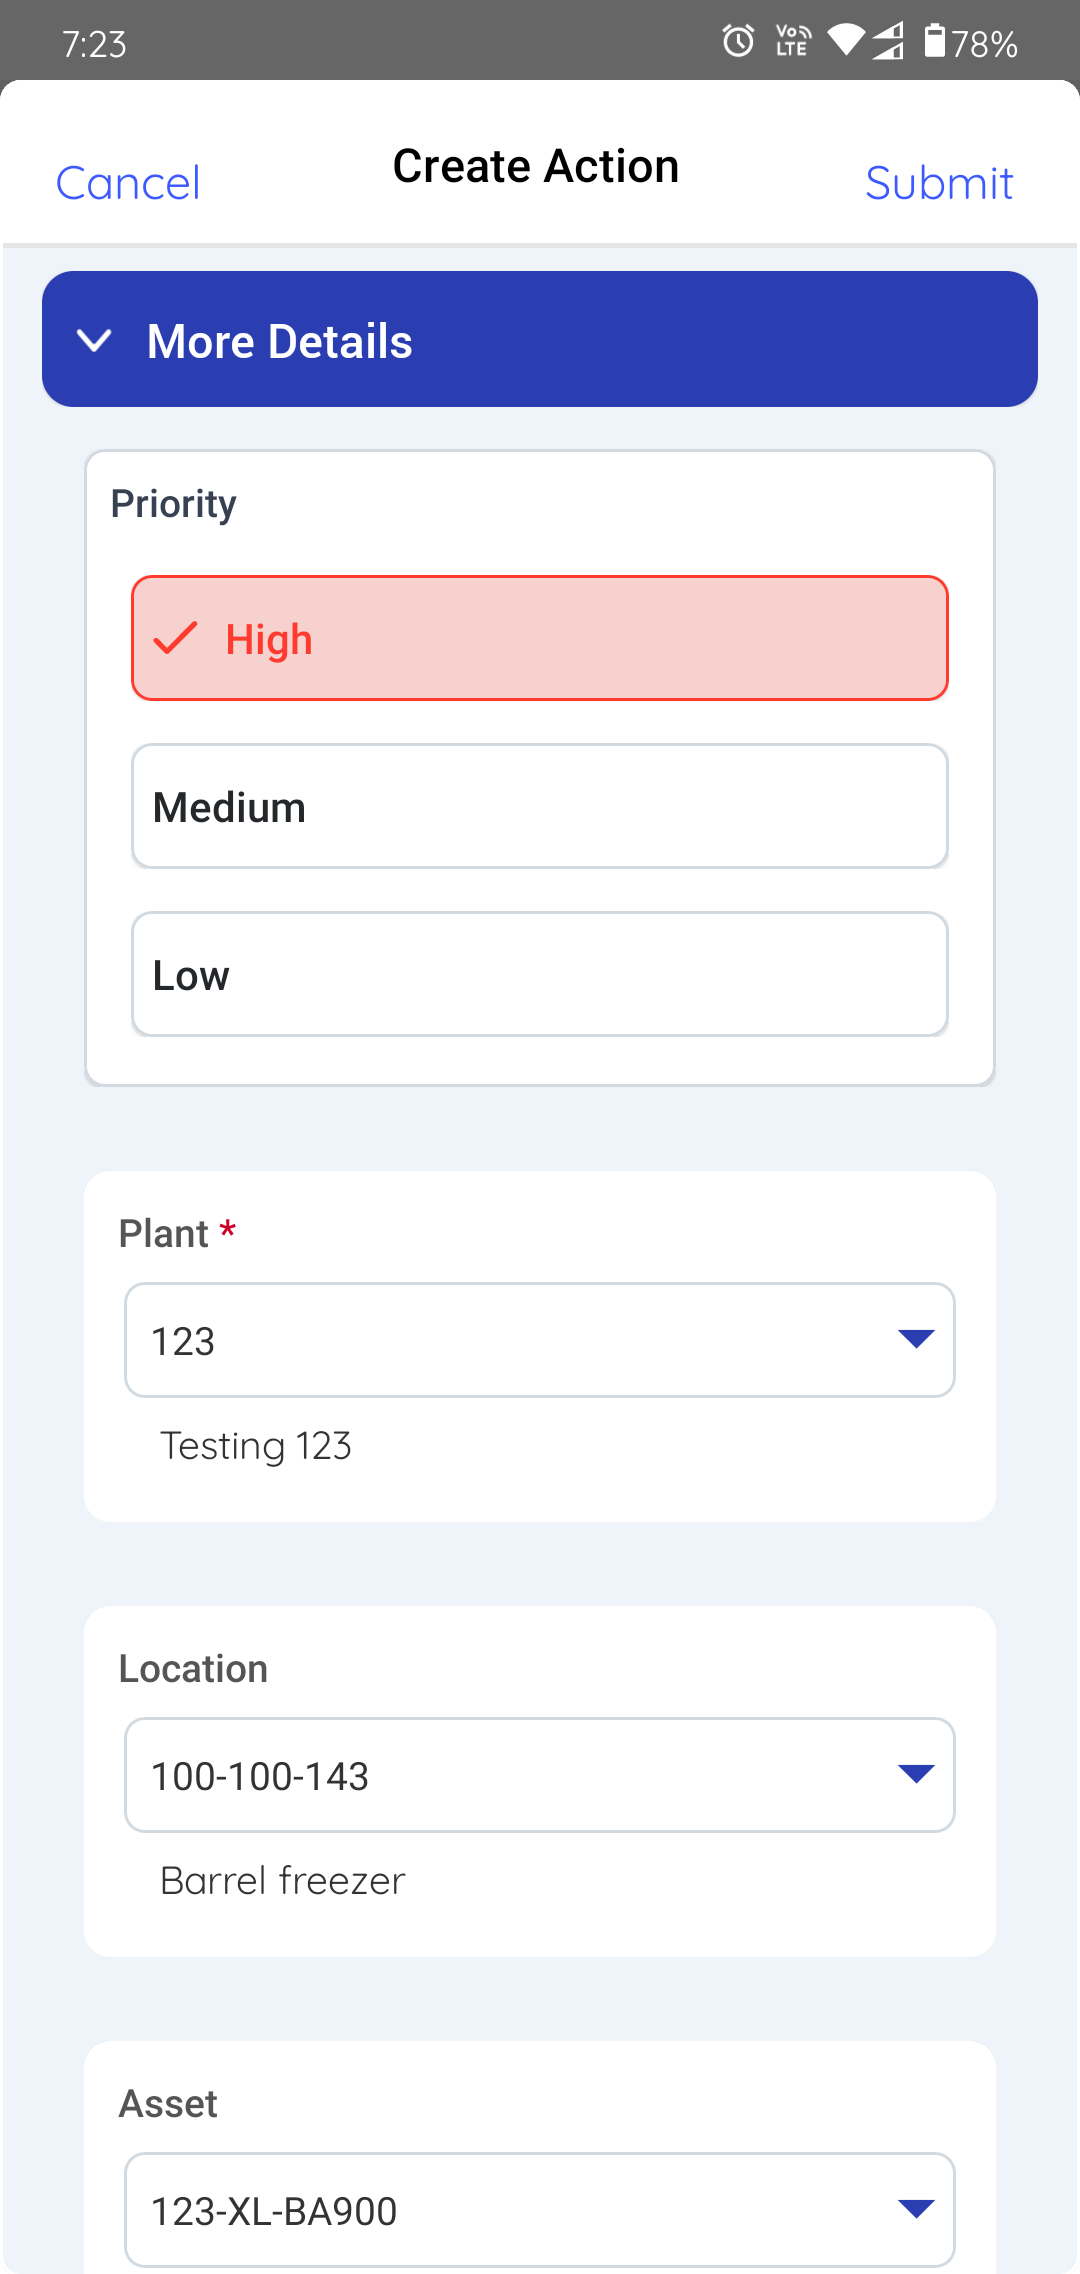
The Action is created and appears in Open Actions. If it is assigned to you, it also appears in My Actions.
Next: If you are taking responsibility for the follow-up, assign the Action to yourself. Return to the round and continue the remaining tasks.