Create Permit Template
Configure and define the permit template with sections and required fields based on specific business use cases and plant requirements.
Create Permit Template – Manually
To create a permit template:
-
Expand the EHS module and click Authoring.
The Permits tab is displayed with a list of permit templates.
- Click the Create Manually button on top right.
-
In the Template Details screen, provide the following information:
Field Description Template Name -
Click the Hamburger icon to select the Permit Type (For example, Hot Work, Mechanical, Work on Height, Confined Space, Radiation, Lifting, Electrical, and so on).
-
Select an appropriate icon to visually represent the permit type (for example, a red flame icon for Hot Work permits and a confined space icon for Confined Space permits).
-
Enter a unique name in the text box for the permit template (e.g., Mechanical Work Permit).
Template Code Provide the required template code with 2 characters (letters/numbers). Template Description Describe the purpose of the template. Plant Select the applicable plant. Tags Add tags to categorize the template. Acknowledgement Form Select the required form applicable to the selected plant. Note:Select the Acknowledgement Form for permit types that require Technicians/Contractor's acknowledgement before work execution (for example, Confined Space or Hot Work permits).Additional Forms Select the required additional forms from the drop-down. - Contractor Form: Select to associate the required Contractor Forms with the Permit Template.
- Atmospheric Log: Select this option to enable the Field Validation stage during permit raise.
-
-
Click Next.
Figure 1. Permit Template Details 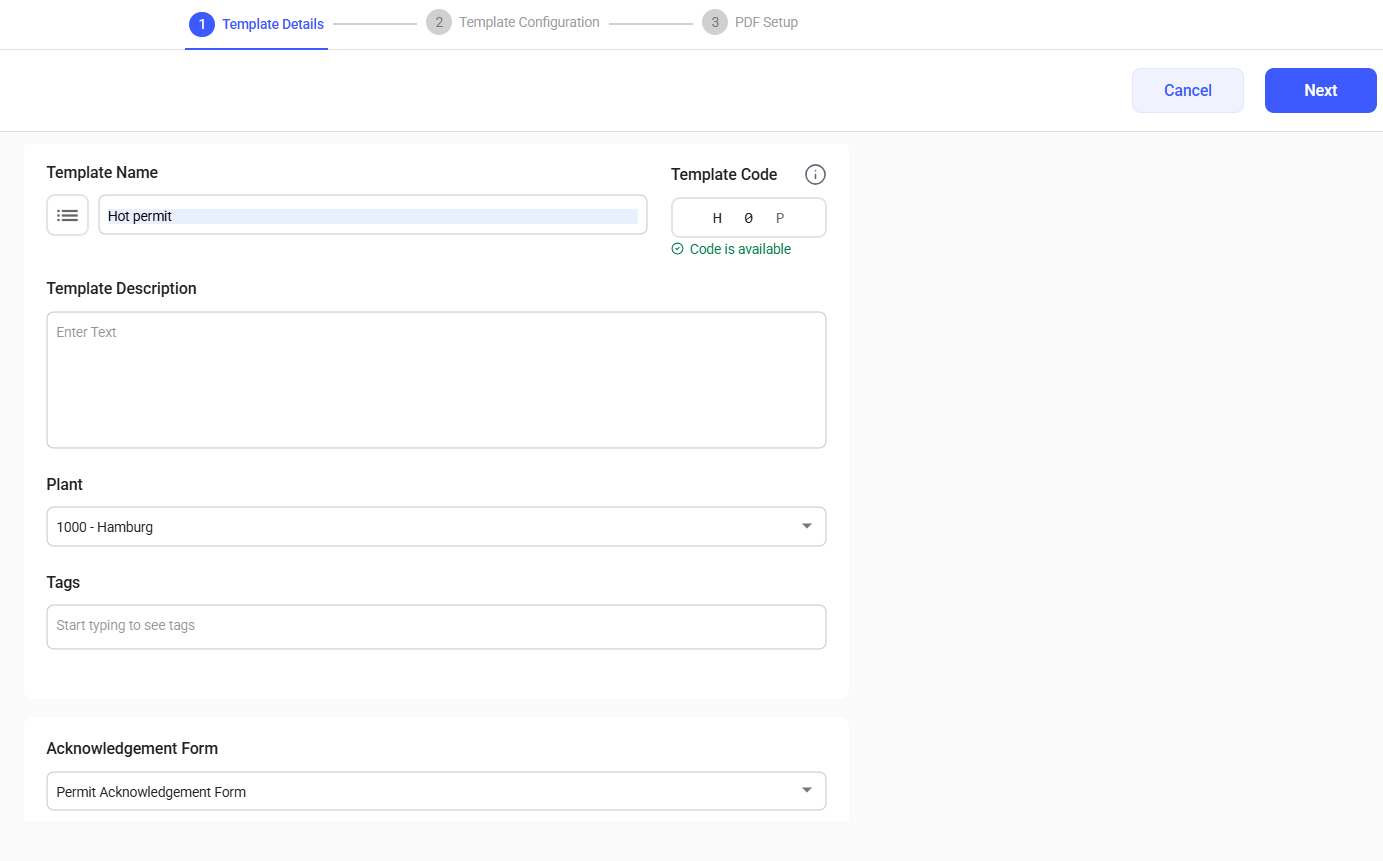
-
In the Template Configuration screen:
- . Add the required Sections within each page based on the Permit
Template requirements (for example, EHS Details, Basic Permit
Details).Note:Default sections with fields are auto populated to help you get started. You can modify them or add new sections as required.
- Insert Fields (Questions) into sections.
- Select Response Type (Text, Number, Slider, Multiple Choice, etc.).
- Add required properties.
- In this screen, you can:
- Use the Import button to import sections and fields from an existing template.
- Rename, reorder, copy, or delete fields and change response types as needed.
- Rename, reorder, duplicate, or delete sections to match your workflow.
- Set view, edit, or hide permissions for a section.
- Select the Role, then select Edit if the role should be able to view and modify the Field/Section.
- Select the Role, then select View if the role should only be able to see the Field/Section without editing.
- Select the Role, then select Hide if the role should not see the Field/Section.
- Click + Add Role to configure permissions for additional roles on the same section
- . Add the required Sections within each page based on the Permit
Template requirements (for example, EHS Details, Basic Permit
Details).
-
You can reuse sections and questions from existing Published or Draft permit
templates to avoid rework and maintain consistency.
- Click Import and select the permit template required from the list.
- Click Use to import the selected content into the current permit template.
- Click Preview to see how the template appears in both web and tab applications.
-
Click Next.
Figure 2. Permit Template Configuration 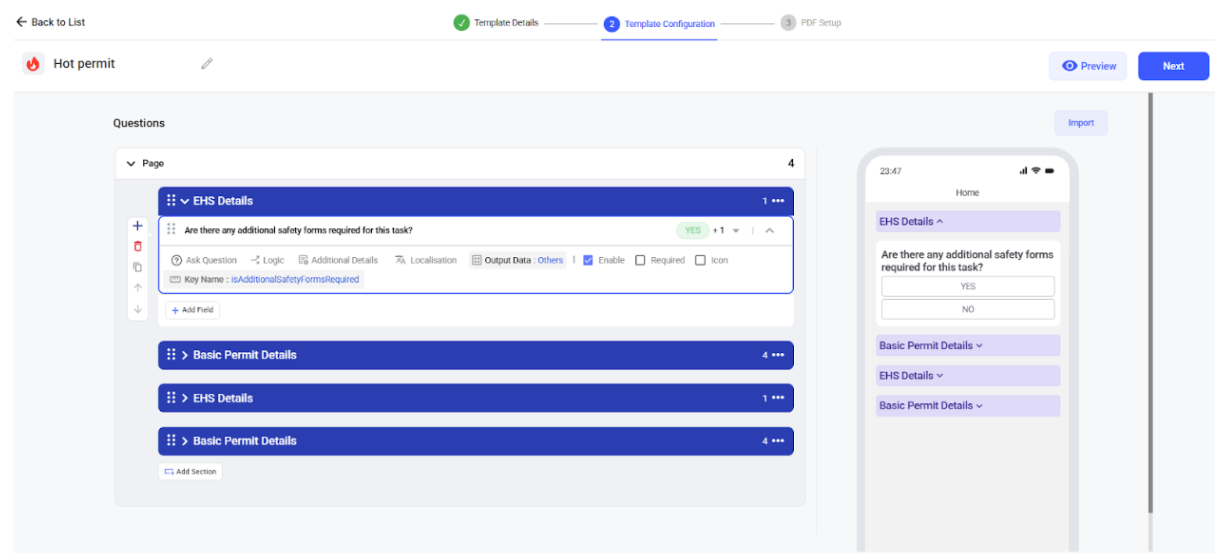
-
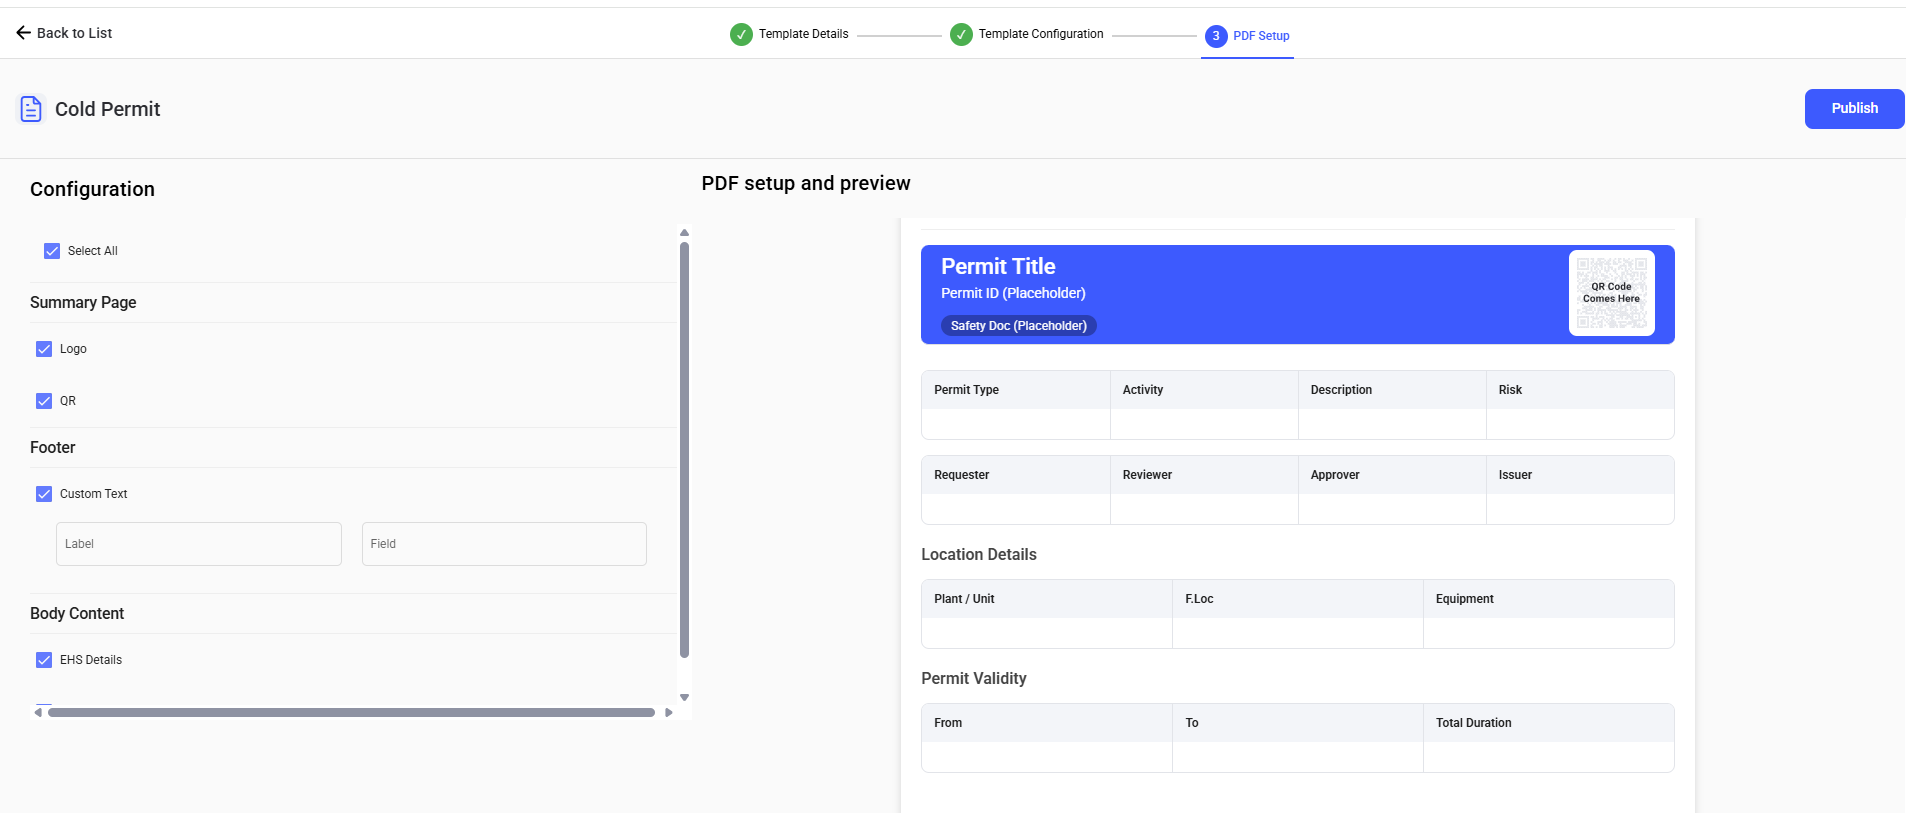
In the PDF Setup screen, click Publish.
Note:You can configure the PDF on the left side pane to customize what information should appear in the PDF such as Logo, Header, Footer, Body Content, etc.
Figure 3. PDF Setup