Create Dynamic Form
To configure Dynamic Forms:
-
Click the Dynamic Forms button on the left panel and click the
Dynamic Forms option.
Note: You can also expand the Menu
 and click the
Dynamic Forms option.
and click the
Dynamic Forms option.Figure 1. Dynamic Forms 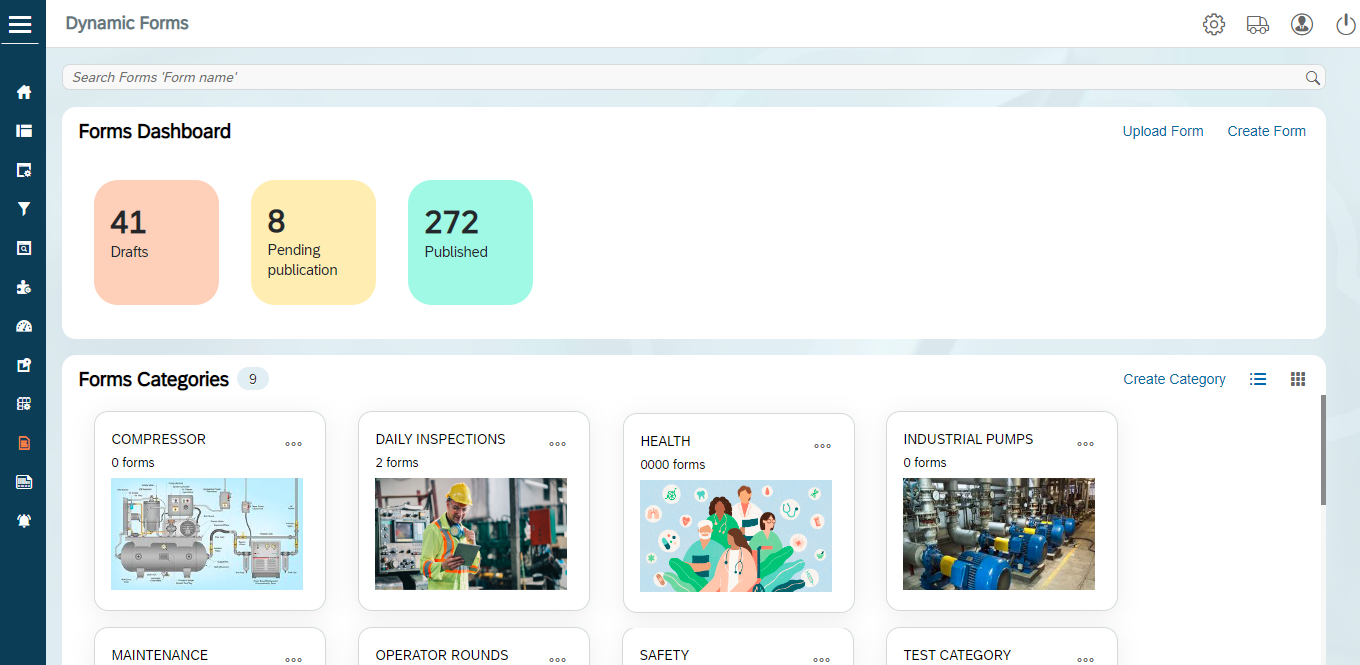
-
Click the Create Form button at top right corner and click Create
Form option.
You can also create a Form using an existing template.
-
In the Create Form popup window, enter this information:
Table 1. Create Form attributes Field Description Form Name Unique ID or name to identify the form. Form Description Name of the Form shown on application UI. Form Type Type of Form like Single or Multi level. Form Category Category of the form. Once you select the category, the form automatically added to the selected category. Attribute Select the attributes like Plant, Order Type and Material for which the Form is applicable. Depending on the values you select, app filters the forms list shown to the field technician. -
Click Create.
Figure 2. Dynamic Form Fields 
-
In the Create New Form Fields pane, enter the following
information:
Table 2. Dynamic Forms configuration attributes Field Description Field Key Unique identifier for the form to perform validations. Valid From Date from when the Form parameters are applicable. Valid To Date after which the Form parameters are not valid. Version Version number of the Form. Section Name Select the Section where the field appears on the form. Section contains a group of fields that share the same purpose, for styling and organization of form data. Section Position Position of Section on the Form layout. Reference Field Select Reference field for the form field. Reference field defines relationship between fields like defining Currency units related to Quantity values. Sub-Form Name To maintain navigation inside the form and it is maintained same as forms. Field Label Enter the text to be shown on the application UI. Field Position Position for the field compared to other fields on the form. Placeholder Text to describe the field like type or description. Field Type Element type for form field like Dropdown, text field. Following are a few of the supported field types for forms: Table 3. UI Field Types Field Type ID Field Type Purpose LF Label Field Displays only field value. DL Date Label Displays field value of type Date. CB Check Box To enable and disable the check box. DD Drop-Down Allows to select of a value from a drop-down list of values. DF Date Field Allows to select a date. TF Text Field Allows to enter free text. SF Scan Field Scans a barcode or a enter free text. ID Input Drop-Down Allows to either select a value from a drop-down list of values or a enter free text. ARD Array Field Line Display Allows to add sub-form inside a field of a form.
Note: Select the form in the Sub-form field if you configure this field type.
You can attach attachments, signatures, and images in the sub-forms. When you convert the sub form into PDF, the attachments and signatures also appear in the PDF.
TIF Time Field Allows to add time. TIL Time Label Allows to add label for time. TV Text View Allows to add text fields with more characters. GAI Geo-Location Address Input Allows to add the current location of device in the field. GAL Geo-Location Address Label Fetch the location of device and display in form. SGF Signature Field Allows to add signature. SMF Sum Field Calculates the field values and shows the sum in the form. NF Numeric Field Allows to enter a numeric value in a free text field. CL Check Label Displays a Check Box. DDM Drop Down Multi Selection Allows to select multiple values from a list of values. IDM Input Drop-Down Multi Selection Allows to select either multiple values from a list of values or enter multiple values as free text. ATT Attachment Allows to add images as attachments to the form. DOC Document Adds a reference document in line with the form field. IMG Image Adds an image in line with the form fields. VI Visible Input Shows the possible values for the field on the screen but not as a list. RT Rating Shows a scale to record or capture the readings. DD Dependency Fields Select the Dependent field on the transaction screen that facilitates filtering of the field values. Note: Displayed only if the Field Type is set to DD - Drop Down or ID - Input Dropdown.DD Values Values for dropdown form elements in json format. Dropdown Table Source table from where the dropdown field values are populated. Active To show/hide the field on the form. Overview Enable/disable the form field in Overview section of the transaction screen. Detail Enable/disable to show the form field in Detail section of the transaction screen. Default Value Value to be populated in the form field. Field Instruction User instructions relevant to the field. Field Color Defines the color of the field on the Form in the UI. Mandatory To show the extension as Mandatory field on the transaction screen. Follow up Indicator To mandate the follow-up process for this Form. Validation Required To configure validation rules for the form field. UI Validation Specify the validations for user entered values. Note: This field is displayed only if the Validation Required is enabled.UI Validation Message Enter the alert message to be displayed if the UI validation is applicable. Note: This field is displayed only if the Validation Required is enabled.API Type Indicates the type of data source such as RFC, BOR, ODATA services. Currently we support only RFC, BOR. System Name Origin of the data source like SAP ECC and CRM. API Name Data provider that carries the data sets of the API. API Field Name of the field in the data source to be associated with form field. For example, you would want to retrieve Vendor details based on the Purchasing Document. Here, Vendor field is the API Field.
API Keys Indicates the relation between API and the document. For the API field (Vendor), Purchasing Document is the API Key field.
-
Click Create.
In this scree, you can,
- Search fields using Search field on the left section.
- Click Filter
 icon to filter the fields.
 - Click the ellipses
 button to view Version History of the form, Update,
Copy, and Deactivate the form.
button to view Version History of the form, Update,
Copy, and Deactivate the form. - Select ON/Off on the right section to show or hide advanced fields.